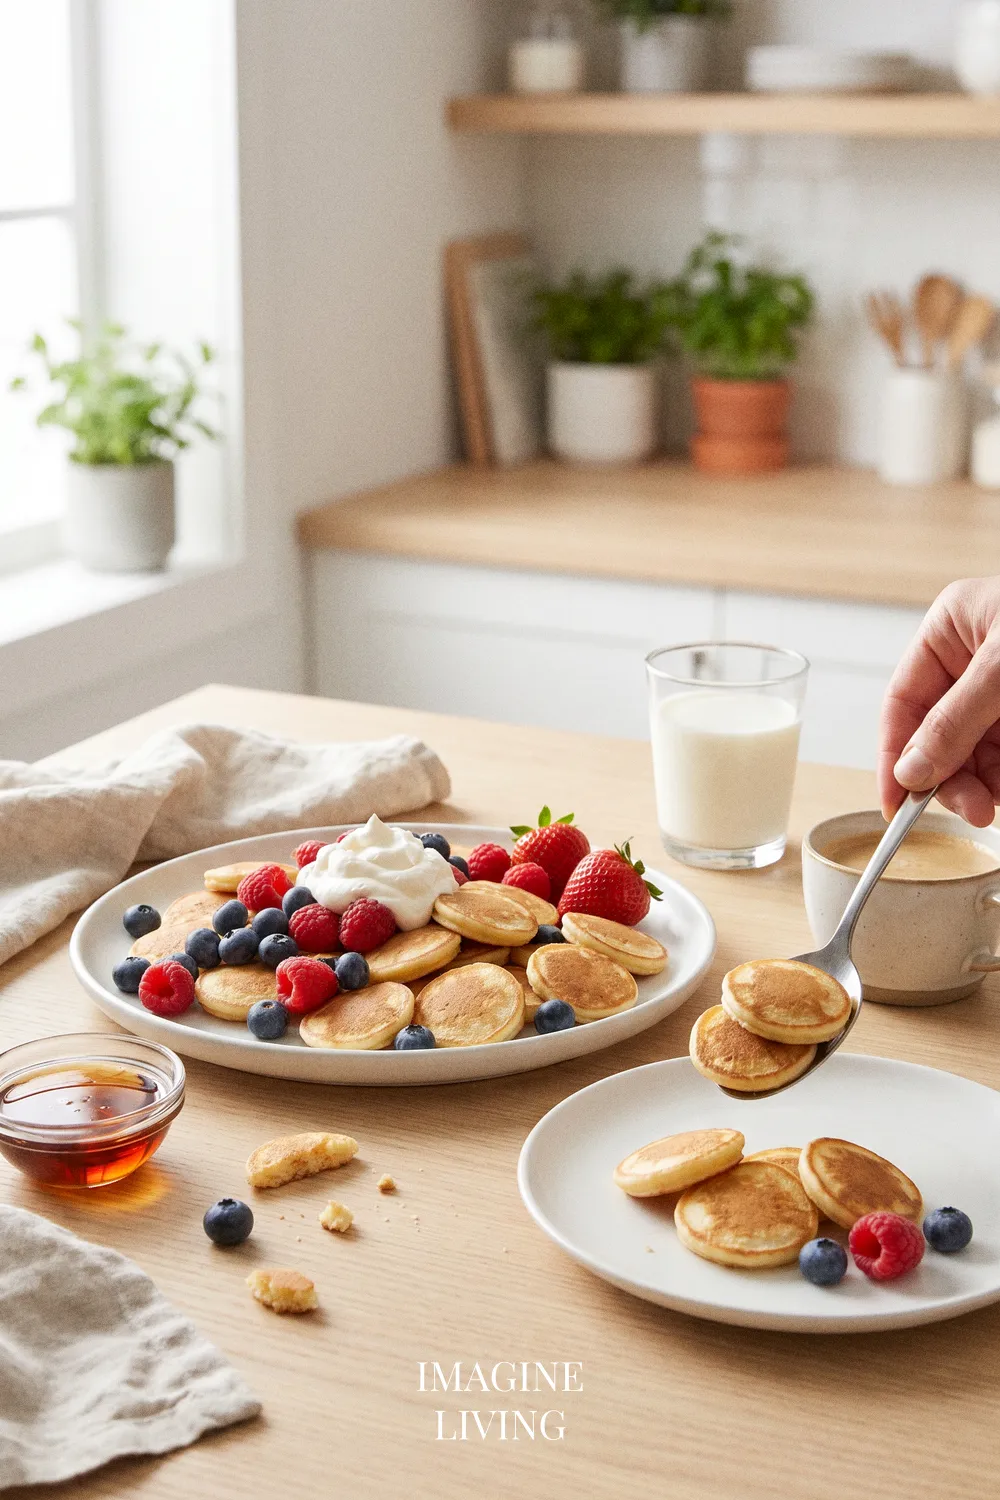
Irresistible Mini Pancake Bites
The scent of warm batter hits the air almost as soon as you start, a little reminder that simple things can feel surprisingly good in the moment. These mini pancake bites come together without much fuss, and it’s nice knowing the oven does most of the work. They’re easy to pick up, easy to share, and—quietly satisfying—easy to make disappear. And if a tray of tiny pancakes doesn’t make the morning feel a bit lighter, well, that’s rare.
Why You’ll Love This Recipe
Mini pancake bites are an engaging twist on classic pancakes. They offer all the comfort of your favorite breakfast treat while allowing for a more playful eating experience. Each little bite is fluffy, sweet, and perfectly portioned for sharing. Here are a few reasons you’ll adore making these:
- Quick and easy to whip up, making them perfect for busy mornings.
- Fun for kids and adults alike; serve them with a variety of dips!
- They freeze beautifully, perfect for make-ahead breakfasts.
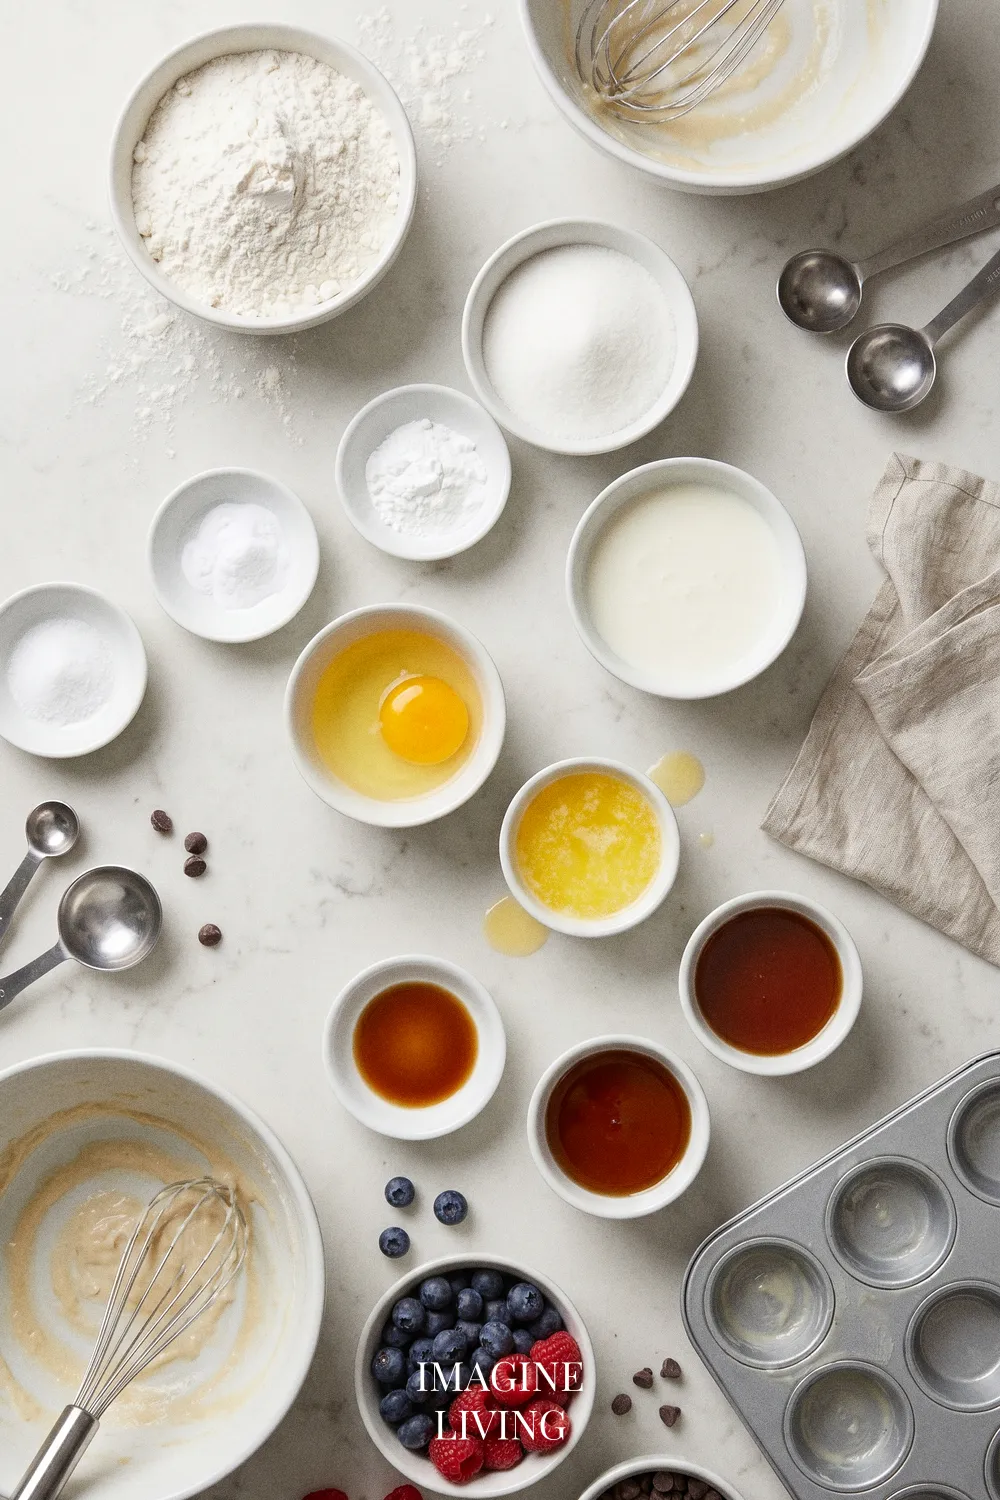
Ingredients: Mini Pancake Bites
Servings: 4-6
For the Pancakes
- 1 cup (125 g) all-purpose flour
- 2 tablespoons sugar
- 1 teaspoon baking powder
- 1/2 teaspoon baking soda
- 1/4 teaspoon salt
- 1 cup (240 ml) buttermilk (or milk with a splash of vinegar)
- 1 large egg
- 2 tablespoons melted butter
- 1 teaspoon vanilla extract
For the Toppings
- Maple syrup
- Fresh berries
- Chocolate chips
- Whipped cream
Options: Consider using almond or oat milk for a different flavor.
Equipment Needed
- Mixing bowls
- Whisk
- Mini muffin tin
- Cooking spray or lined paper cups
- Cooling rack
Step-By-Step Guide: Making Mini Pancake Bites
A quick mix-and-bake recipe like this has only one real challenge: keeping the batter light. Luckily, this part is easier than it looks.
Preheat the Oven
Start by preheating your oven to 350°F (175°C). The warm air always feels like a quiet promise that things are underway.
Mix Dry Ingredients
In a bowl, combine the flour, sugar, baking powder, baking soda, and salt. Whisk until well blended, creating a dry base for your mini pancake bites.
Combine Wet Ingredients
In another bowl, mix the buttermilk, egg, melted butter, and vanilla extract. The warm scent of butter tends to drift up right away.
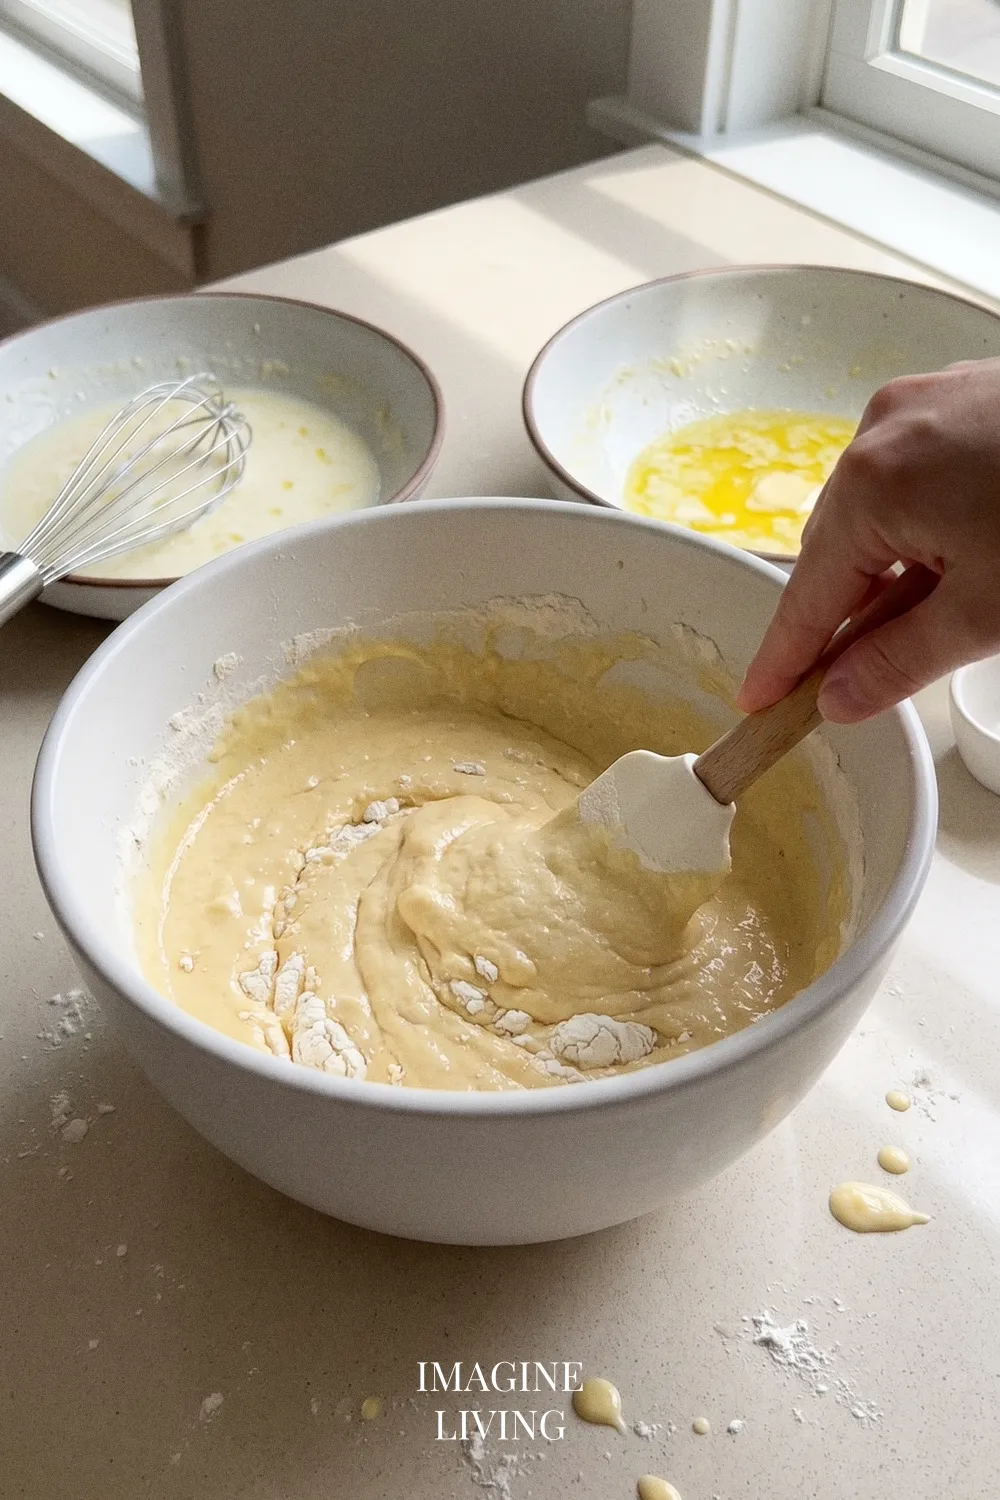
Combine Mixtures
Gently fold the wet mixture into the dry ingredients until just combined. It’s okay if there are some lumps; overmixing will lead to tough pancakes.
Tip: Make sure not to skip this step; it keeps your pancake bites soft and fluffy.
— The moment the batter comes together, you can feel when it’s time to stop stirring.
Prepare the Muffin Tin
Lightly grease your mini muffin tin with cooking spray or use lined paper cups. This step prevents the pancake bites from sticking.
Fill the Muffin Tin
Spoon the pancake batter into the mini muffin cups, filling them about 2/3 full. There’s something satisfying about watching the tin fill row by row.
Bake and Cool
Bake for about 10-12 minutes, or until a toothpick inserted into the center comes out clean. The bites should be lightly golden.
Tip: Allow them to cool slightly on a cooling rack before serving; this keeps them fluffy.
— They’re always a bit tempting right out of the oven, but that brief rest really does help.
Pro Tips for Mini Pancake Bites
Here are a few gentle nudges that can make the process feel smoother overall.
- Use a mix of flavors in one batch: add chocolate chips to some, blueberries to others.
- Experiment with different milks; almond or oat milk work beautifully.
- Serve with a variety of toppings for a fun pancake bar!
- Keep an eye on cooking time; mini bites can bake quickly and you want them fluffy, not dry.
- Store leftovers in an airtight container to maintain freshness.
One small note: the batter often thickens if it sits, so a quick stir helps.
Dietary Variations & Substitutions
Gluten-Free Version
- Swap all-purpose flour 1:1 with a gluten-free all-purpose baking blend that includes xanthan gum.
- Gently fold the mixture as you would with standard flour; the texture may become slightly different but still delicious.
- Check for doneness a few minutes earlier, as gluten-free batter may cook faster.
Tip: If your blend doesn’t include xanthan gum, add 1/4 tsp per cup of flour to help with texture.
Dairy-Free
- Replace buttermilk with a dairy-free alternative like almond milk, coconut milk, or a dairy-free yogurt mixed with water (1:1 ratio).
- Use dairy-free butter or oil as a substitute for melted butter in equal amounts.
- The texture might be slightly less rich, so don’t overmix to maintain fluffiness.
Tip: Adding a teaspoon of apple cider vinegar to the dairy-free milk can enhance its tanginess, mimicking buttermilk.
Egg-Free / Vegan
- Substitute the egg with 1 tablespoon ground flaxseed mixed with 3 tablespoons water, resting the mixture for 5 minutes before adding.
- Use the dairy-free options above for milk and butter as well.
- Expect a denser texture; bake for an extra 1-2 minutes if needed.
Tip: A tablespoon of baking soda combined with the milk can help the batter rise more effectively.
Nut-Free
- Replace any nut milks (like almond milk) with oat milk or soy milk (1:1).
- Ensure that your baking powder and any additional toppings (like chocolate or whipped cream) are also nuts-free.
- The overall flavor will remain rich, just without nut undertones.
Tip: Check for cross-contamination if using packaged ingredients to ensure they are nut-free.
Low-Sugar
- Reduce sugar by up to 50% and add a touch of vanilla extract to enhance sweetness without added sugar.
- For a natural sweetener option, consider using 1/3 cup unsweetened applesauce in place of sugar.
Tip: Adjust cooking time slightly if the batter becomes denser; monitor closely for doneness.
High-Protein
- Substitute 1/2 cup of flour with a protein powder of your choice to increase protein content.
- Mix in an additional egg white to boost protein further while maintaining moisture.
- Be aware that the texture may be slightly different; adjust cooking time as necessary.
Tip: Add a tablespoon of Greek yogurt or cottage cheese to maintain a fluffy texture while boosting protein.
Creative Variations: Fun Mini Pancake Bite Ideas
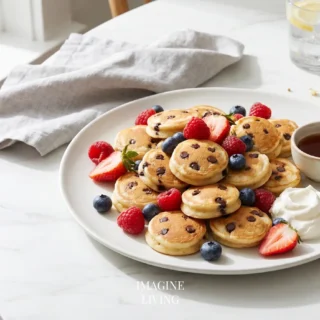
Chocolate Chip Mini Pancake Bites
Add 1/2 cup of mini chocolate chips to the batter for a sweet twist.
Tip: Let chocolate chips cool slightly before serving, allowing them to harden a bit.
Berry Burst Mini Pancake Bites
Fold in 1/2 cup of blueberries or raspberries.
Tip: Use frozen berries if fresh ones aren’t available, just fold them in without thawing.
Banana Bread Pancake Bites
Incorporate 1 ripe mashed banana for a twist of flavor.
Tip: Top with a drizzle of peanut butter for an added kick.
Nutty Pancake Bites
Add 1/4 cup finely chopped nuts like walnuts or pecans for extra texture.
Tip: Toast the nuts beforehand for deeper flavor.
Pumpkin Spice Pancake Bites
Incorporate 1/2 cup pumpkin puree and 1 teaspoon pumpkin spice for a fall treat.
Tip: Serve with cream cheese frosting instead of syrup for a seasonal delight.

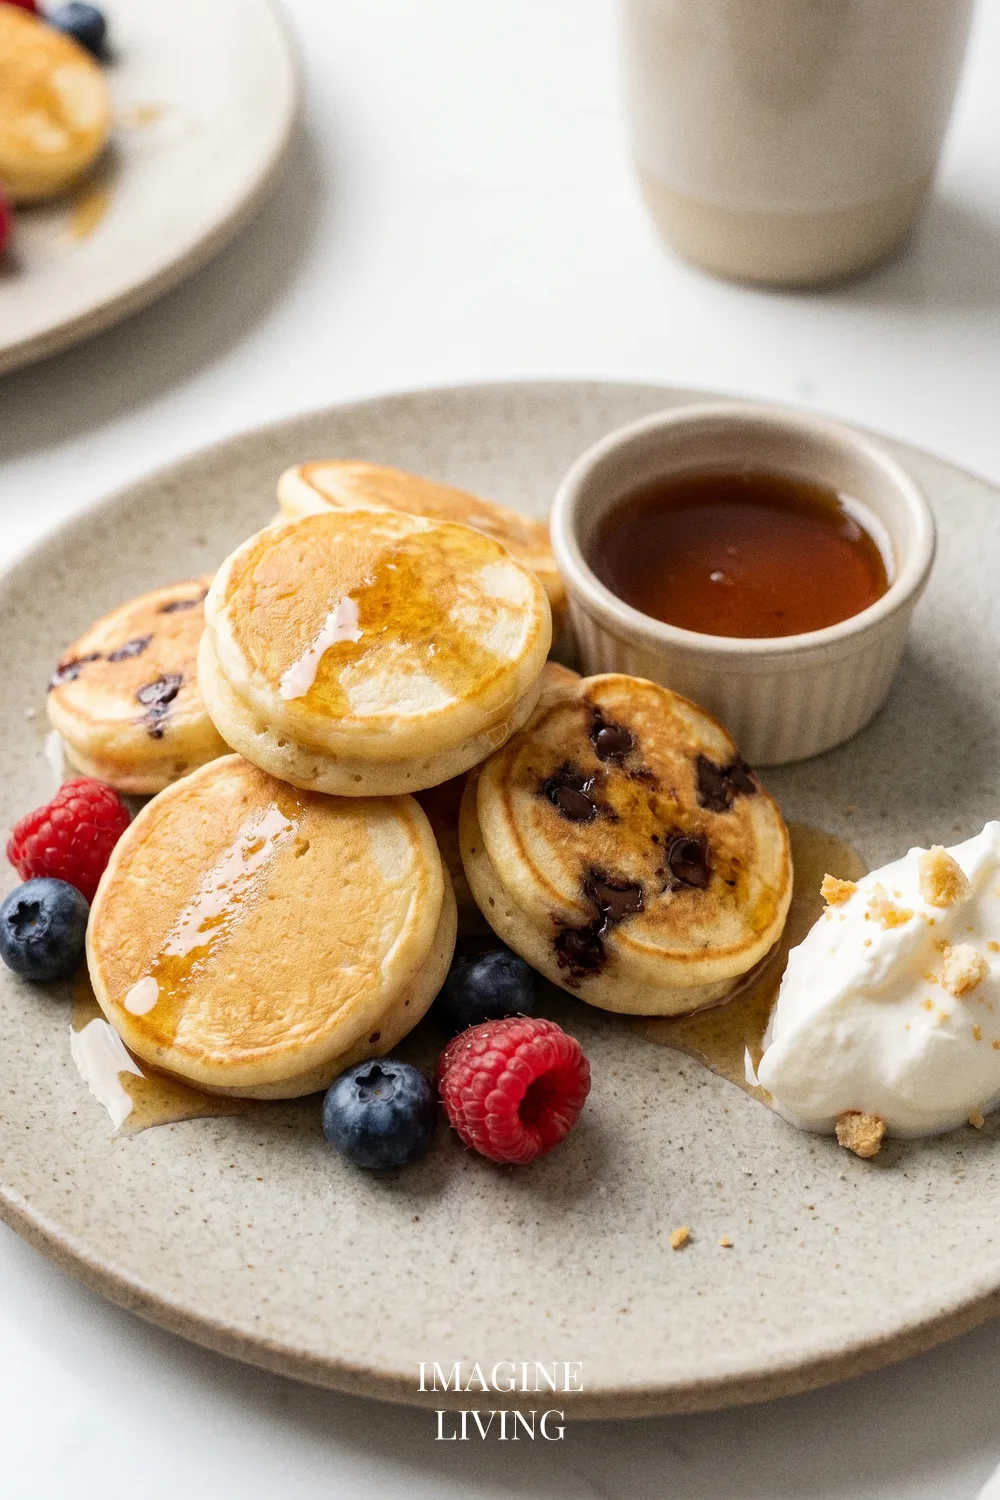
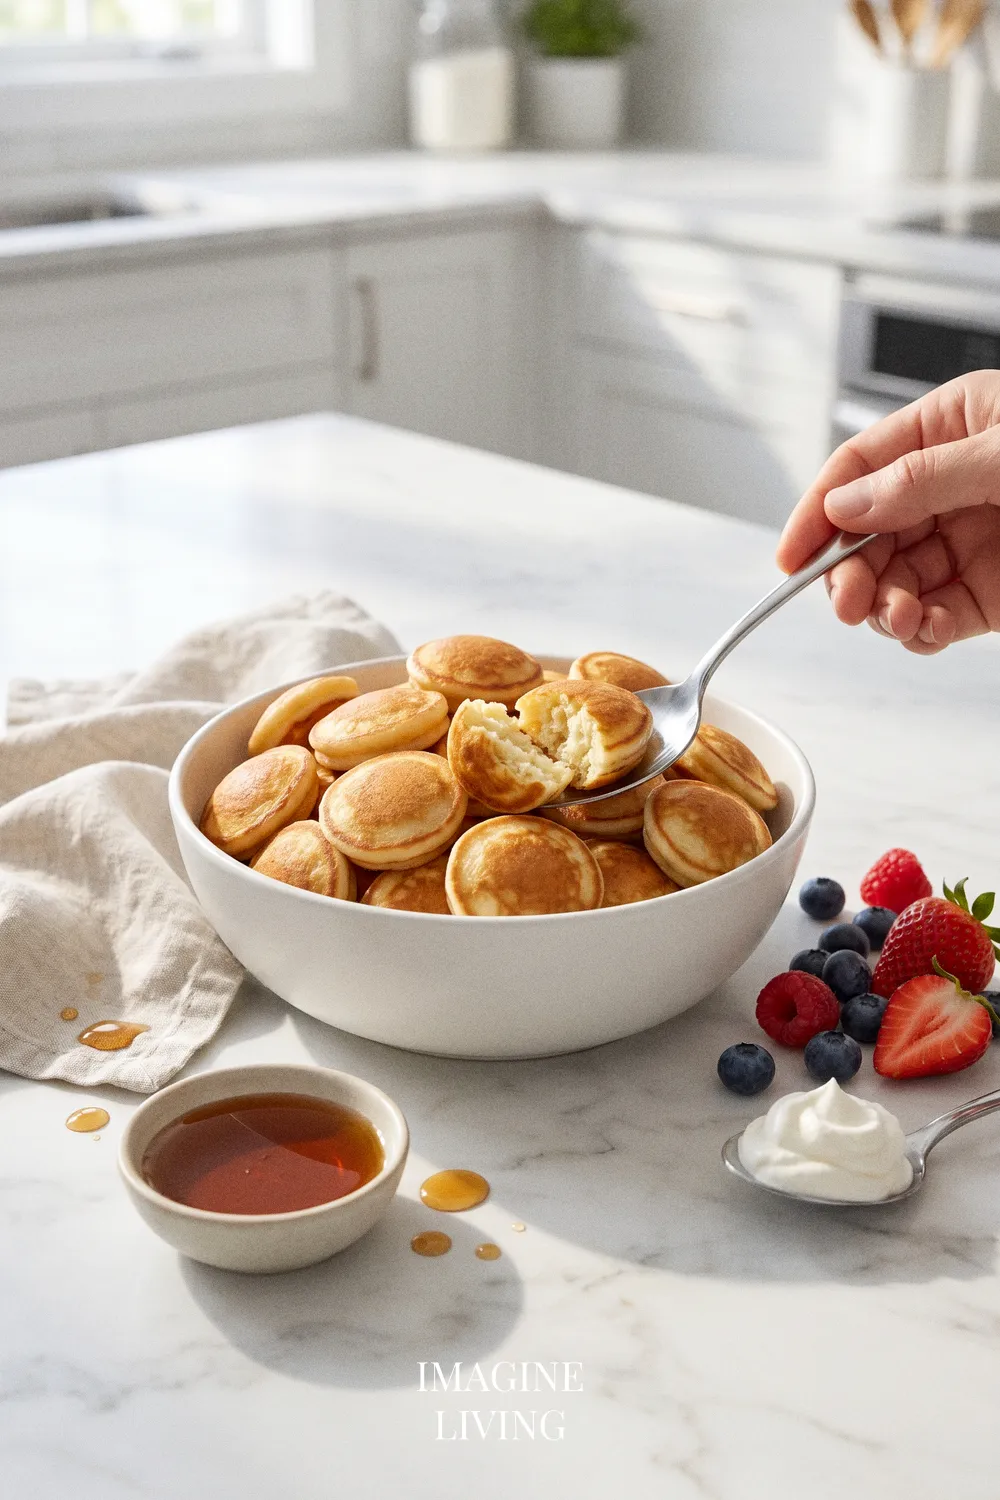
Serving Suggestions
Serve these mini pancake bites warm, alongside a small bowl of maple syrup for dipping. For an elevated breakfast, stack them with layers of Greek yogurt and fruit. You can also let the little ones create their own pancake stack with toppings of their choice.
Storage and Reheating
Store leftover mini pancake bites in an airtight container at room temperature for up to 2 days. If you want to keep them longer, freeze them in a single layer on a baking sheet. Once frozen, transfer them to a bag for up to a month. To reheat, simply pop them in the microwave for about 15-20 seconds or warm in an oven at 350°F (175°C) for 5-7 minutes.
Common Mistakes to Avoid
It’s easy to get these right, but here are a few spots where things can drift—and how to bring them back in line.
Overmixing the Batter
This can lead to dense pancake bites; mix until just combined. A few lumps are completely fine.
Underbaking
Make sure the bites are cooked through to avoid gummy centers.
Tip: Use a toothpick for testing doneness.
Skipping Greasing the Tin
Not greasing or lining can result in sticky pancake bites that break apart.
Tip: Use paper liners for easy clean-up.
Not Preheating the Oven
Always preheat for evenly cooked bites; a hot oven is key. If they’re pale and slow to rise, this is usually why.
Using Cold Ingredients
Bring your eggs and milk to room temperature for better mixing.
Tip: Do this while gathering your ingredients.
FAQs
Can I use whole wheat flour?
Yes, you can substitute whole wheat flour for a healthier option, but expect a denser texture.
Can I make these gluten-free?
Absolutely! Use a gluten-free all-purpose flour blend for delicious results.
How can I add flavor to the batter?
Experiment with spices like cinnamon or nutmeg, or add flavored extracts.
Can I make these ahead of time?
Yes! Make and freeze, then reheat as needed for a quick breakfast.
What’s the best way to serve them?
They’re fantastic dipped in syrup, yogurt, or served with whipped cream and fruit.
Delicious Mini Pancake Bites for Every Occasion
These mini pancake bites come together with just enough ease to make breakfast feel approachable, even on a busy day. They’re simple, adaptable, and a nice little thing to set on the table and enjoy, one warm bite at a time.
Irresistible Mini Pancake Bites
Equipment
- Mixing bowl
- Whisk
- Mini muffin tin
- Cooking spray or lined paper cups
- Cooling rack
Ingredients
For the Pancakes
- 1 cup all-purpose flour
- 2 tablespoons sugar
- 1 teaspoon baking powder
- 1/2 teaspoon baking soda
- 1/4 teaspoon salt
- 1 cup buttermilk or milk with a splash of vinegar
- 1 large egg
- 2 tablespoons melted butter
- 1 teaspoon vanilla extract
For the Toppings
- Maple syrup
- Fresh berries
- Chocolate chips
- Whipped cream
Instructions
Preheat the Oven
- Start by preheating your oven to 350°F (175°C). A warm oven ensures perfect golden-brown bites!
Mix Dry Ingredients
- In a bowl, combine the flour, sugar, baking powder, baking soda, and salt. Whisk until well blended, creating a dry base for your mini pancake bites.
Combine Wet Ingredients
- In another bowl, mix the buttermilk, egg, melted butter, and vanilla extract.
Combine Mixtures
- Gently fold the wet mixture into the dry ingredients until just combined. It’s okay if there are some lumps.
- Tip: Make sure not to skip this step; it keeps your pancake bites soft and fluffy.
Prepare the Muffin Tin
- Lightly grease your mini muffin tin with cooking spray or use lined paper cups.
Fill the Muffin Tin
- Spoon the pancake batter into the mini muffin cups, filling them about 2/3 full.
Bake and Cool
- Bake for about 10-12 minutes, or until a toothpick inserted into the center comes out clean.
- Tip: Allow them to cool slightly on a cooling rack before serving; this keeps them fluffy.