Decadent Cherry Crisp That Satisfies Every Sweet Craving
There’s a quiet kind of pleasure in hearing cherries hit the bowl, their juice already hinting at what’s coming. As I toss them with the sugar and lemon, I always notice how quickly the scent shifts—bright, almost awake. And if you’re feeling unsure at any point, don’t worry; this is one of those desserts that happily meets you where you are. Even the topping behaves, which feels like a small kindness on a busy day.
Why You’ll Love This Recipe
This cherry crisp stands out not just for its irresistible taste but also for its simplicity. Whether you’re a baking novice or a seasoned pro, this recipe offers a straightforward approach to delicious indulgence.
- Quick to prepare with minimal fuss.
- Utilizes fresh, seasonal cherries that burst with flavor.
- Can be served warm or at room temperature, making it versatile for any occasion.
- Great for gatherings, family dinners, or just a cozy night in.
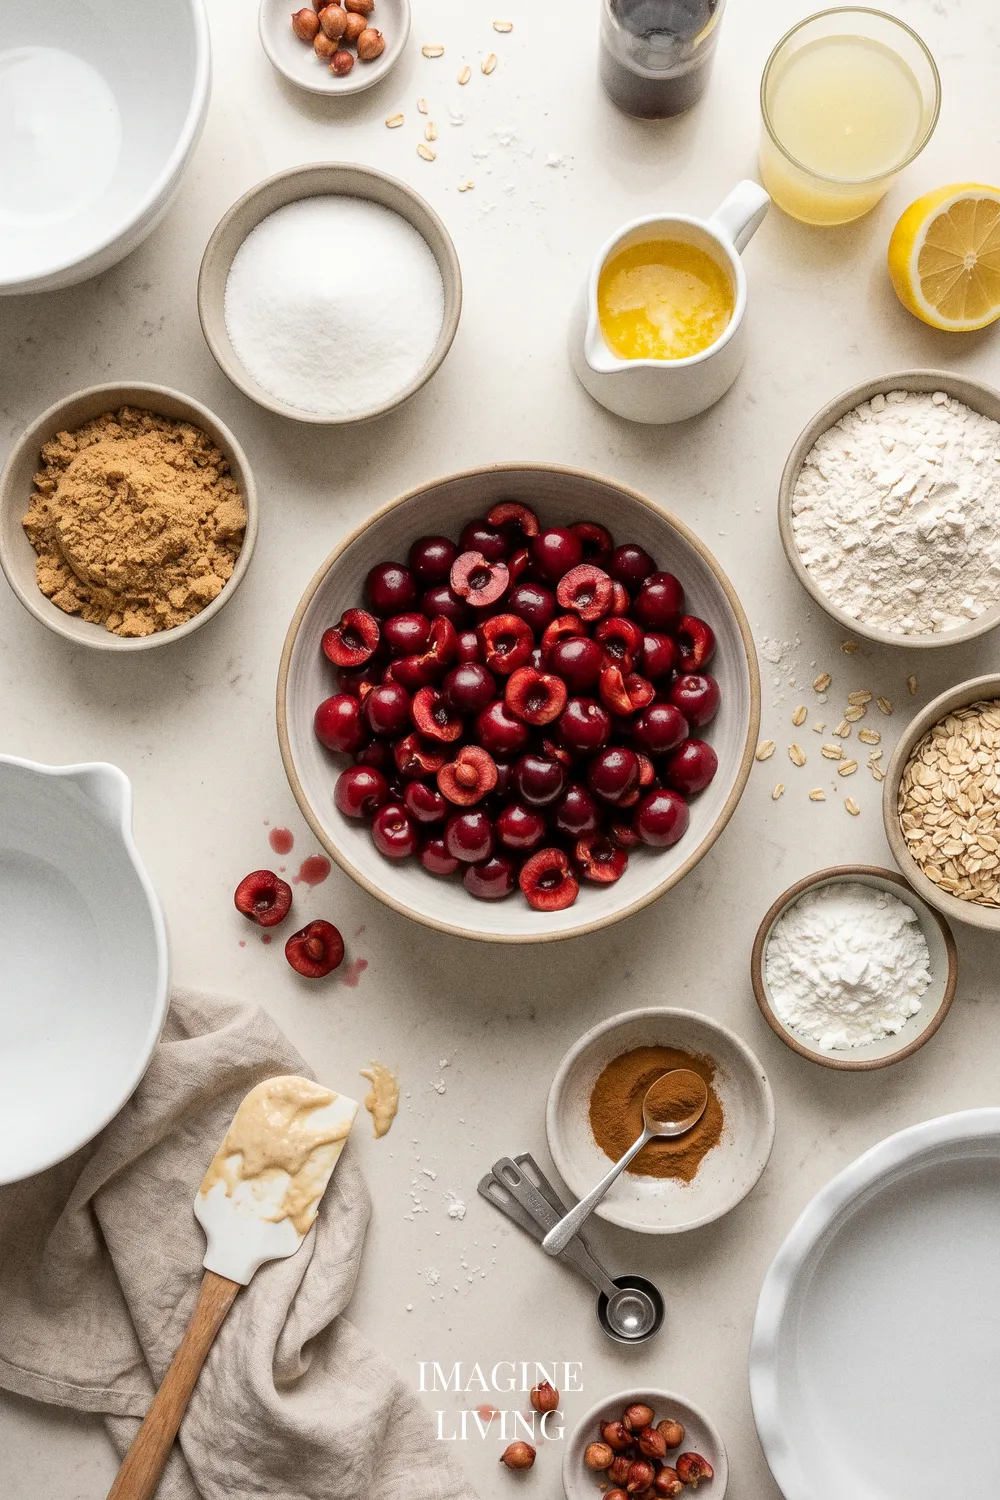
Ingredients: Easy Cherry Crisp Recipe
Servings: 6-8
For the Filling
- 4 cups fresh cherries, pitted and halved (approximately 1 kg)
- ¾ cup granulated sugar (150 g)
- 2 tablespoons cornstarch
- 1 teaspoon vanilla extract
- 1 tablespoon lemon juice
For the Topping
- 1 cup rolled oats (100 g)
- ½ cup all-purpose flour (60 g)
- ½ cup packed brown sugar (100 g)
- ½ teaspoon cinnamon
- ½ cup unsalted butter, melted (115 g)
Options: Try using gluten-free oats or coconut oil for a dairy-free version.
Equipment Needed
- 9-inch (23 cm) baking dish
- Mixing bowls
- Spoon or spatula
- Oven
Step-By-Step Guide: Making Cherry Crisp
A crisp is really just about balance—heat, texture, and not rushing the moment when everything starts to bubble. Luckily, this part is easier than it looks.
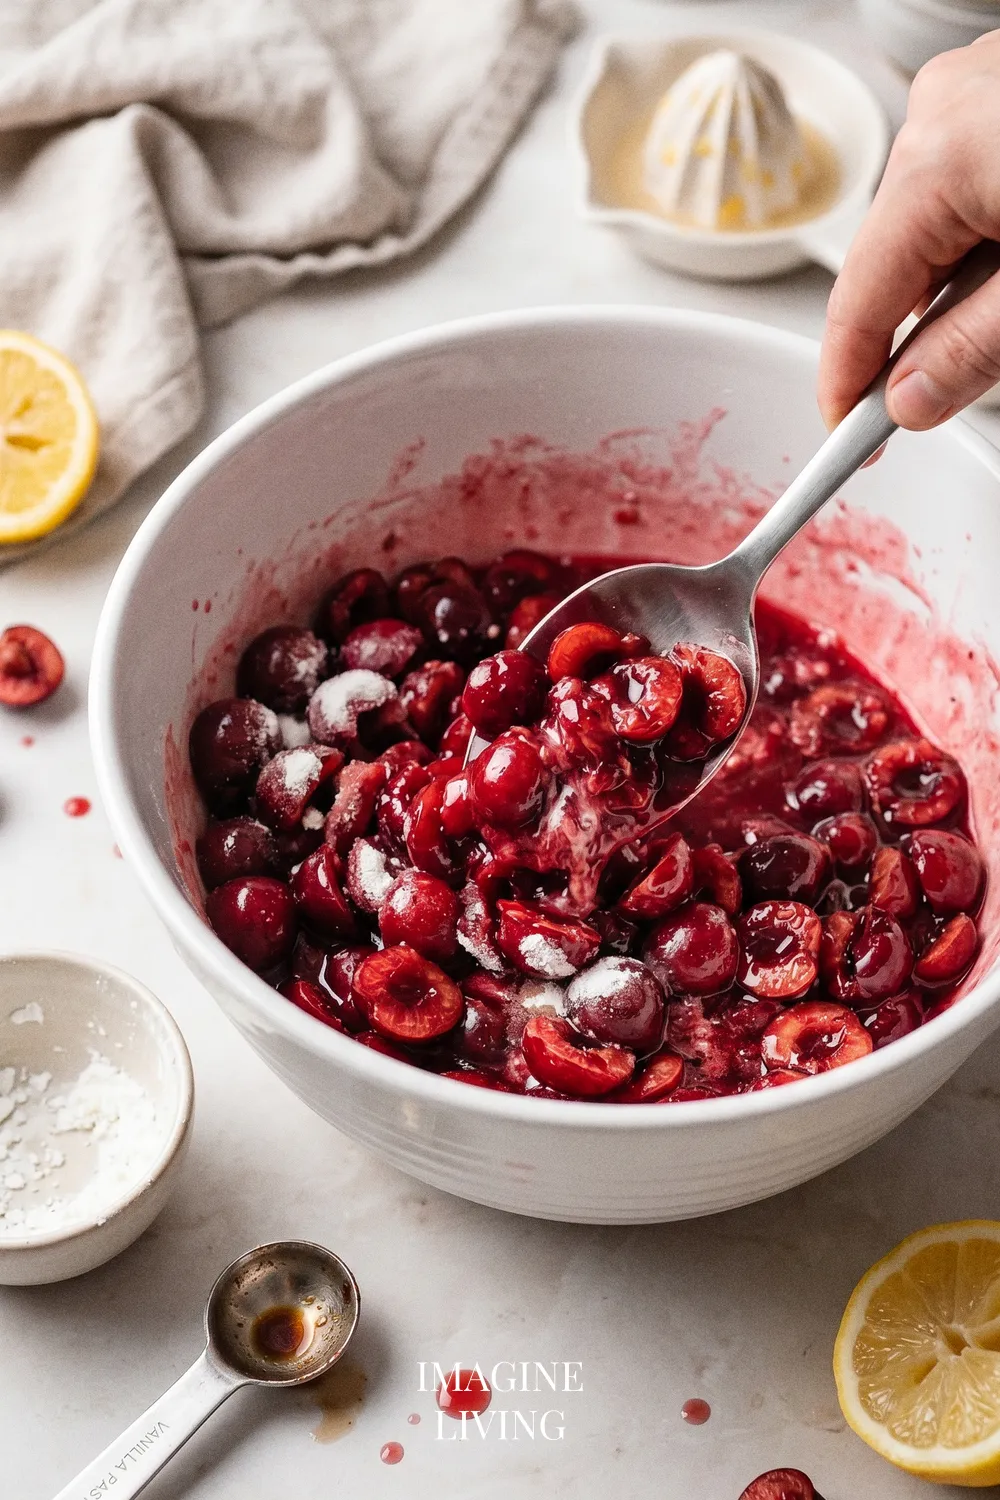
Prepare the Cherry Filling
In a mixing bowl, combine the pitted cherries, granulated sugar, cornstarch, vanilla extract, and lemon juice. As it all comes together, you’ll see the cherries turn glossy—always a good sign.
Tip: Gently fold the ingredients to coat the cherries evenly without mashing them.
Make the Oat Topping
In another bowl, combine the rolled oats, flour, brown sugar, and cinnamon. Drizzle in the melted butter and mix until crumbly. The mixture should feel loose but slightly clumpy—right where you want it.
Tip: Use your fingers to mix for a rustic texture that enhances the topping’s crispiness.
Assemble
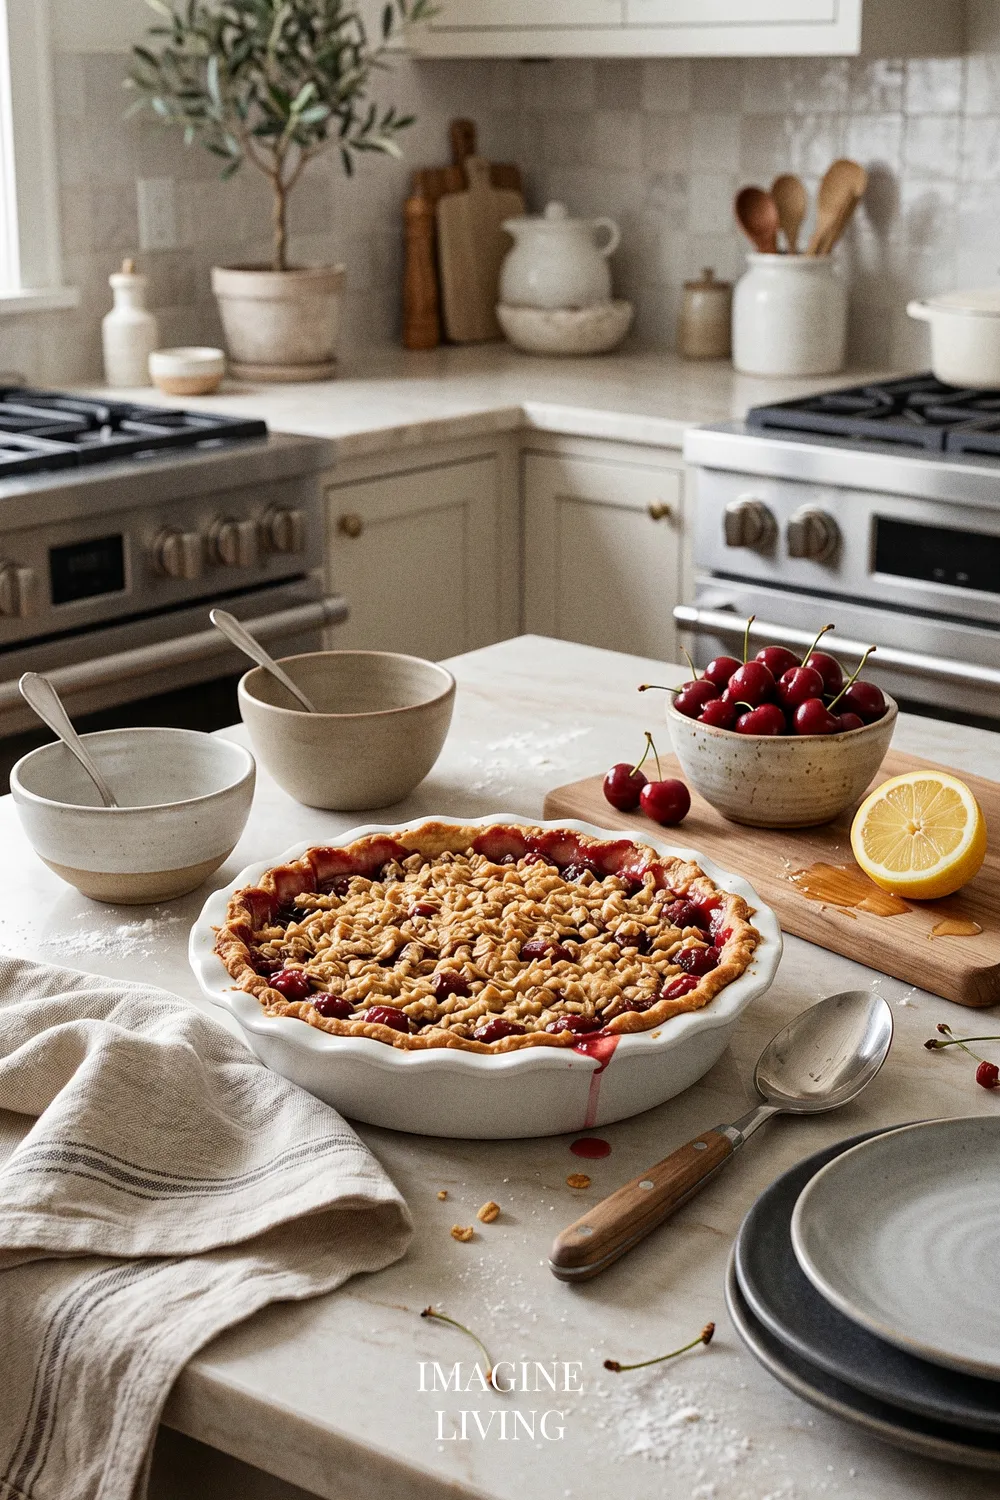
Pour the cherry mixture into the baking dish, spreading it evenly. Then, sprinkle the oat topping generously over the cherries. A few uneven spots are fine—everything settles nicely in the oven.
Bake
Place the baking dish in a preheated oven at 350°F (175°C) and bake for 30-35 minutes until the topping is golden and the filling is bubbly. There’s always a moment near the end when the smell suddenly deepens—worth pausing for.
Tip: Watch closely in the last few minutes to prevent the topping from over-browning.
Pro Tips for Cherry Crisp
There’s no need to overthink this dessert—just a few small choices can make it even better.
- Use ripe, in-season cherries for the sweetest flavor.
- Experiment with adding nuts to the topping for extra crunch.
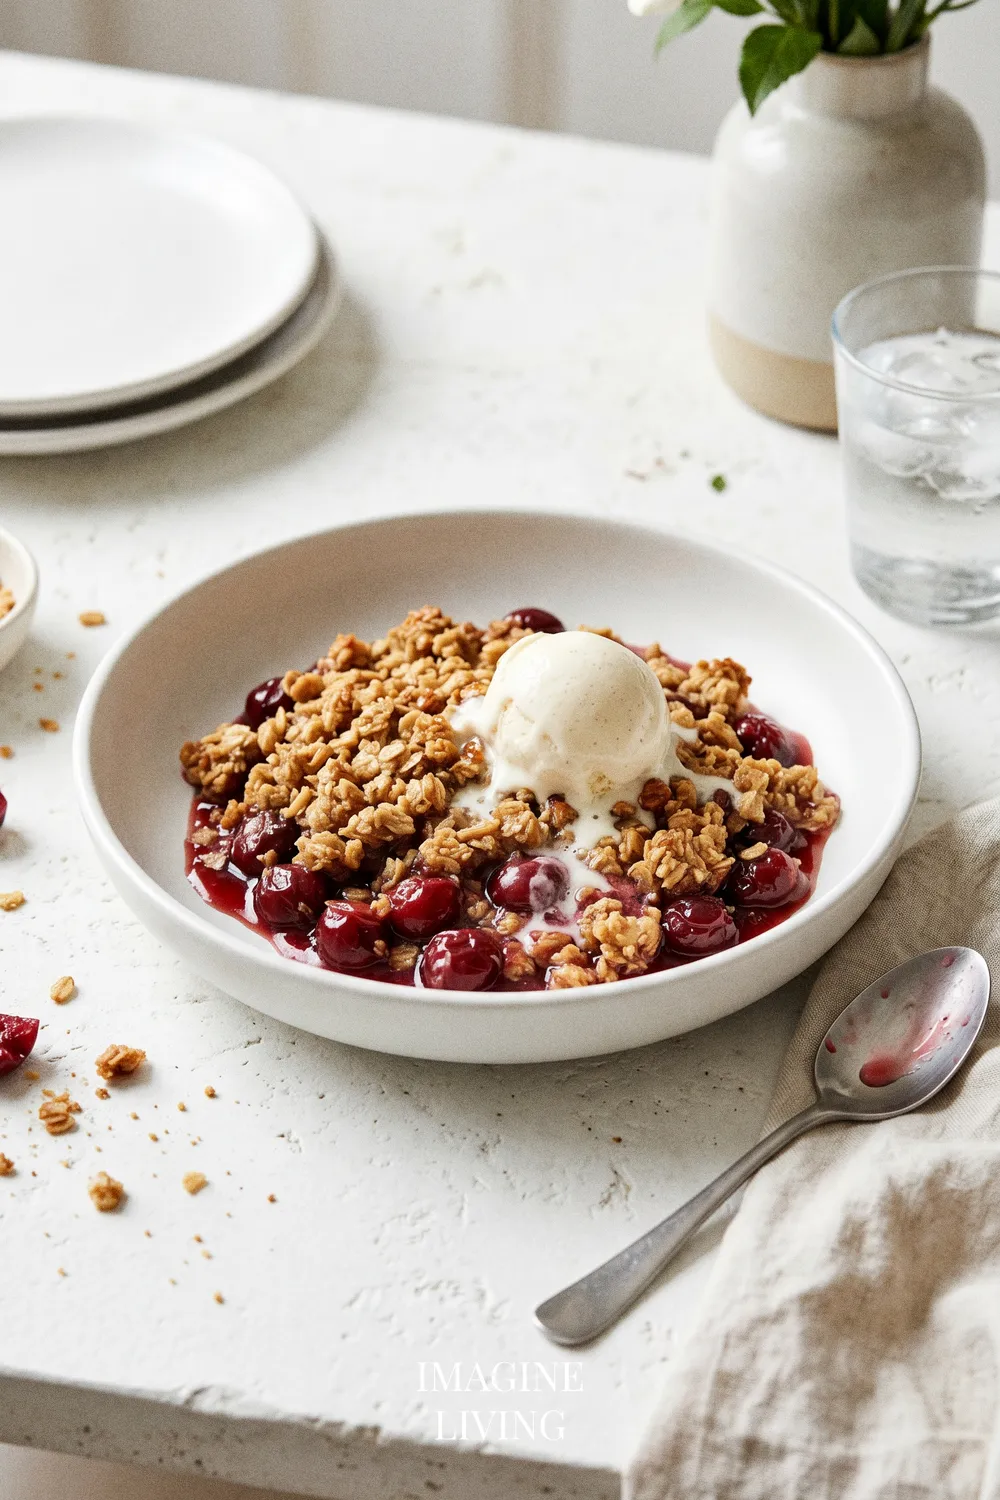
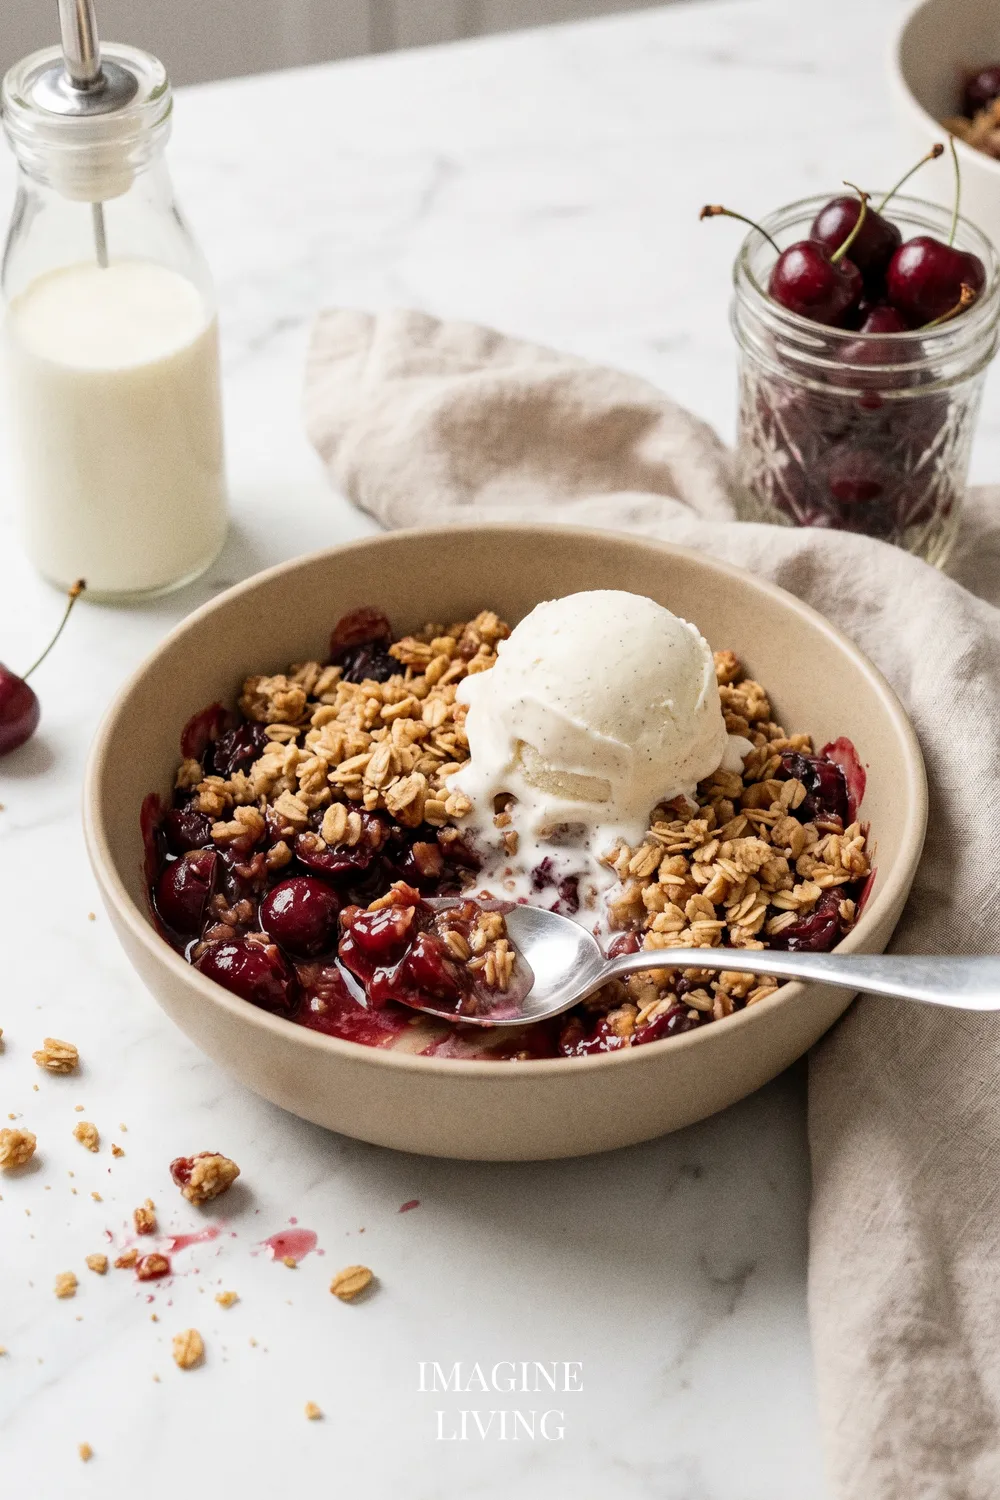
- Serve with a scoop of vanilla ice cream for the ultimate treat.
- Don’t skip the lemon juice; it enhances the cherries’ natural tartness.
- Consider using a mix of cherries and other stone fruits for a unique twist.
Dietary Variations & Substitutions
Gluten-Free Version
- Substitute all-purpose flour with a 1:1 gluten-free baking blend or almond flour.
- Ensure the oats are certified gluten-free to avoid cross-contamination.
- Check for bubbling and doneness earlier, about 5–10 minutes before recommended time.
Tip: If using almond flour, consider adding 1-2 tablespoons of additional liquid to help bind the topping.
Dairy-Free Version
- Replace unsalted butter with coconut oil or a dairy-free butter alternative, using the same amount.
- Use non-dairy milk in place of any cream or whipped toppings, if desired.
- Expect a slightly different flavor profile; the coconut oil may add a subtle coconut taste.
Tip: For extra creaminess, whip up some coconut cream to serve on top.
Vegan Version
- Use coconut oil instead of butter and maple syrup in place of granulated sugar at a 1:1 ratio.
- Ensure that any chocolate chips added are dairy-free for a full vegan experience.
- If the topping is too crumbly, add a slight amount of non-dairy milk to moisten.
Tip: Letting the coconut oil solidify before mixing will help maintain the desired crumbly texture.
Nut-Free Version
- Omit any suggested nuts from the topping or swap slivered almonds with pumpkin seeds for a crunch without nuts.
- Pay attention to cross-contamination in oats and baking blends by selecting nut-free certified options.
- Mix well to combine all topping ingredients without additional binding elements.
Tip: Introduce sunflower seeds for an extra crunch while keeping it nut-free.
Low-Sugar Version
- Reduce the granulated sugar by 25%, adjusting the natural sweetness of the cherries as needed.
- Consider incorporating a natural sweetener like stevia or monk fruit sweetener to maintain flavor balance.
- Taste the cherry mixture before adding full amounts of sweetener to ensure desired sweetness.
Tip: Enhancing the tartness with a bit more lemon juice will elevate flavors despite lower sugar levels.
Creative Variations: Cherry Crisp Ideas
Almond Cherry Crisp
Add slivered almonds to the topping for a nutty crunch.
Tip: Toast the almonds lightly for added depth of flavor.
Chocolate Cherry Crisp
Mix in chocolate chips with the cherry filling for a decadent twist.
Tip: Use dark chocolate for a rich contrast to the tart cherries.
Vegan Cherry Crisp
Replace butter with coconut oil and use maple syrup instead of sugar for a vegan-friendly version.
Tip: Ensure the coconut oil is solid for the right crumbly texture.
Spiced Cherry Crisp
Incorporate nutmeg and allspice into the topping for a warm, spiced flavor profile.
Tip: Adjust spices to your personal preference for more or less warmth.
Gluten-Free Cherry Crisp
Substitute all-purpose flour with almond flour or a gluten-free blend for a safe option.
Tip: Increase the liquid slightly to ensure the topping binds well.
Serving Suggestions
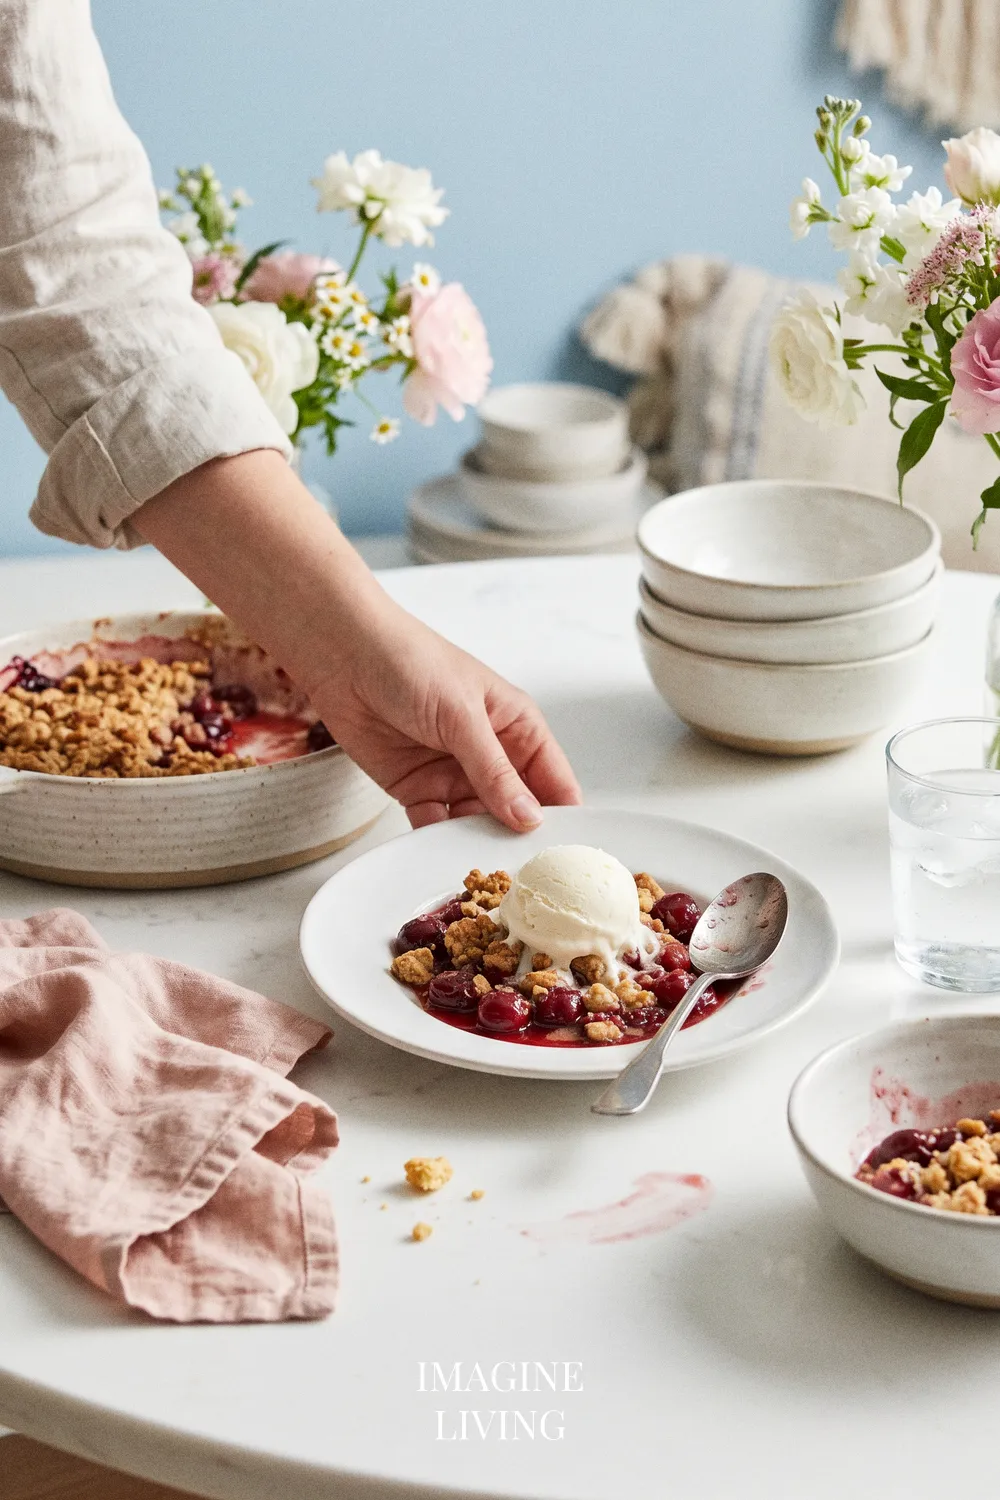
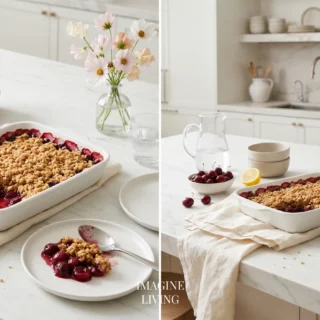
Cherry crisp can stand alone or pair beautifully with various accompaniments. Serve it warm with a generous scoop of vanilla ice cream or alongside whipped cream for a luxurious touch. It’s also delightful with a drizzle of fresh cream or a dusting of powdered sugar for a simple yet elegant presentation.
Storage and Reheating
To store leftover cherry crisp, cover it tightly with plastic wrap or aluminum foil and refrigerate for up to three days. Reheat in the oven at 350°F (175°C) until warmed through, approximately 10-15 minutes.
Tip: Reheating in the oven helps restore that crispy topping.
Common Mistakes to Avoid
A crisp is forgiving, but a few small things can throw it off. Nothing here is hard to fix.
Overcooking the Cherries
Overcooked cherries can become mushy and lose their flavor.
Tip: Keep an eye on the baking time and check for bubbling.
Using Unripe Cherries
Using cherries that are not fully ripe results in a sour filling.
Tip: Choose cherries that yield slightly to pressure and have a vibrant color.
Skipping the Lemon Juice
Lemon juice brightens the flavors of the filling.
Tip: Don’t omit this crucial ingredient.
Not Letting It Cool
Cutting into the crisp before it cools can lead to a soupy mess.
Tip: Allow it to rest for at least 10-15 minutes before serving.
Not Using Enough Topping
A sparse topping means less crunch and flavor.
Tip: Generously cover the cherries for the best texture.
FAQs
Can I use frozen cherries?
Yes, frozen cherries work too, but thaw and drain excess moisture before using.
How do I know when my crisp is done?
It’s done when the topping is golden brown and the filling is bubbling around the edges.
Can I make this ahead of time?
Yes, assemble and refrigerate before baking for up to one day.
Can I substitute other fruits?
Absolutely! Peaches, blueberries, or mixed berries work wonderfully.
What can I serve with cherry crisp?
It pairs great with vanilla ice cream, whipped cream, or even yogurt.
Savor the Comfort of Cherry Crisp
When the crisp finally cools just enough to serve, there’s a quiet satisfaction in that first spoonful. The cherries settle, the topping softens around the edges, and everything feels easy in a way good desserts often do. Enjoy it just as it is, warm and simple and exactly right.
Decadent Cherry Crisp
Equipment
- 9-inch (23 cm) baking dish
- Mixing bowls
- Spoon or spatula
- Oven
Ingredients
For the Filling
- 4 cups fresh cherries, pitted and halved (approximately 1 kg)
- ¾ cup granulated sugar (150 g)
- 2 tablespoons cornstarch
- 1 teaspoon vanilla extract
- 1 tablespoon lemon juice
For the Topping
- 1 cup rolled oats (100 g)
- ½ cup all-purpose flour (60 g)
- ½ cup packed brown sugar (100 g)
- ½ teaspoon cinnamon
- ½ cup unsalted butter, melted (115 g)
Instructions
Prepare the Cherry Filling
- In a mixing bowl, combine the pitted cherries, granulated sugar, cornstarch, vanilla extract, and lemon juice.
- Tip: Gently fold the ingredients to coat the cherries evenly without mashing them.
Make the Oat Topping
- In another bowl, combine the rolled oats, flour, brown sugar, and cinnamon.
- Drizzle in the melted butter and mix until crumbly.
- Tip: Use your fingers to mix for a rustic texture that enhances the topping's crispiness.
Assemble
- Pour the cherry mixture into the baking dish, spreading it evenly.
- Sprinkle the oat topping generously over the cherries.
Bake
- Place the baking dish in a preheated oven at 350°F (175°C) and bake for 30-35 minutes until the topping is golden and the filling is bubbly.
- Tip: Watch closely in the last few minutes to prevent the topping from over-browning.