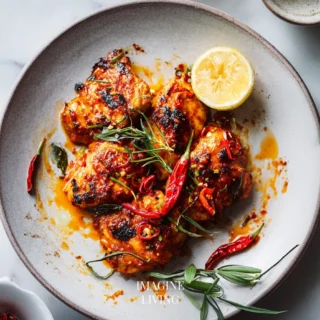
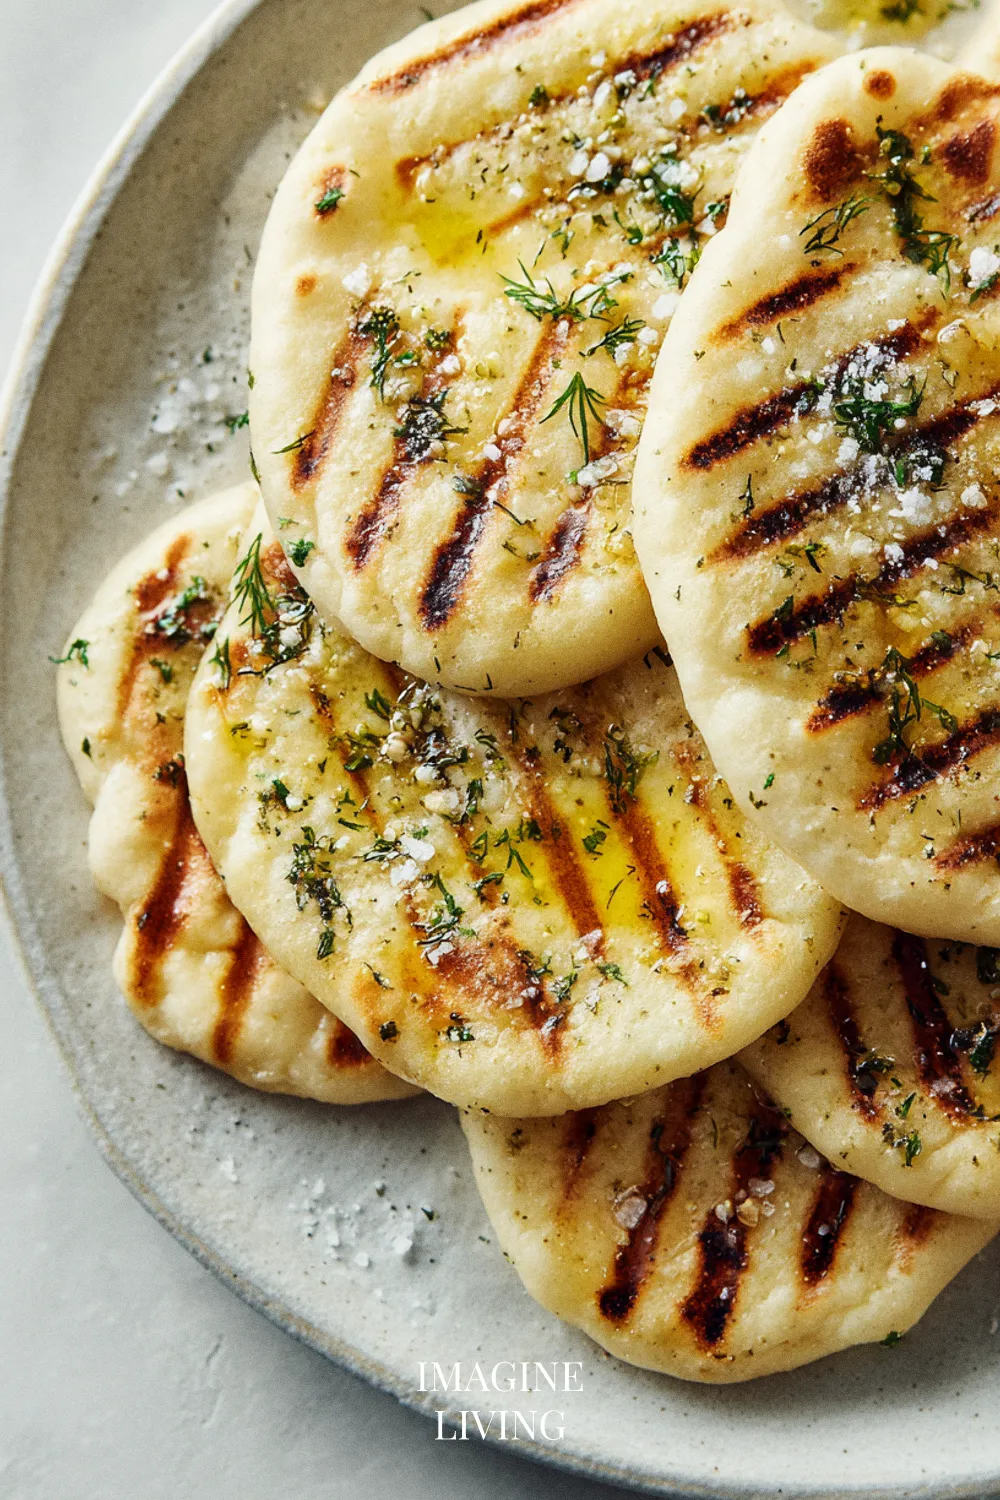
Grilled Flatbread With Olive Oil
The moment the dough hits the heat, you get that faint, toasty scent that always feels like things are headed in the right direction. I like this recipe because it asks so little and gives so much—just a few ingredients, a warm grill, and a few minutes of attention. And if a flatbread lands on the grill slightly crooked, well, it usually tastes even better for it.
Why You’ll Love This Recipe
Grilled flatbread is versatile, perfect for accompanying dips, salads, or even as a base for your favorite toppings. It’s quick to make and requires only a handful of ingredients, making it an excellent choice for spontaneous gatherings or picnics.
- Perfect for soaking up olive oil or your favorite sauces
- Easy to customize with herbs and spices
- A fantastic grilling project for novice and seasoned cooks alike
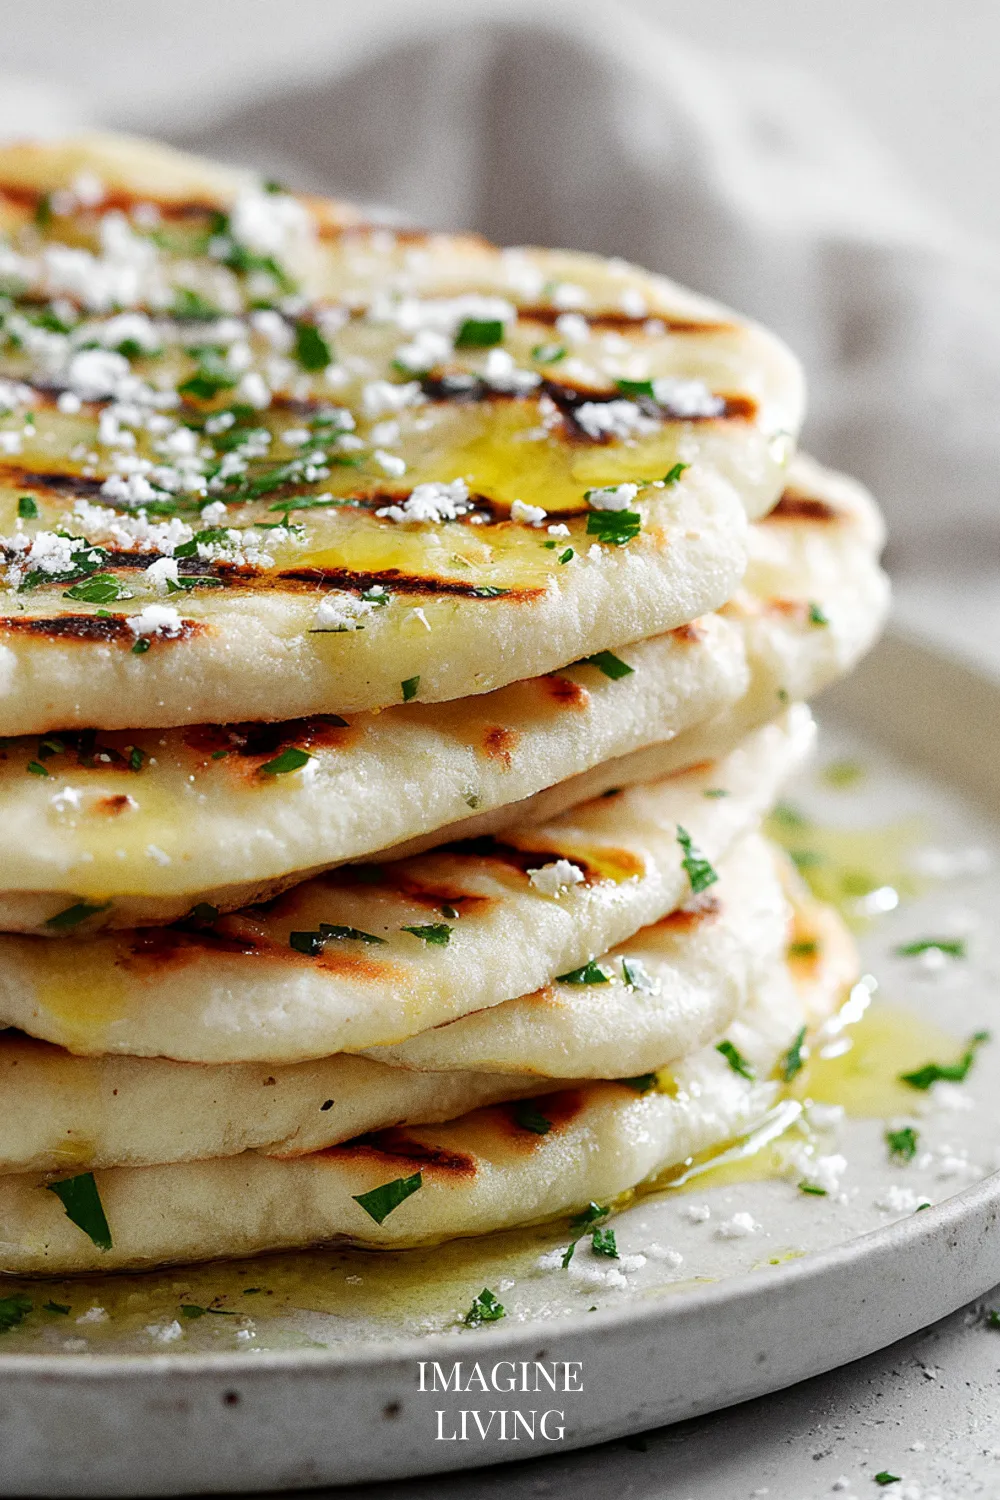
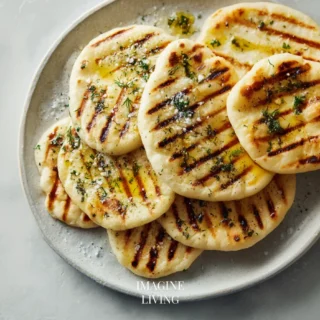
“Grilled flatbread with olive oil—made for long, warm evenings outside.” Imagine Living
Ingredients: Simple Grilled Flatbread Recipe
Servings: 4
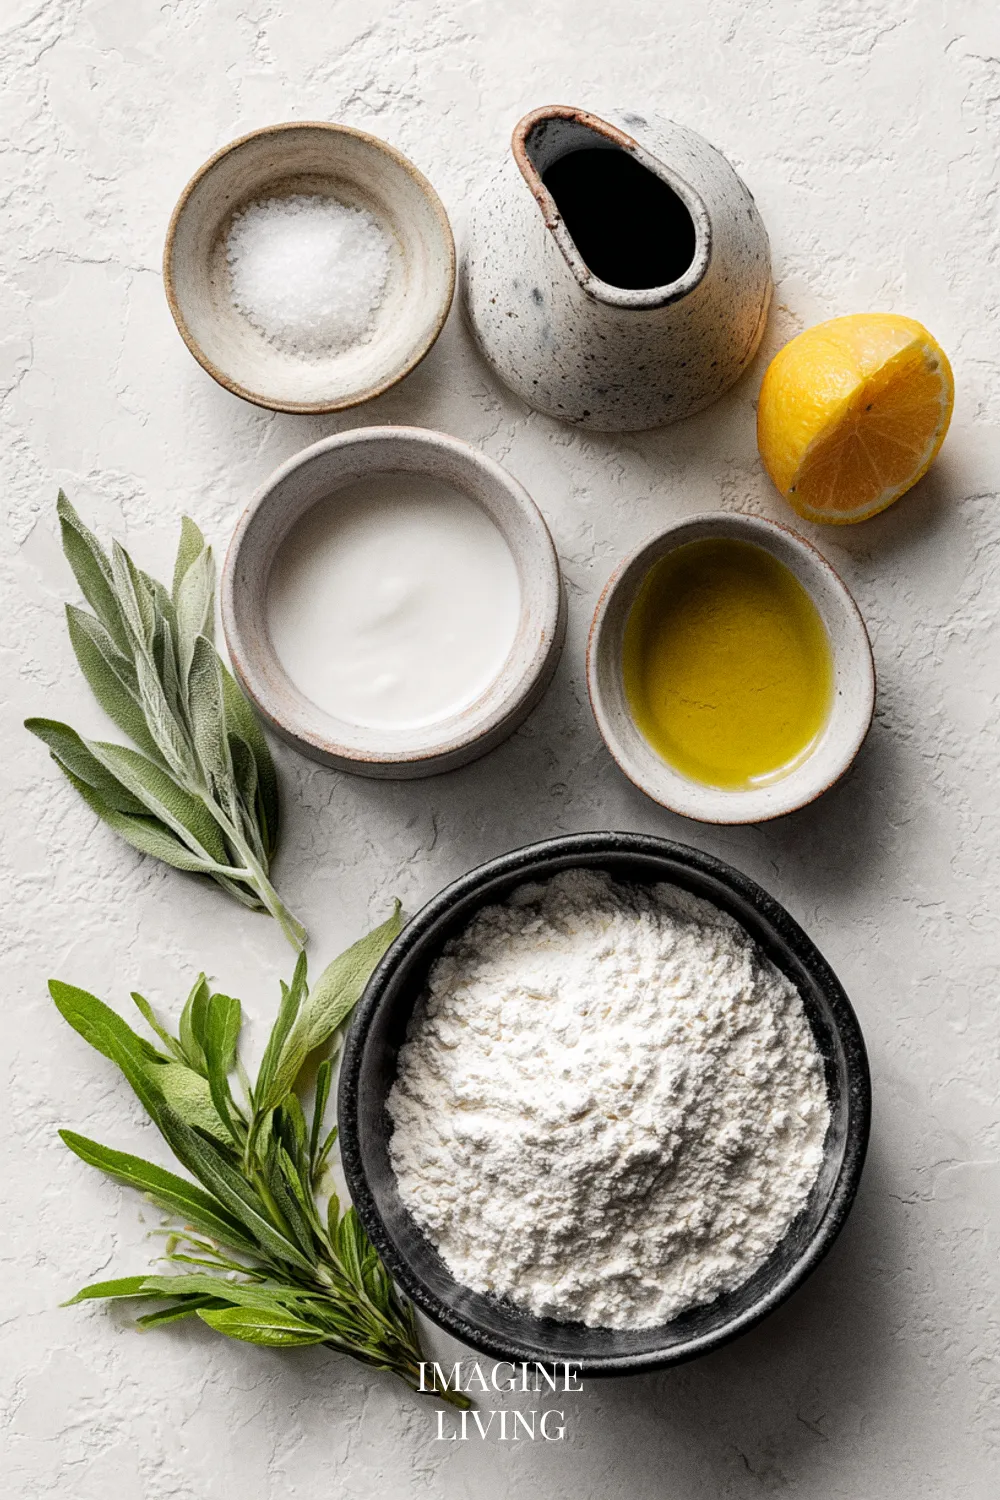
For the Dough
- 2 cups (250g) all-purpose flour
- 1 teaspoon salt
- ¾ cup (180ml) warm water
- 2 teaspoons active dry yeast
- 1 tablespoon olive oil
For Serving
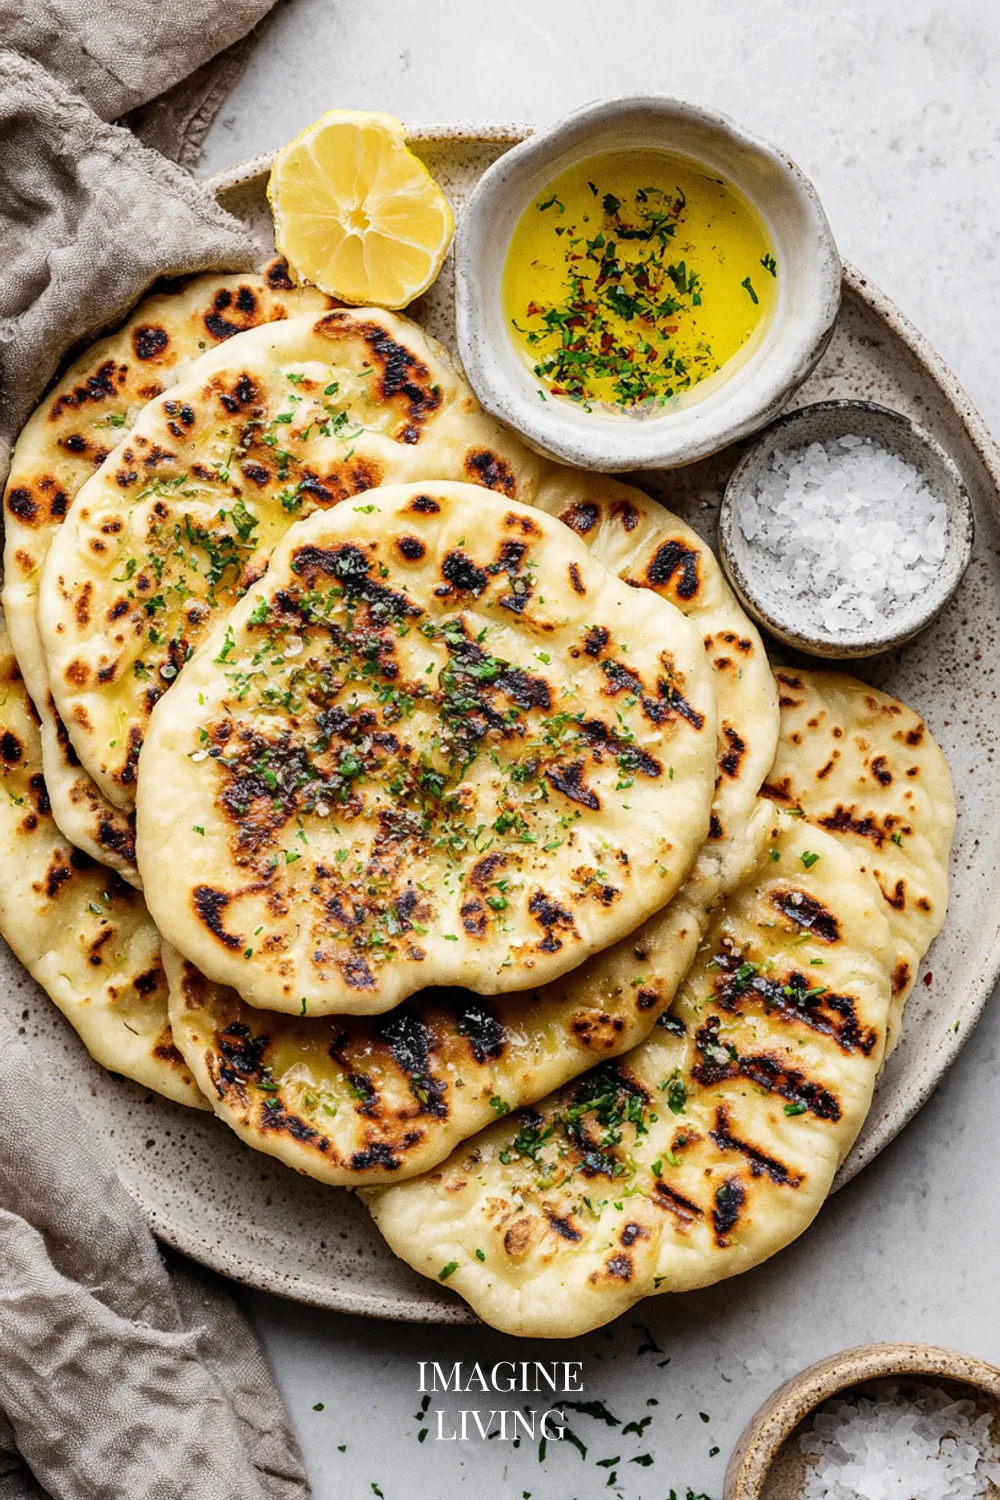
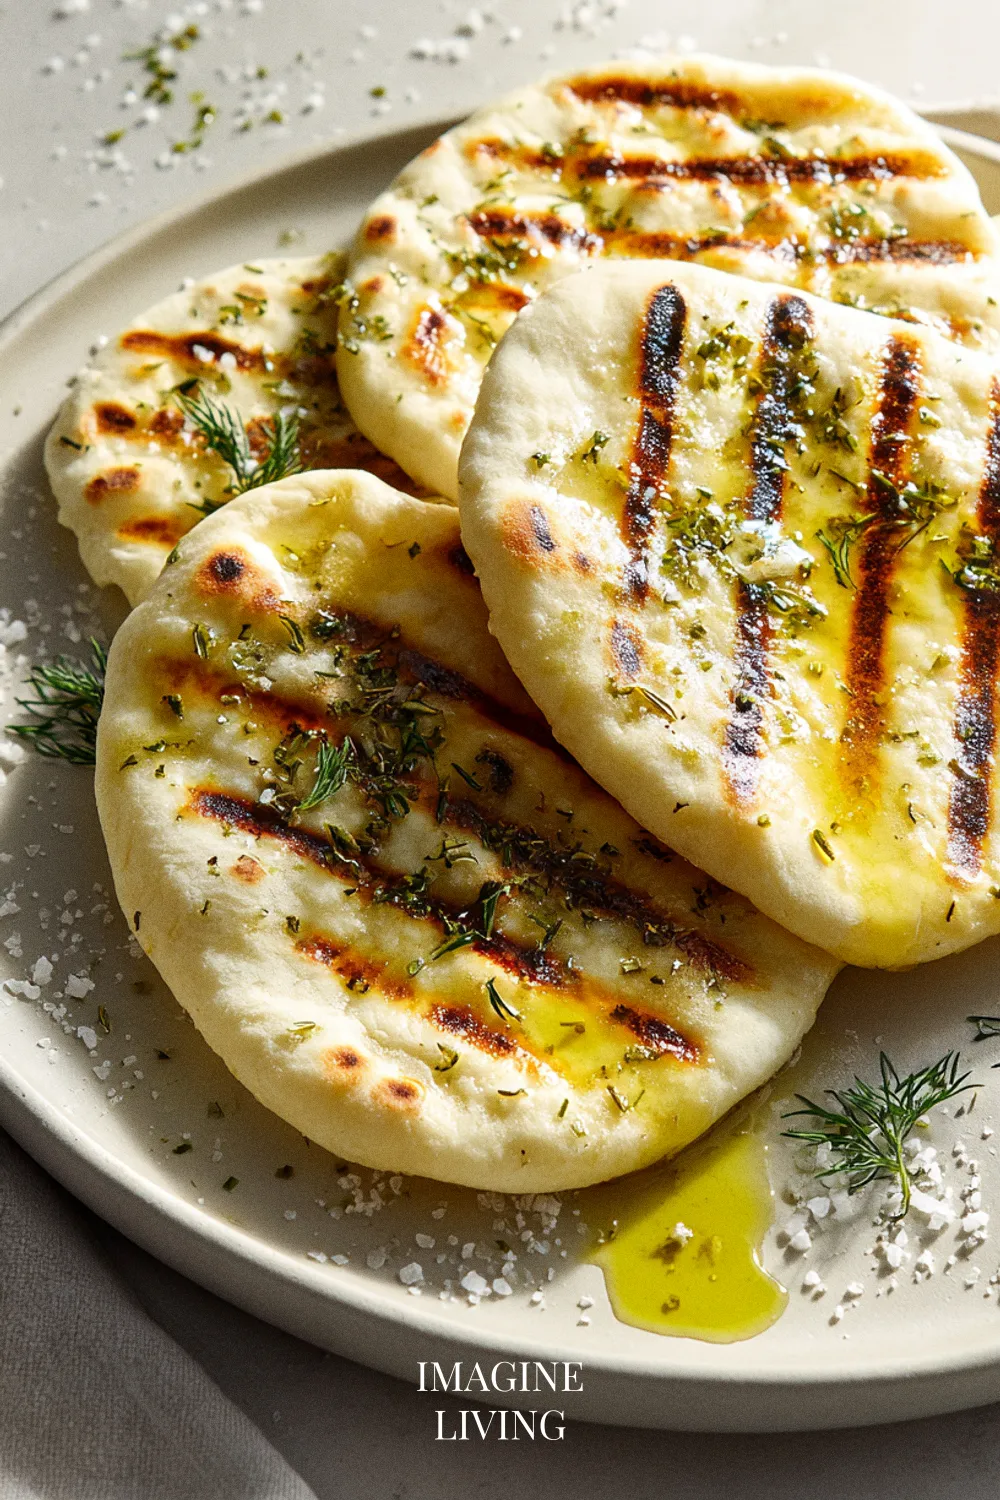
- Extra olive oil for drizzling
- Fresh herbs (like rosemary or thyme) for garnish, optional
Options: Consider using whole wheat flour for a nuttier taste.
Equipment Needed
- Mixing bowl
- Rolling pin
- Grill or grill pan
- Brush for oiling
- Cooking thermometer (optional)
Step-By-Step Guide: Making Grilled Flatbread
This part is mostly about timing and heat, but it moves more smoothly than it looks. Once you start, the rhythm settles in quickly.
Step 1: Prepare the Dough
In a mixing bowl, combine warm water and yeast. Let it sit for 5 minutes until frothy. Stir in the flour and salt, then drizzle in olive oil. Knead on a floured surface until smooth, about 5 minutes.
Tip: Use your hands or a stand mixer for easy kneading.
A soft, slightly tacky dough here usually means everything is on track.
Step 2: Let It Rise
Place the dough in a lightly oiled bowl, cover with a cloth, and let it rise in a warm spot for about 1 hour, or until it has doubled in size.
You might catch that quiet yeasty smell drifting up—always a good sign.
Step 3: Preheat the Grill
While the dough is rising, preheat your grill or grill pan to medium-high heat. If you’re using a charcoal grill, allow the coals to turn white hot for even cooking.
Step 4: Shape the Flatbreads
Once risen, punch down the dough and divide it into 4 equal pieces. Roll each piece into an oval or circle about ¼ inch thick, dusting with flour as needed to prevent sticking.
Tip: Don’t worry about perfect shapes; rustic is part of the charm!
A slightly uneven edge tends to look intentional once it’s grilled.
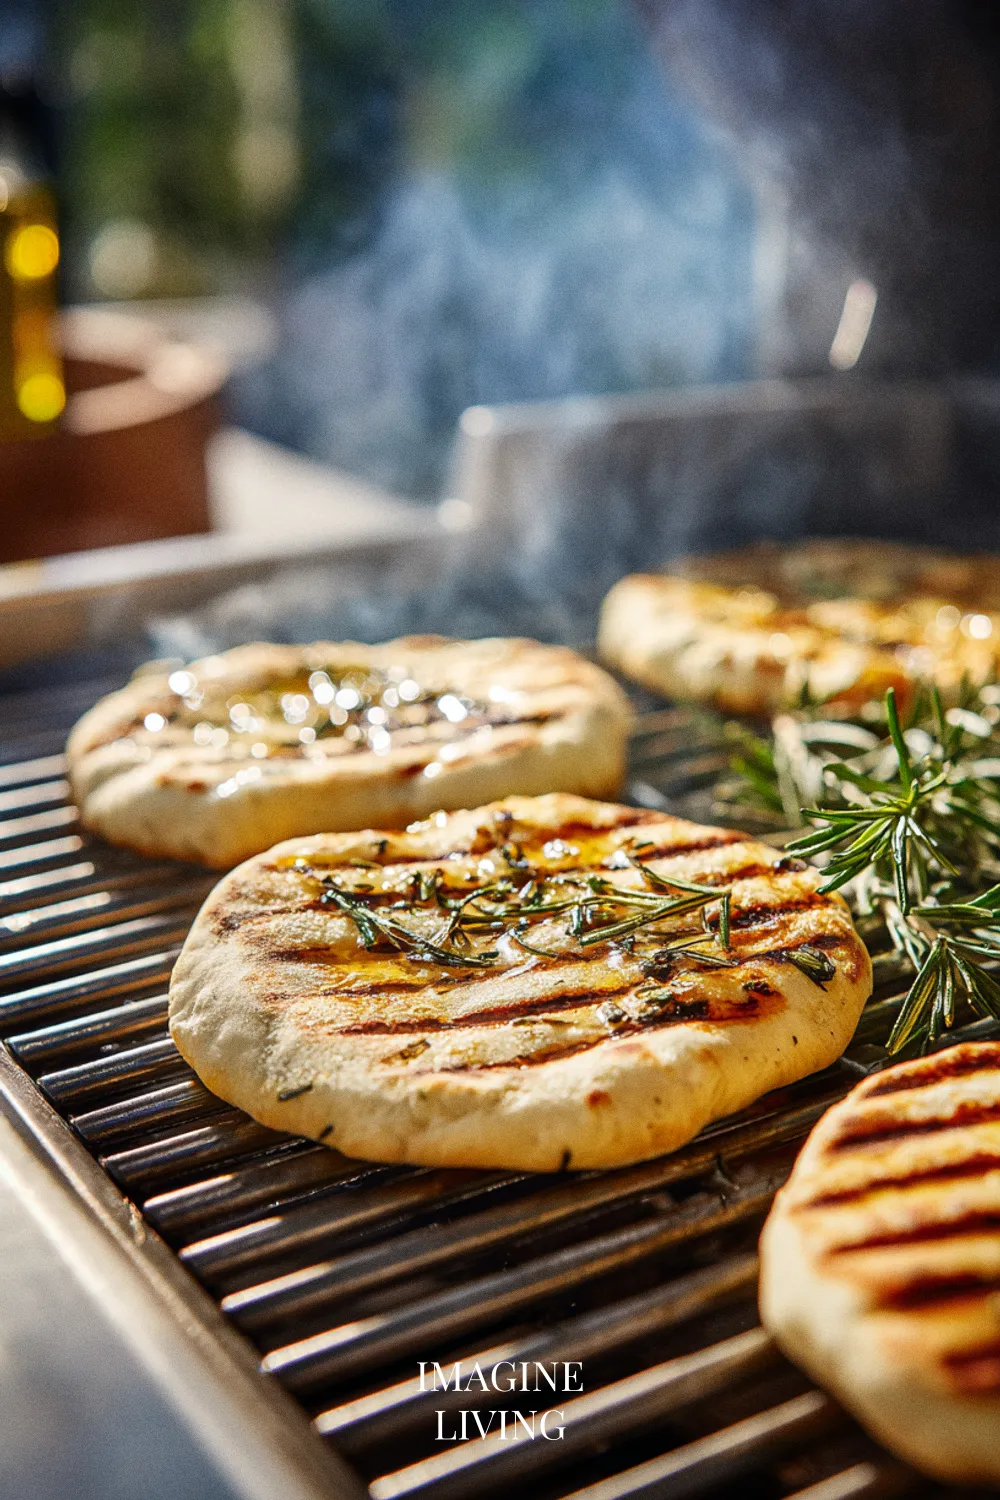
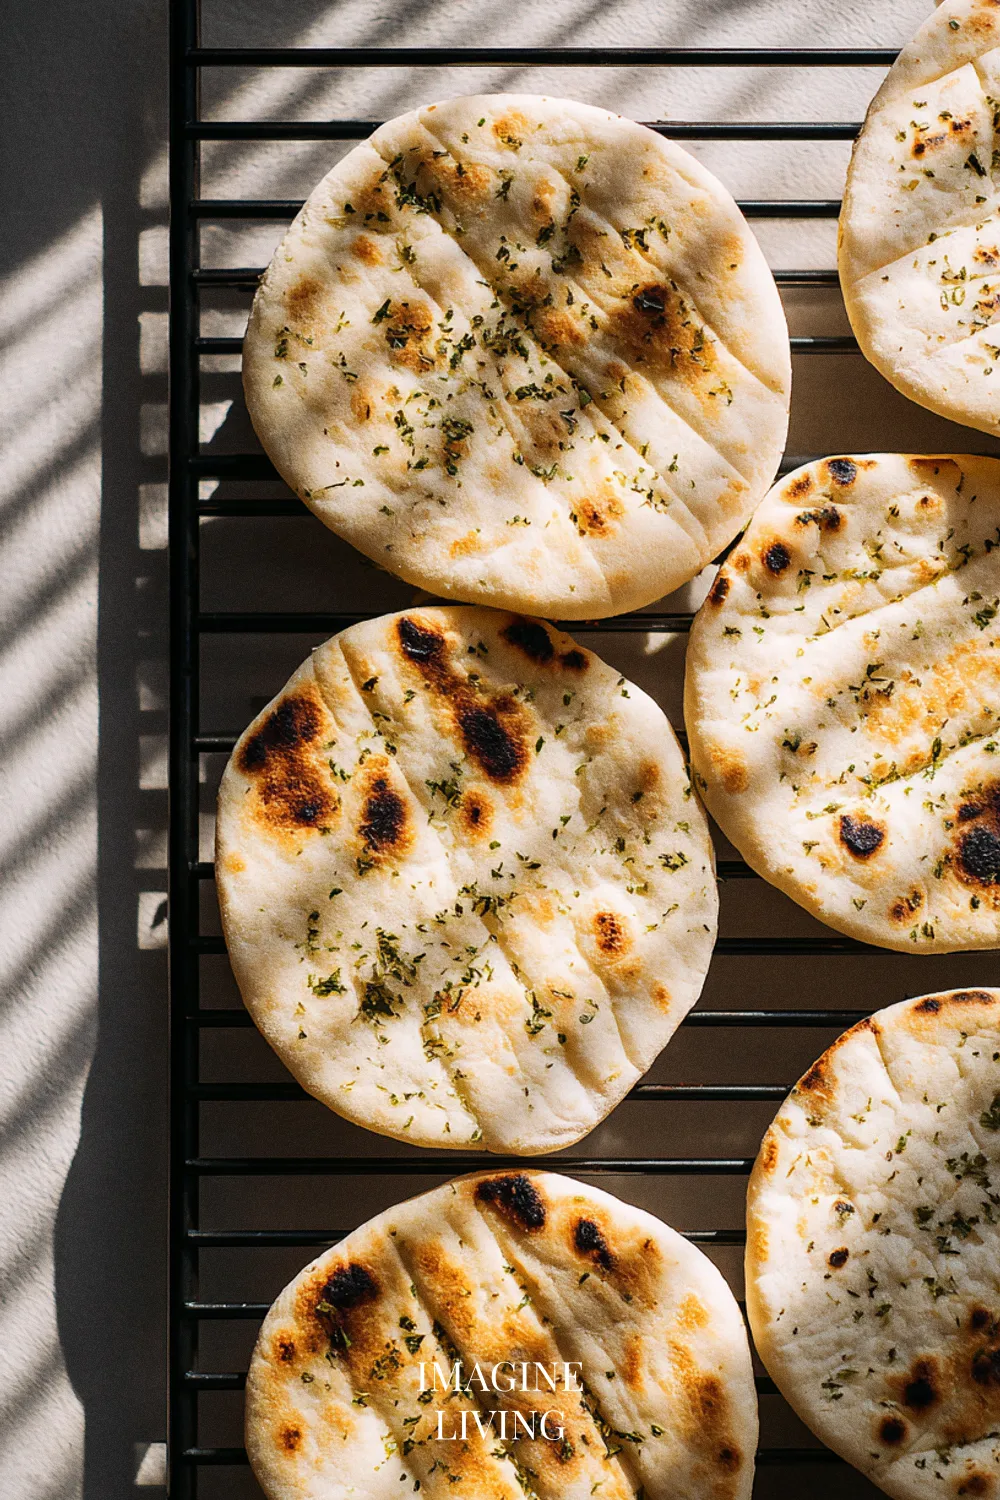
Step 5: Grill the Flatbreads
Brush the flatbreads with olive oil on one side, then place them oil-side down on the grill. Cook for 2-3 minutes or until you see grill marks. Flip and grill the other side for an additional 1-2 minutes until cooked through.
Option note: If using whole wheat flour, monitor closely as it may cook faster.
That first flip often feels like a little victory.
Step 6: Serve Warm
Remove from the grill and immediately drizzle with more olive oil. If desired, sprinkle with fresh herbs for added flavor and color.
“Food brings us together. It creates community.” Giada De Laurentiis
Pro Tips for Grilled Flatbread
A few small things can make the whole process smoother.
- Use fresh yeast for best results.
- Experiment with whole wheat flour for a different flavor profile.
- Allow the grill to reach the right temperature for optimal char.
- Don’t overcrowd the grill; ensure there’s enough space for even cooking.
- Enjoy the flatbread fresh for the best texture, but it can be reheated as well.
One good flatbread sometimes disappears before the next one is off the grill.
Dietary Variations & Substitutions
Gluten-Free Version
- Substitute all-purpose flour with a gluten-free flour blend, in a 1:1 ratio.
- Ensure the blend contains xanthan gum for proper texture and rise.
- Check for doneness 2–3 minutes earlier, as gluten-free options may cook faster.
Tip: Add 1/4 teaspoon of xanthan gum if your blend does not include it.
Dairy-Free
- Use any vegetable oil in place of olive oil for brushing or in the dough.
- This recipe is already dairy-free as written, but ensure any added toppings (like cheese) are dairy-free.
- Expect a similar texture and flavor with no adjustments needed.
Tip: Infuse your oil with herbs for extra flavor without dairy.
Vegan
- This recipe is already vegan as written; simply ensure to use plant-based toppings.
- For added richness, consider using aquafaba (3 tablespoons) as an egg replacement if adding any binding agents.
- No adjustments to cooking time or method are necessary.
Tip: Incorporating nutritional yeast into the dough can provide a cheesy flavor without dairy.
Low-Sugar
- This recipe does not contain added sugar, making it naturally low-sugar.
- If desired, omit any toppings that may include sugar, such as sweet toppings.
- No adjustments to the cooking process are necessary.
Tip: Enhance flavor with spices or herbs instead of sugar.
Whole Wheat Version
- Substitute 1:1 whole wheat flour for all-purpose flour for a nuttier taste.
- The dough may be slightly denser; adjust the water by adding 1-2 tablespoons if necessary.
- Monitor grilling time closely; it may cook a bit faster than all-purpose versions.
Tip: Incorporate 1 tablespoon of vital wheat gluten to improve the structure of whole wheat flatbreads.
Egg-Free
- This recipe is already egg-free.
- If you typically use eggs for fluffiness, try adding 1 tablespoon of baking powder to the dough.
- No changes needed to the cooking method.
Tip: Ensure leveraging yeast properly for texture and rise.
Nut-Free
- This recipe is nut-free as written but check toppings or dippings for potential allergens.
- Make sure any oil used is not from a nut source, opting for olive, canola, or sunflower oil instead.
- No changes to the cooking process required.
Tip: Always check for cross-contamination if you have severe nut allergies.
Creative Variations: Flavorful Flatbread Options
Herbed Flatbread
Mix 1 tablespoon of dried herbs (such as oregano or basil) into the dough.
Tip: Fresh herbs can also be finely chopped and added to the dough for extra flavor.
Garlic Flatbread
Add minced garlic to the dough for an aromatic twist.
Tip: Brush with garlic-infused oil before grilling for enhanced flavor.
Cheese-Stuffed Flatbread
Add a few tablespoons of your favorite cheese (like feta or mozzarella) between two thin layers of dough before sealing and grilling.
Tip: Keep it thin to prevent bursting.
Spiced Flatbread
Sprinkle the rolled out dough with spices like za’atar or cumin before grilling.
Tip: This adds a lovely aroma and unique taste!
Sweet Flatbread
Top with cinnamon sugar after grilling for a delightful dessert option.
Tip: Serve with honey for dipping!
“Creativity is the soul of the cooking process.” Jacques Pepin
Serving Suggestions
- Serve as an appetizer with hummus or tzatziki.
- Pair with a fresh salad for a light meal.
- Use as a base for flatbread pizzas or topped with seasonal vegetables.
Storage and Reheating
Store leftover flatbread in an airtight container for up to 2 days at room temperature. To reheat, warm on the grill for a few seconds or in a preheated oven at 350°F (175°C) for about 5 minutes until warm.
Common Mistakes to Avoid
A few things can throw off the texture, but each one has an easy fix.
Not Letting Dough Rise
Make sure to give the dough enough time to rise for a fluffy texture.
Tip: Look for the dough to double in size.
If it’s slow, a slightly warmer spot usually helps.
Overworking the Dough
Knead just until smooth; overworking can lead to tough flatbreads. Stopping a little earlier is often the better call.
Forgetting to Preheat the Grill
A preheated grill ensures that the flatbread cooks evenly and develops those lovely char marks. If the first one cooks pale, the heat probably needs a minute.
Using Cold Ingredients
Make sure your water is warm to help activate the yeast. Cold water just slows everything down.
Not Oil Enough
Oil the grill and the dough to prevent sticking and ensure a crisp texture. A light brush is all it needs.
FAQs
Can I use whole wheat flour?
Yes, whole wheat flour can be used; it will impart a nuttier flavor and denser texture.
How do I know when the flatbread is done?
Look for golden brown grill marks and a puffed appearance.
Can I freeze grilled flatbread?
Yes, allow to cool completely, then wrap tightly and freeze for up to 3 months.
Is it possible to make the dough ahead of time?
Absolutely! You can prepare the dough a day in advance and refrigerate it after the first rise.
What can I serve with grilled flatbread?
It pairs beautifully with dips, salads, or even as a base for a sandwich.
Savoring the Simple Joy of Grilled Flatbread
When the last flatbread comes off the grill, still warm and a little smoky, it has a way of making the whole meal feel effortless. It’s one of those small, satisfying moments that reminds you why cooking can be such a steady pleasure.
Grilled Flatbread With Olive Oil
Equipment
- Mixing bowl
- Rolling Pin
- Grill or grill pan
- Brush for oiling
- Cooking thermometer optional
Ingredients
For the Dough
- 2 cups all-purpose flour
- 1 teaspoon salt
- ¾ cup warm water
- 2 teaspoons active dry yeast
- 1 tablespoon olive oil
For Serving
- Extra olive oil for drizzling
- Fresh herbs like rosemary or thyme, for garnish, optional
Instructions
Step 1: Prepare the Dough
- In a mixing bowl, combine warm water and yeast. Let it sit for 5 minutes until frothy.
- Stir in the flour and salt, then drizzle in olive oil. Knead on a floured surface until smooth, about 5 minutes.
- Tip: Use your hands or a stand mixer for easy kneading.
Step 2: Let It Rise
- Place the dough in a lightly oiled bowl, cover with a cloth, and let it rise in a warm spot for about 1 hour, or until it has doubled in size.
Step 3: Preheat the Grill
- While the dough is rising, preheat your grill or grill pan to medium-high heat.
- If you’re using a charcoal grill, allow the coals to turn white hot for even cooking.
Step 4: Shape the Flatbreads
- Once risen, punch down the dough and divide it into 4 equal pieces.
- Roll each piece into an oval or circle about ¼ inch thick, dusting with flour as needed to prevent sticking.
- Tip: Don’t worry about perfect shapes; rustic is part of the charm!
Step 5: Grill the Flatbreads
- Brush the flatbreads with olive oil on one side, then place them oil-side down on the grill.
- Cook for 2-3 minutes or until you see grill marks. Flip and grill the other side for an additional 1-2 minutes until cooked through.
Step 6: Serve Warm
- Remove from the grill and immediately drizzle with more olive oil.
- If desired, sprinkle with fresh herbs for added flavor and color.
Notes
Experiment with whole wheat flour for a different flavor profile.
Allow the grill to reach the right temperature for optimal char.
Don’t overcrowd the grill; ensure there’s enough space for even cooking.
Enjoy the flatbread fresh for the best texture, but it can be reheated as well.