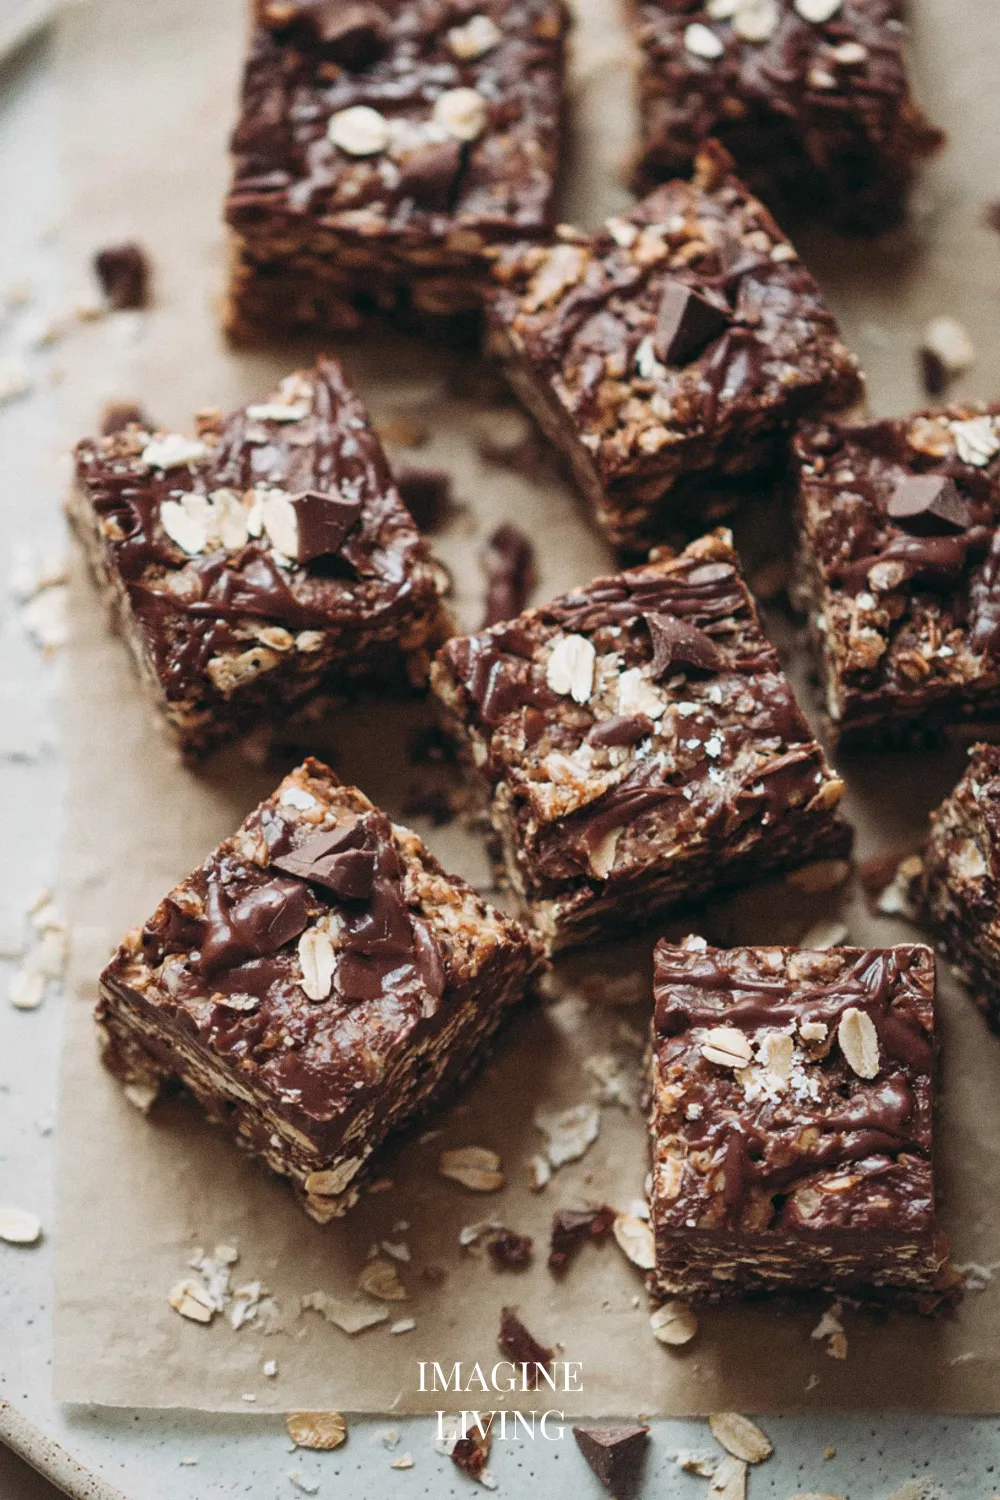
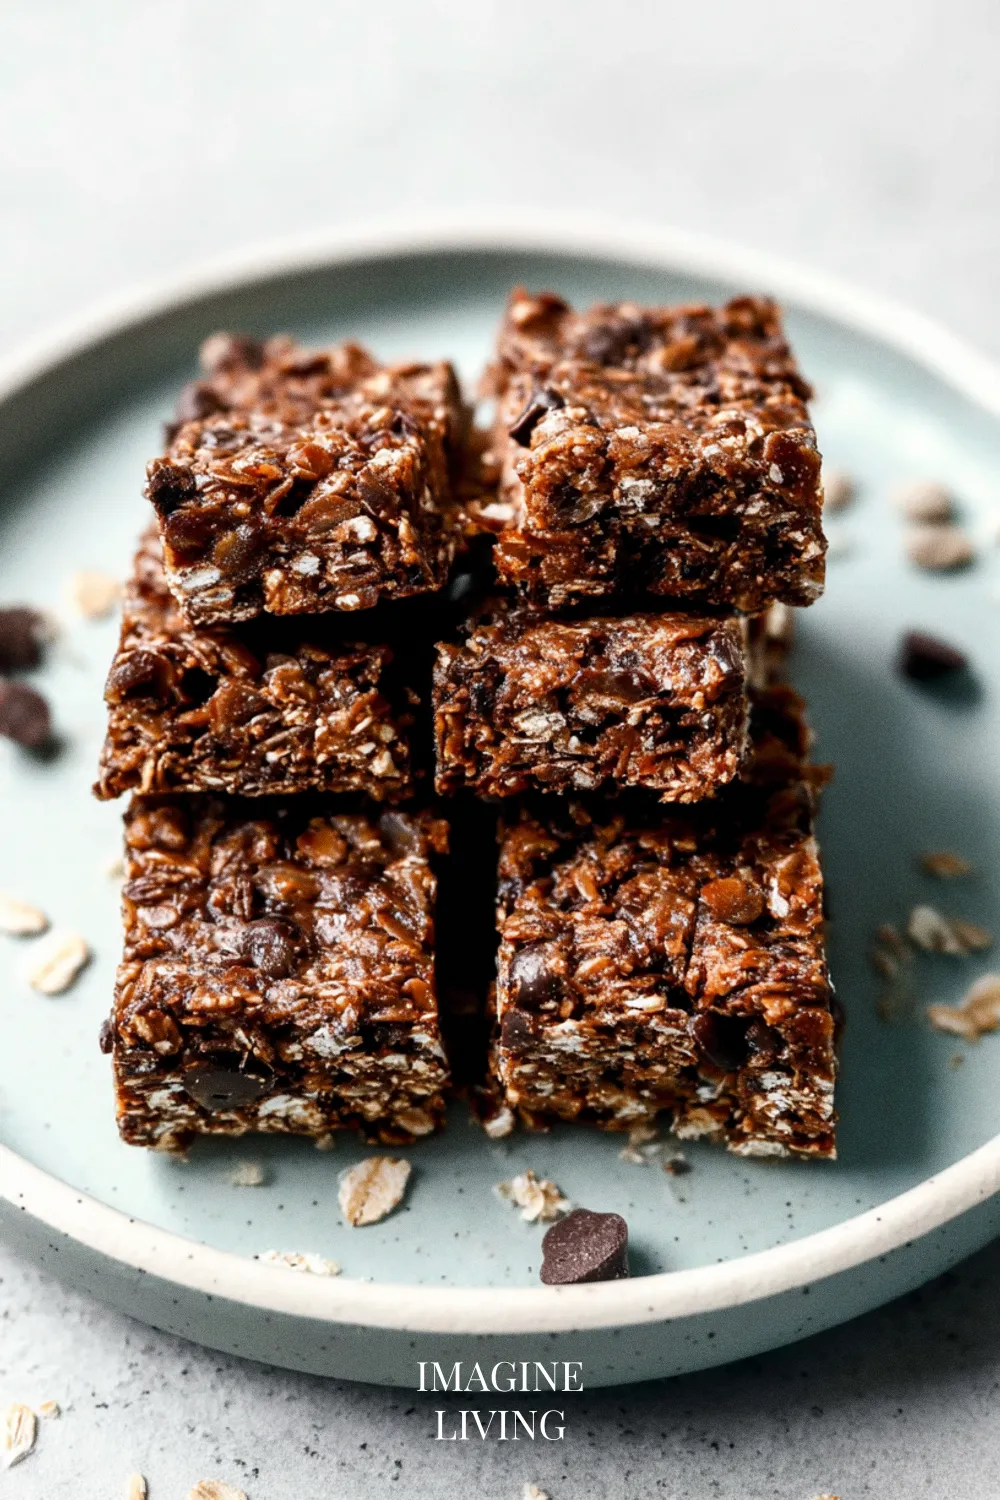
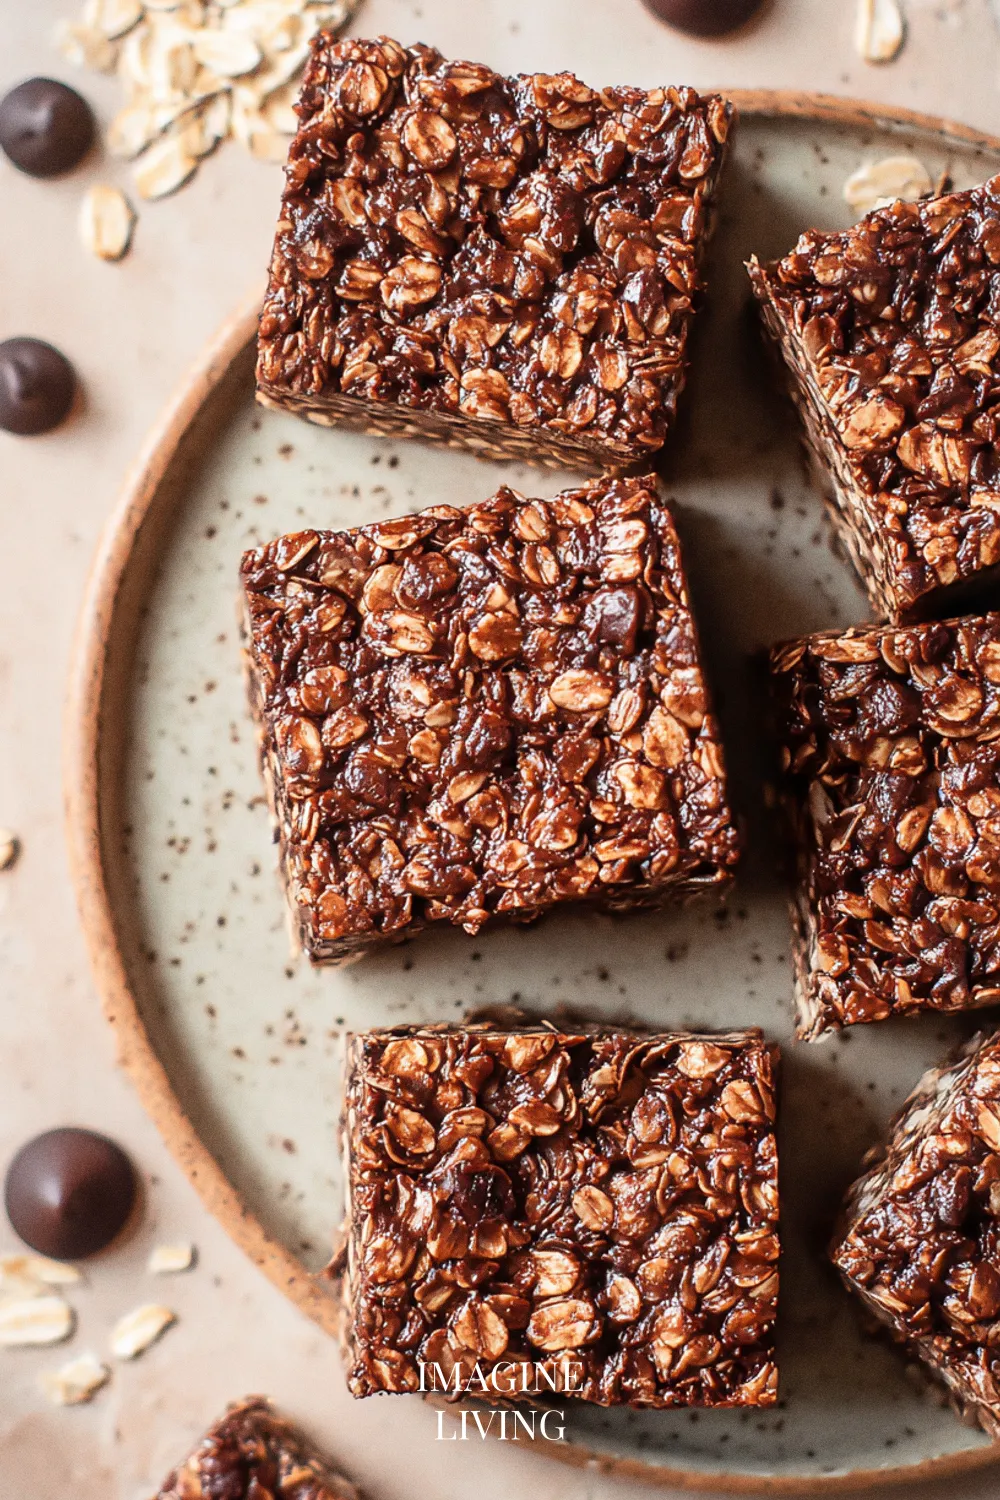
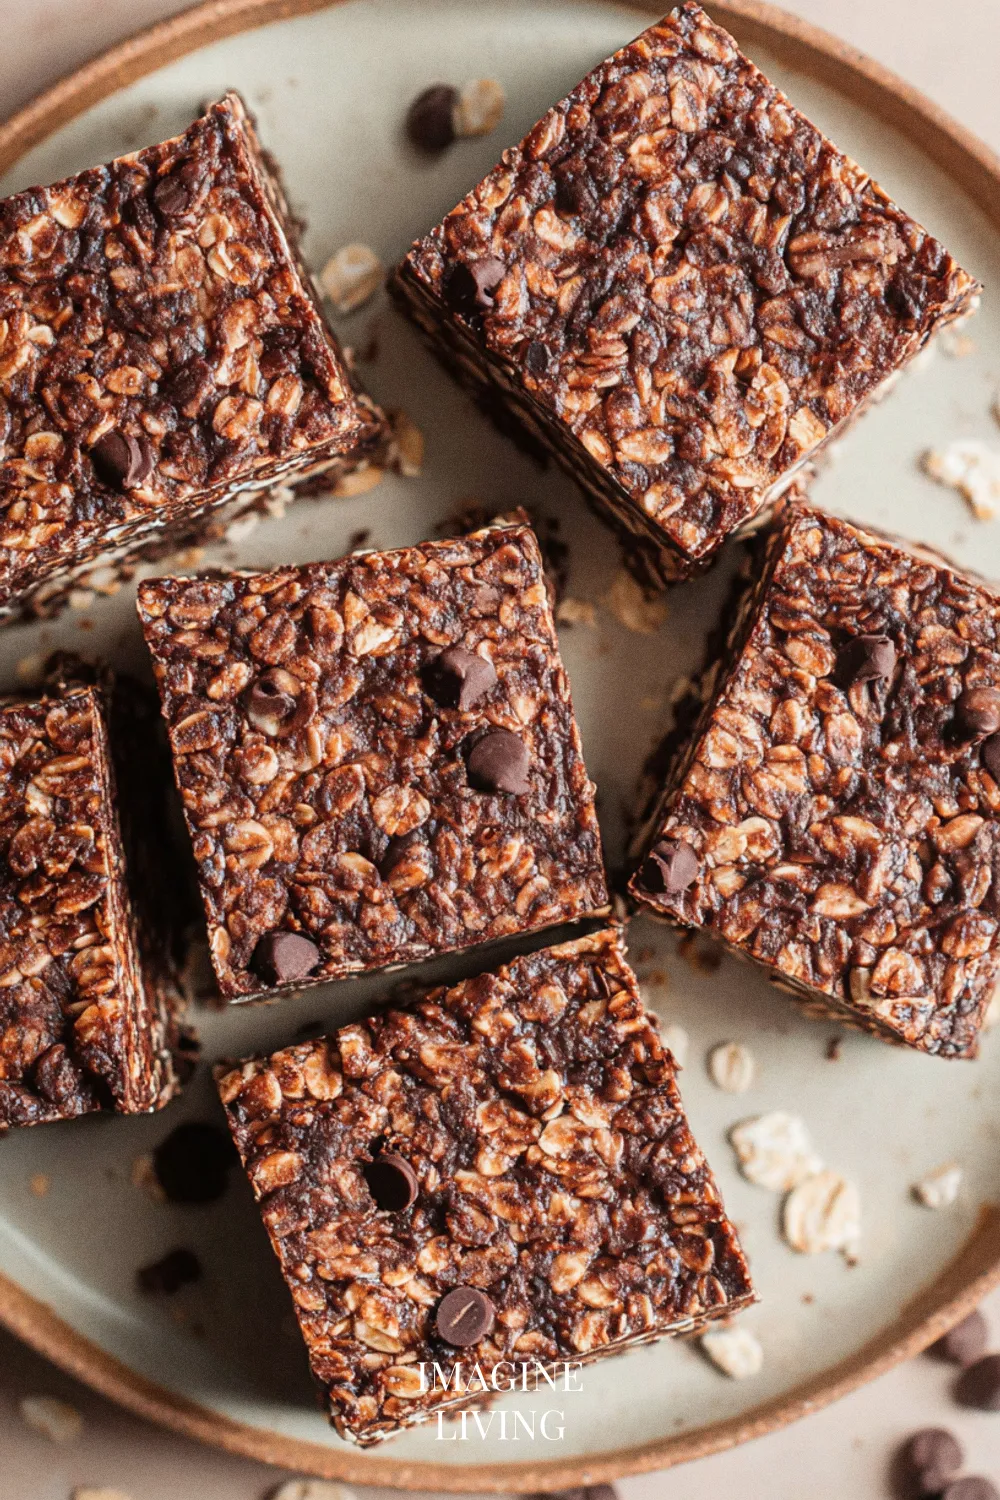
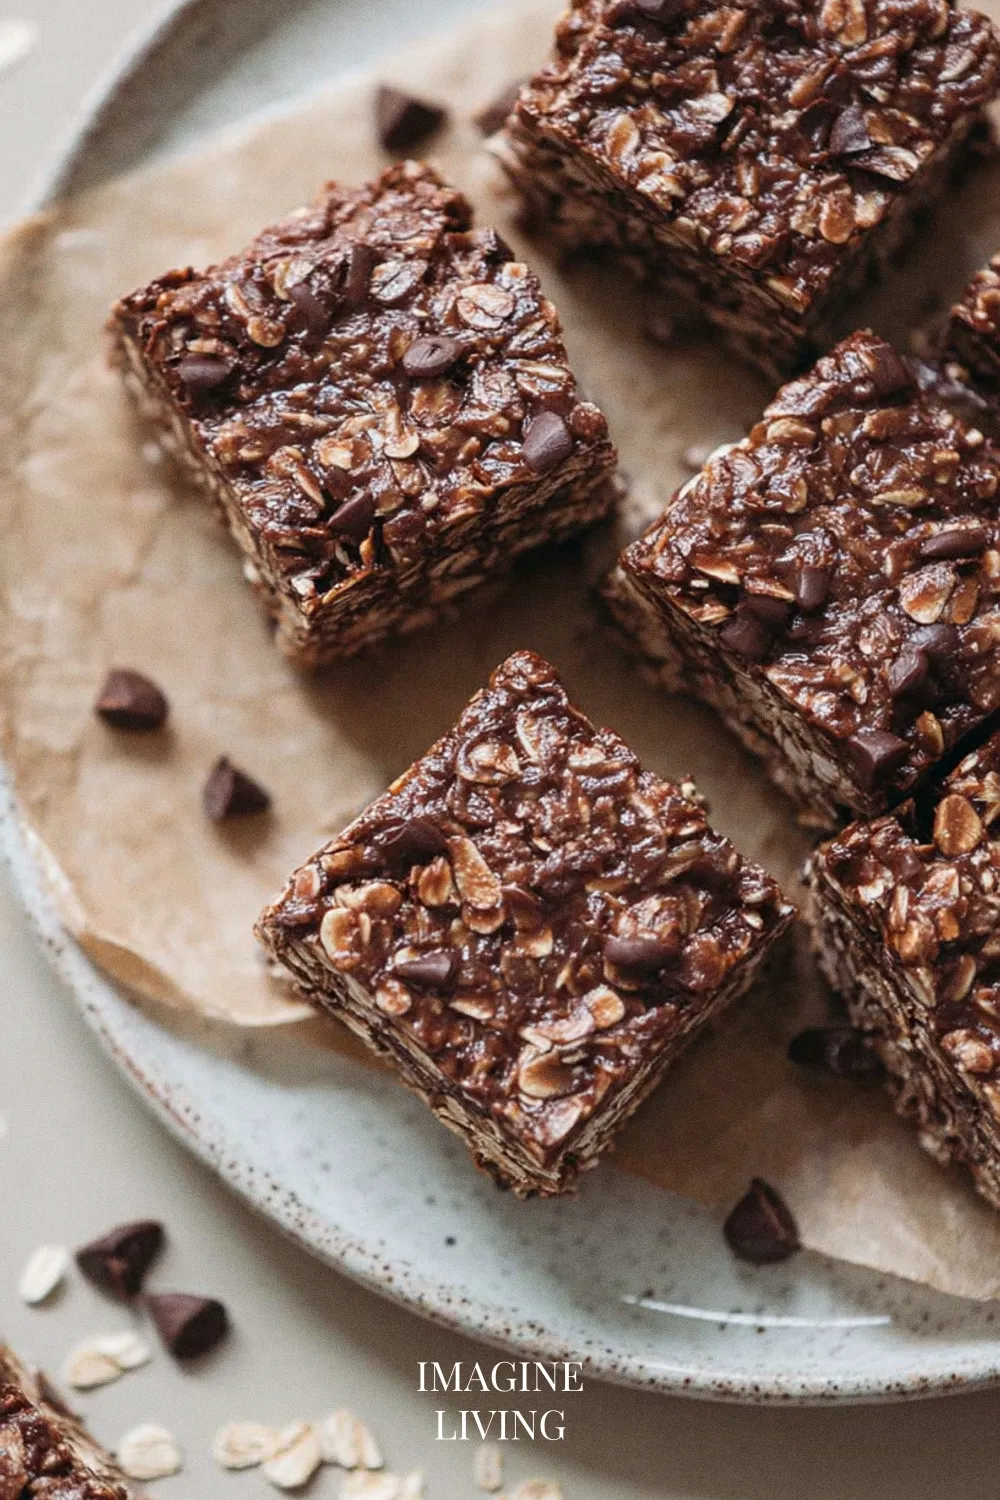
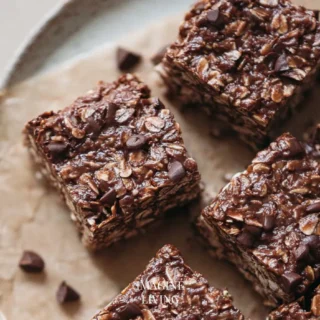
Irresistible Chocolate Oat Bars for a Healthy Snack
The way the oats toast in the oven gives off a warm, nutty scent that feels grounding right away. I always notice it just as the chocolate starts to soften on the counter — a small reminder that this recipe doesn’t ask much of you. Everything comes together easily, with room to breathe and even enjoy a quiet moment or two. And if anything goes slightly off, it usually still tastes great, which is always a relief.
Why You’ll Love This Recipe
These chocolate oat bars are a fantastic guilt-free treat that can easily fit into your busy lifestyle. They are perfect for breakfast on the go, an afternoon pick-me-up, or even a sweet addition to your lunchbox. Simple to prepare and endlessly satisfying, they promise both energy and enjoyment.
A great way to use pantry staples.
Packed with fiber and nutrients thanks to oats.
Customizable with your favorite mix-ins.
A wholesome alternative to store-bought snacks for kids and adults alike.
“The snack bar that tastes like dessert.”
Ingredients: Chocolate Oat Bars
Servings: 12 bars
For the Base
2 cups (180g) rolled oats
1 cup (120g) almond flour (or whole wheat flour)
1/2 cup (100g) coconut sugar (or brown sugar)
1/4 teaspoon salt
1/3 cup (80ml) coconut oil, melted
1/4 cup (60ml) maple syrup (or honey)
Options: Substitute almond flour with whole wheat flour for a different flavor profile.
For the Topping
3/4 cup (130g) dark chocolate chips (or milk chocolate for a sweeter option)
1/4 cup (60ml) almond milk (or any milk of choice)
1/4 cup (40g) chopped nuts (optional)
Options: Use milk chocolate for a sweeter touch or any milk of choice to suit dietary preferences.
Equipment Needed
Mixing bowls
Baking dish (8×8 inches or 20×20 cm)
Parchment paper
Saucepan or microwave-safe bowl
Spoon or spatula
Step-By-Step Guide: Making Chocolate Oat Bars
A few steps involve heat and timing, but nothing rushed — everything here is steadier than it looks.
Preheat and Line the Baking Dish
Start by preheating your oven to 350°F (175°C). Line your baking dish with parchment paper, allowing some overhang for easy removal later. — The parchment always tries to curl a little; it settles once the mixture goes in.
Combine Dry Ingredients
In a large mixing bowl, combine the rolled oats, almond flour, coconut sugar, and salt. This blend forms the hearty base of the bars, ensuring each bite is filled with texture and taste.
Tip: Make sure to break up any clumps in the almond flour for even mixing.
Mix the Wet Ingredients
In another bowl, whisk together the melted coconut oil and maple syrup until smooth. The warmth of the oil will help the syrup integrate beautifully.
Pour and Stir
Pour the wet ingredients into the dry mixture and stir until everything is well combined. The mixture should be moist, yet crumbly enough to hold its shape. — It’s normal if a few oats try to escape the bowl.
Press into the Dish
Transfer the mixture into your prepared baking dish and firmly press it down with the back of a spatula.
Bake
Place the dish in the preheated oven and bake for about 15–20 minutes, until the edges are lightly golden. — That first wisp of toasted oat scent usually signals it’s close.
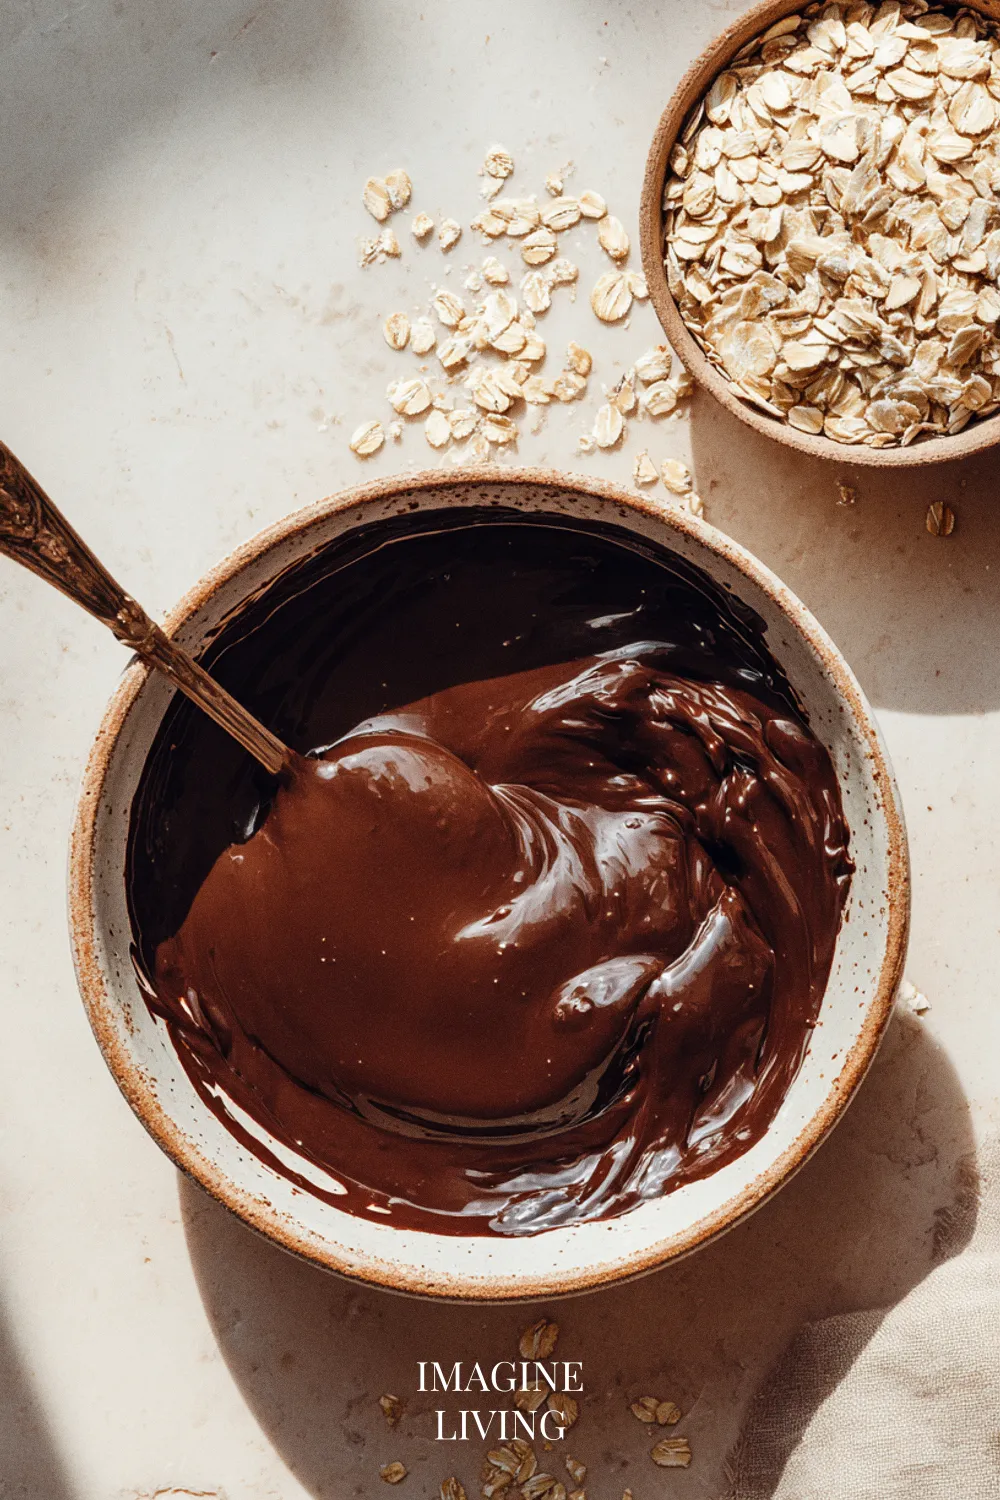
Melt the Chocolate
While the base bakes, melt the dark chocolate chips in a saucepan over low heat or in the microwave in short bursts. Once melted, stir in the almond milk until smooth. Option note: If using milk of choice, ensure it’s added until smooth.
Drizzle and Chill
Remove the baking dish from the oven and pour the melted chocolate over the oat base. Spread it evenly, then sprinkle any chopped nuts if desired. Let the bars cool completely; then refrigerate until set, about 1–2 hours. — The chocolate always looks glossier than expected right before it firms up.
Pro Tips for Chocolate Oat Bars
A few gentle tweaks can make the process even smoother.
Use gluten-free oats if necessary to ensure the recipe is gluten-free.
Adjust the sweetness by adding more or less coconut sugar based on your taste.
Feel free to mix in dried fruits like cranberries or apricots for added flavor and nutrition.
Serve the bars chilled for a firmer texture or at room temperature for a softer bite.
Store in an airtight container to maintain freshness.
(And if a corner piece crumbles, it still makes an excellent nibble.)
Dietary Variations & Substitutions
Gluten-Free Version
Swap almond flour 1:1 with a gluten-free flour blend to maintain texture.
Ensure oats are certified gluten-free to avoid cross-contamination.
Monitor baking time, checking for doneness a few minutes earlier as GF ingredients may bake differently.
Tip: A little xanthan gum (1/4 tsp per cup of flour) can help bind the mixture if using gluten-free flour.
Dairy-Free
Replace almond milk with any dairy-free milk such as oat or soy milk at the same volume.
Use dairy-free chocolate chips or cacao nibs instead of dark or milk chocolate.
No adjustments in baking time are necessary, but check for desired chocolate melting consistency.
Tip: Adding a tablespoon of nut-free butter can enhance creaminess in the chocolate topping.
Vegan
Substitute honey with an equal amount of maple syrup to keep it plant-based.
Ensure all chocolate and milk alternatives are vegan-friendly.
No major adjustments needed in baking time or method, just ensure your wet and dry ingredients mix smoothly.
Tip: Including a splash of vanilla extract in the wet ingredients can enhance the overall flavor.
Nut-Free
Use sunflower seed flour or oat flour instead of almond flour for a nut-free option.
Replace almond milk with oat milk or another non-nut alternative.
Keep the chocolate topping as is if using allergen-free chocolate; otherwise, check for nut-safe labels.
Tip: Ensure all mix-ins and chocolate are free from cross-contamination with nuts.
Low-Sugar Version
Reduce coconut sugar by up to 50% and replace with a sugar alternative like stevia or erythritol.
If the batter is too dry, add an extra tablespoon of maple syrup or liquid sweetener to achieve the desired consistency.
Tip: Boost the chocolate flavor with a pinch of espresso powder to balance reduced sweetness.
High-Protein Version
Substitute half of the oat volume with protein powder (about 1 cup), adjusting the liquid as needed to maintain texture.
Add chia seeds (1/4 cup) to the mixture for added protein and fiber.
Keep an eye on the baking time; protein-based additions may cook faster.
Tip: Consider sprinkling hemp seeds on top for a protein boost and added crunch.
Creative Variations: Unique Takes on Chocolate Oat Bars
Peanut Butter Chocolate Oat Bars
Add 1/2 cup (125g) of peanut butter to the wet mixture for a nutty twist.
Tip: Swirl it in for a marbled effect before baking for a delightful surprise.
Coconut Chocolate Oat Bars
Mix in 1/3 cup (30g) of unsweetened shredded coconut with the dry ingredients.
Tip: This adds texture and a tropical vibe to your bars.
Mint Chocolate Oat Bars
Incorporate 1/2 teaspoon of peppermint extract into the melted chocolate.
Tip: Garnish with crushed peppermint candies for added flair!
Espresso Chocolate Oat Bars
Add 1 tablespoon of instant coffee granules to the dry ingredients for a rich, coffee-infused flavor.
Tip: Pair with nuts for a satisfying crunch.
Fruit and Nut Chocolate Oat Bars
Toss in 1/2 cup (75g) of your favorite dried fruits and nuts into the mixture.
Tip: This variation provides an energy boost suitable for pre-workout snacks.
Spicy Chocolate Oat Bars
Sprinkle in a pinch of cayenne pepper to the chocolate for a surprising kick.
Tip: This will balance the sweetness with a lively heat.
Matcha Chocolate Oat Bars
Mix 1 tablespoon of matcha powder into the dry ingredients for an earthy flavor.
Tip: This vibrant green addition also provides a health boost!
Vegan Chocolate Oat Bars
Ensure all ingredients are plant-based, replacing honey with maple syrup.
Tip: These bars are a great option for everyone at the table.
Serving Suggestions
These chocolate oat bars shine as a snack on their own but can also be served with yogurt, drizzled with nut butter, or paired with a side of fresh fruit. They also make excellent lunchbox additions and can be cut into smaller squares for bite-sized treats at gatherings.
Storage and Reheating
Store your chocolate oat bars in an airtight container in the refrigerator for up to one week. They can also be frozen for longer storage. Just ensure they are well-wrapped to prevent freezer burn. To enjoy, simply thaw at room temperature or reheat in the microwave for a few seconds.
Common Mistakes to Avoid
A few things can throw off the texture, but each one has an easy fix.
Overmixing the Ingredients
This can result in dense bars. Mixing just until combined ensures a lighter texture.
Tip: Go gentle when incorporating the wet and dry ingredients.
Not Using Parchment Paper
Skipping this can lead to sticking, making it difficult to remove the bars.
Tip: A lined dish is your best friend for easy release.
Baking for Too Long
Keep an eye on the bars; overbaking can lead to dryness.
Tip: Look for a light golden edge for perfect doneness.
Skipping Cooling Time
Cutting too soon can result in crumbling.
Tip: Patience is key; let them cool completely before slicing.
Ignoring Personal Preferences
Customize your bars with your preferred mix-ins or sweetness level.
Tip: Taste and adjust while preparing for best results.
FAQs
Can I use rolled oats instead of quick oats?
Yes, rolled oats work perfectly and provide a heartier texture.
Are these bars gluten-free?
Yes, if you use certified gluten-free oats and almond flour.
How do I know when the bars are done baking?
They should be lightly golden around the edges and firm in the middle.
Can I use different types of sweeteners?
Absolutely! You can substitute brown sugar, agave, or honey for maple syrup according to your preference.
How should I cut the bars?
Use a sharp knife for clean edges, cutting while they’re in the dish.
Enjoyable Chocolate Oat Bars for Every Occasion
These bars settle nicely into whatever moment you need them for — a quick snack, a small treat, or something steady to keep on hand. They’re simple, satisfying, and easy to enjoy without overthinking.
Chocolate Oat Bars
These chocolate oat bars combine rich chocolate with hearty oats for an indulgent yet nourishing snack. Simple to prepare and perfect for any occasion, they are a wholesome alternative to store-bought snacks.
3/4cupdark chocolate chipsor milk chocolate for a sweeter option
1/4cupalmond milkor any milk of choice
1/4cupchopped nutsoptional
Instructions
Preheat and Line the Baking Dish
Preheat your oven to 350°F (175°C).
Line your baking dish with parchment paper, allowing some overhang for easy removal later.
Combine Dry Ingredients
In a large mixing bowl, combine the rolled oats, almond flour, coconut sugar, and salt.
Tip: Make sure to break up any clumps in the almond flour for even mixing.
Mix the Wet Ingredients
In another bowl, whisk together the melted coconut oil and maple syrup until smooth.
Pour and Stir
Pour the wet ingredients into the dry mixture and stir until everything is well combined. The mixture should be moist, yet crumbly enough to hold its shape.
Press into the Dish
Transfer the mixture into your prepared baking dish and firmly press it down with the back of a spatula.
Bake
Place the dish in the preheated oven and bake for about 15-20 minutes, until the edges are lightly golden.
Melt the Chocolate
While the base bakes, melt the dark chocolate chips in a saucepan over low heat or in the microwave in short bursts.
Once melted, stir in the almond milk until smooth.
Drizzle and Chill
Remove the baking dish from the oven and pour the melted chocolate over the oat base. Spread it evenly, then sprinkle any chopped nuts if desired.
Let the bars cool completely; then refrigerate until set, about 1-2 hours.
Notes
Pro Tips for Chocolate Oat Bars
Use gluten-free oats if necessary to ensure the recipe is gluten-free.
Adjust the sweetness by adding more or less coconut sugar based on your taste.
Feel free to mix in dried fruits like cranberries or apricots for added flavor and nutrition.
Serve the bars chilled for a firmer texture or at room temperature for a softer bite.
Store in an airtight container to maintain freshness.