Sweet Cheese Pierogi With Vanilla
The moment these pierogi hit the pan, there’s a soft sweetness in the air that feels immediately welcoming. I always notice how the dough warms under my hands—it’s a small reminder that this recipe doesn’t ask for perfection, just a bit of presence. And if the idea of filling and sealing dumplings feels intimidating, it settles quickly once you get into the rhythm. Even the first slightly lopsided one has its charm.
Why You’ll Love This Recipe
Making sweet cheese pierogi with vanilla brings a quiet comfort to the kitchen, the kind that builds as you mix, roll, and fold. They’re a staple of Eastern European cuisine, and there’s an easy pleasure in how adaptable they are.
- They can be served at any time of the day, making them a versatile dish.
- The combination of creamy cheese and fragrant vanilla creates an irresistible filling.
- Freshly made, they can be frozen for later enjoyment.
“A dessert pierogi that tastes like Sunday in an Eastern European kitchen.” Imagine Living
Ingredients: Sweet Cheese Pierogi with Vanilla
Servings: 4
For the Dough
- 2 cups all-purpose flour (250 g)
- 1 large egg
- 1/2 cup sour cream (120 ml)
- 1/4 teaspoon salt
For the Filling
- 1 cup farmer’s cheese (250 g)
- 1/4 cup powdered sugar (30 g)
- 1 teaspoon vanilla extract
- 1 egg yolk
For Serving
- Powdered sugar for dusting
- Fruit preserves (optional)
Options: Consider gluten-free flour for a different texture or use dairy-free alternatives like cashew cream for the filling.
Equipment Needed
- Large mixing bowl
- Rolling pin
- Round cutter or glass
- Pot for boiling
- Skillet for frying
Step-By-Step Guide: Preparing Sweet Cheese Pierogi with Vanilla
A little dough, a little filling—this part looks more technical than it feels. Once you start, the steps fall into place easily.
Make the Dough
In a large mixing bowl, combine the flour and salt. Make a well in the center and add the egg and sour cream. Mix until a dough forms, then knead it on a lightly floured surface for about 5 minutes until smooth and elastic. —There’s a moment when the dough suddenly softens under your palms; that’s when it’s ready.
Tip: Letting the dough rest for 20-30 minutes will make it easier to roll out.
Prepare the Filling
In another bowl, mix together the farmer’s cheese, powdered sugar, vanilla extract, and egg yolk until smooth and creamy. —If the filling looks a little grainy at first, it usually settles with another quick stir.
Tip: Taste the filling during preparation; you can adjust the sweetness according to your preference. Option note: If using dairy-free alternatives, ensure they are well-mixed to maintain creaminess.
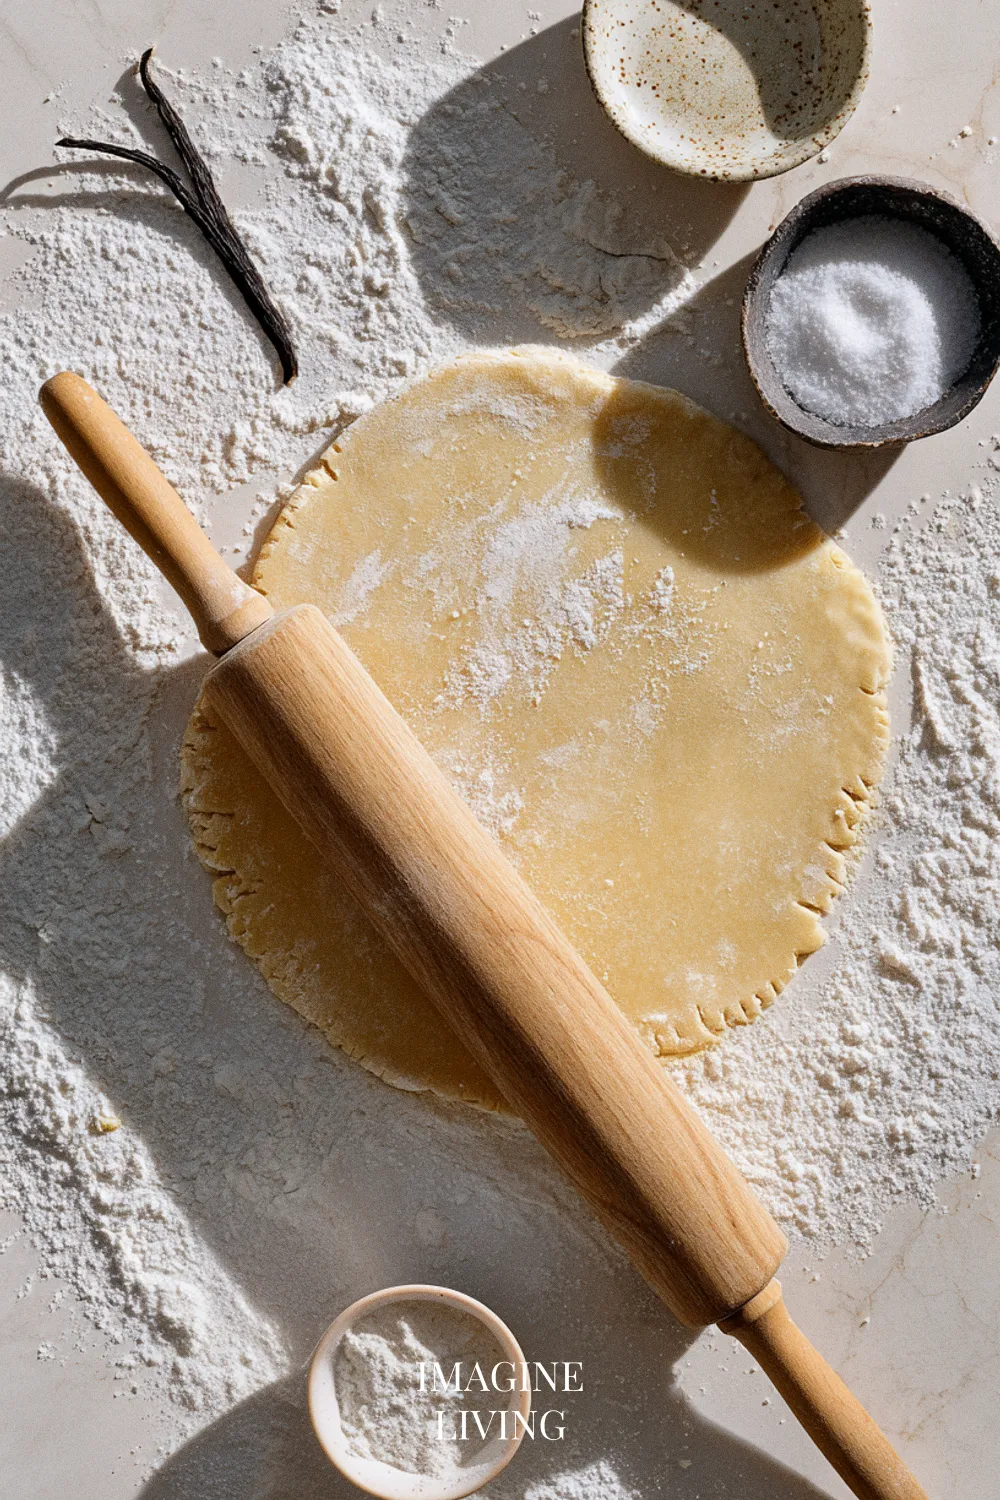
Assemble the Pierogi
Roll out the dough on a floured surface to about 1/8 inch thick. Use a round cutter to cut circles from the dough. Place a tablespoon of filling in the center of each circle, fold them over, and pinch the edges to seal tightly. —A clean edge always makes sealing easier; wiping a thumb along the side becomes second nature fast.
Tip: Ensure there’s no filling near the edges for a better seal.
Cook the Pierogi
Bring a large pot of salted water to a boil. Drop pierogi in batches, cooking until they float to the top—about 3-4 minutes. —They rise slowly at first, then all at once, like they’ve agreed on it.
Tip: You can stop here or sauté the boiled pierogi in a skillet with butter for a delightful crispness.
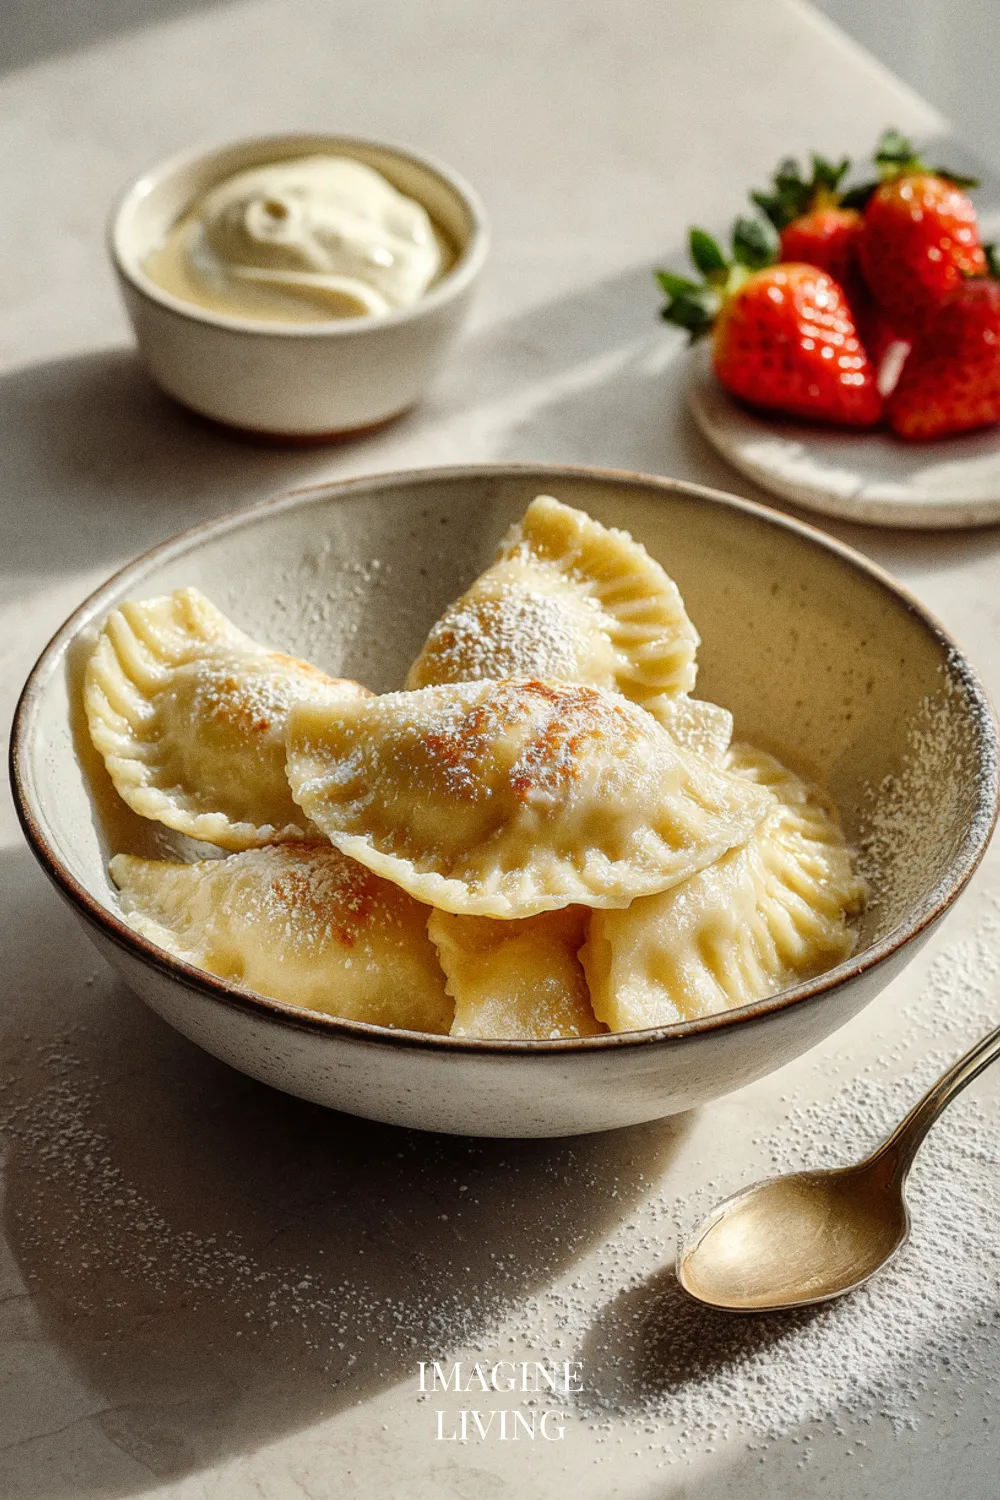
Serve and Enjoy
Dust the warm pierogi with powdered sugar and serve with fruit preserves, if desired.

Pro Tips for Sweet Cheese Pierogi
A few small habits make these pierogi come together with less fuss.
- Use high-quality farmer’s cheese for the best flavor.
- Experiment with different types of sugar; brown sugar adds a nice depth.
- For a fun twist, incorporate lemon or orange zest into the filling.
One small note: zest goes further than expected, so a light hand is usually enough.
Dietary Variations & Substitutions
Gluten-Free Version
- Substitute all-purpose flour with a 1:1 gluten-free flour blend that contains xanthan gum.
- Mix the dough until combined but avoid over-kneading to prevent toughness.
- Check for doneness during boiling since gluten-free pierogi may cook a bit differently, generally ready when they float.
Tip: Let the gluten-free dough rest for at least 30 minutes for better texture.
Dairy-Free Version
- Replace sour cream with dairy-free yogurt or cashew cream in equal amounts for the dough.
- Use a dairy-free cream cheese alternative in place of farmer’s cheese for the filling (1:1).
- Ensure the filling is blended well for a smooth consistency.
Tip: Add a splash of lemon juice to dairy-free yogurt for brightness.
Vegan Version
- Replace the egg in the dough with 1/4 cup unsweetened applesauce.
- Substitute the farmer’s cheese with a blend of soaked cashews (1 cup) and nutritional yeast (2 tbsp).
- Omit the egg yolk in the filling or use a flax egg (1 tbsp ground flaxseed + 2.5 tbsp water).
Tip: Chill the dough for about 30 minutes before rolling for easier handling.
Nut-Free Version
- If using cashew cream for the filling, opt for a different creamy base such as tofu or a nut-free cream cheese alternative.
- Ensure any store-bought ingredients are verified as nut-free to avoid cross-contamination.
Tip: Blend tofu with a little vanilla and sweetener to mimic creamy filling.
Low-Sugar Version
- Reduce powdered sugar in the filling by 25% and enhance flavor with extra vanilla extract or a hint of cinnamon.
- Consider using a sugar substitute like monk fruit sweetener, adjusting to the equivalent measure.
Tip: A touch of vanilla can elevate sweet flavors if using less sugar.
High-Protein Version
- Incorporate protein powder (1-2 scoops) into the dough mix; reduce flour proportionally for similar consistency.
- Use ricotta cheese instead of farmer’s cheese for a protein boost in the filling.
Tip: Ensure the protein powder is unflavored to maintain a well-balanced flavor profile.

Creative Variations: Sweet Cheese Pierogi Ideas
Chocolate Chip Filling
Add mini chocolate chips to the filling for an indulgent treat.
Tip: Use semi-sweet chips for balanced sweetness.
Berry Compote Drizzle
Serve with a warm berry compote for a burst of fruity flavor.
Tip: Choose seasonal berries for the freshest taste.
Nutty Delight
Incorporate crushed nuts like walnuts or hazelnuts into the filling for added texture.
Tip: Toast the nuts lightly for enhanced flavor.
Coconut Infusion
Mix shredded coconut into the cheese filling for a tropical twist.
Tip: Use unsweetened coconut to control the sweetness.
Savory Touch
Add herbs like chives or dill for a unique savory-sweet twist.
Tip: This pairs beautifully with sour cream instead of preserves.

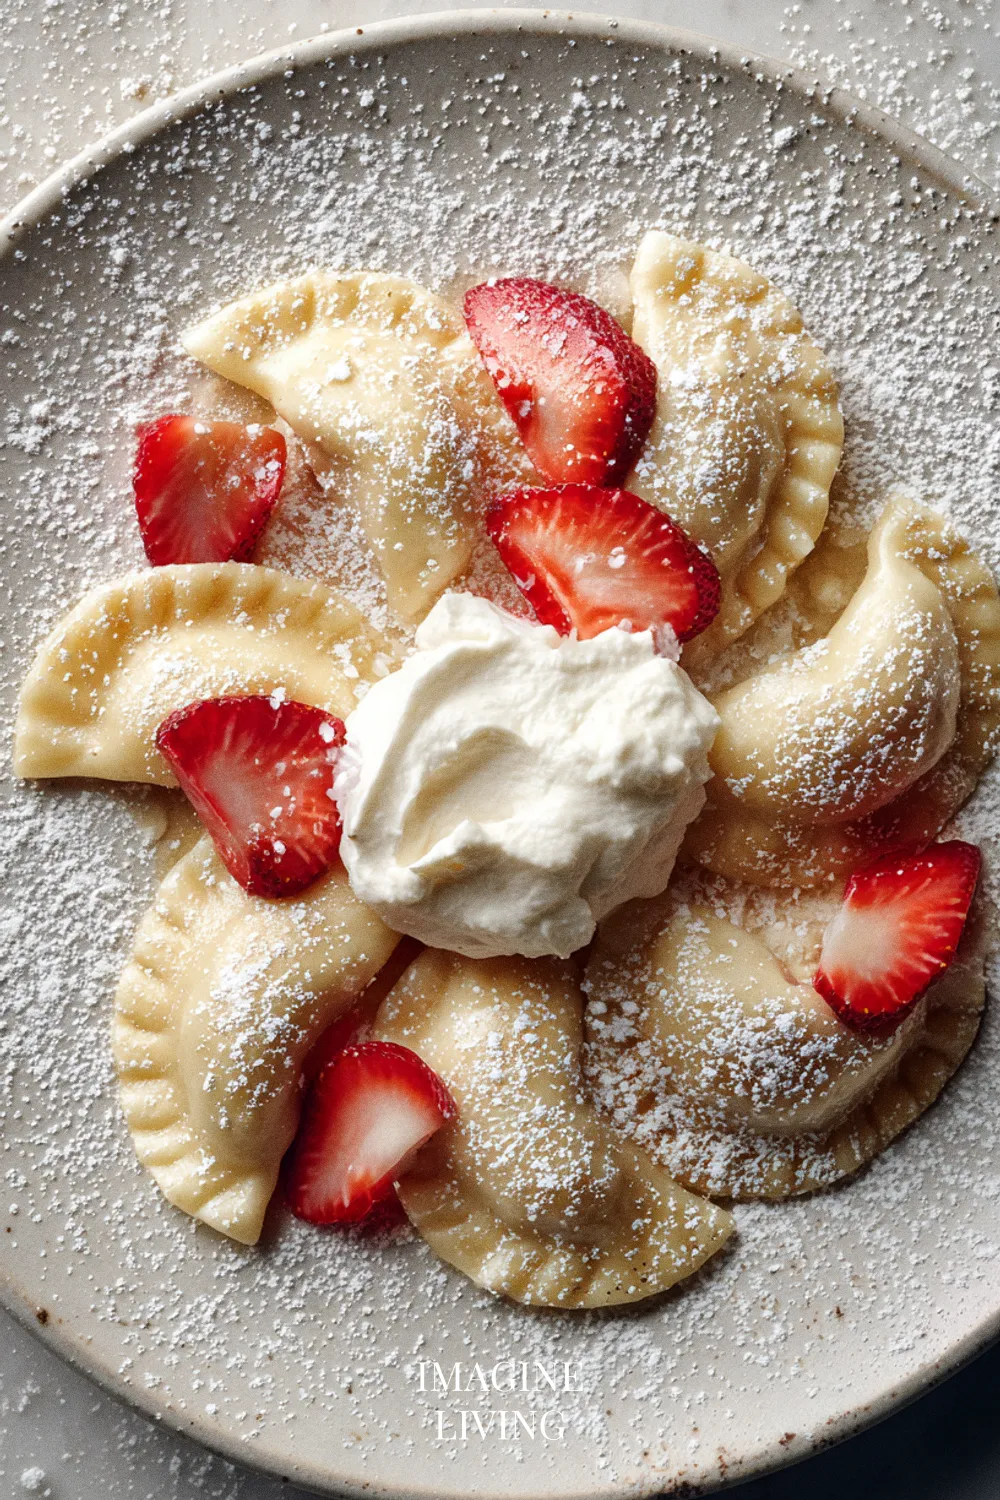
Serving Suggestions
Pair sweet cheese pierogi with a smooth vanilla sauce or a scoop of ice cream for a decadent dessert. They also taste fantastic alongside a fresh fruit salad.
Storage and Reheating
To store, place cooked pierogi in an airtight container in the refrigerator for up to 3 days. For longer-term storage, freeze uncooked pierogi in a single layer, then transfer to a freezer bag for up to 2 months.
To reheat, simply boil for 2-3 minutes or sauté in a skillet with a bit of butter until heated through.
Common Mistakes to Avoid
It’s normal for the first batch or two to feel like a warm-up round.
Overworking the Dough
Over-kneading can result in tough pierogi.
Tip: Knead just until smooth and no longer. If it springs back too much, it’s had enough.
Skipping the Resting Time
A rested dough is easier to roll out and manage.
Tip: Don’t rush this; it makes a notable difference.
Underfilling
It’s tempting to underfill, but this can lead to doughy bites.
Tip: Be generous but ensure the edges remain clean.
Not Sealing Properly
Seams that aren’t sealed will burst during cooking.
Tip: Press firmly around edges to ensure a tight seal.
Forgetting the Salt
Forgetting to salt the water can dull the flavor.
Tip: Always salt your boiling water.

FAQs
Can I use another type of cheese?
Absolutely! Cream cheese or ricotta can make a lovely filling.
How do I know when the pierogi are cooked?
Pierogi will float to the surface when cooked through.
Can I make the dough ahead of time?
Yes, you can prepare the dough a day in advance and store it in the fridge.
What can I serve with pierogi?
They pair well with sour cream, applesauce, or any fruit preserves.
Are they gluten-free?
Using gluten-free flour can work; however, the texture will be different.
Savory Indulgence Awaits
Once you’ve folded the last pieróg and dusted them with a bit of sugar, there’s a quiet satisfaction that settles in. These are simple, steady pleasures—easy to enjoy right away, and just as welcome pulled from the freezer on a busy day. Enjoy them at your own pace.

Sweet Cheese Pierogi With Vanilla
Equipment
- Large mixing bowl
- Rolling Pin
- Round cutter or glass
- Pot for boiling
- Skillet for frying
Ingredients
For the Dough
- 2 cups all-purpose flour (250 g)
- 1 large egg
- 1/2 cup sour cream (120 ml)
- 1/4 teaspoon salt
For the Filling
- 1 cup farmer’s cheese (250 g)
- 1/4 cup powdered sugar (30 g)
- 1 teaspoon vanilla extract
- 1 egg yolk
For Serving
- Powdered sugar for dusting
- Fruit preserves (optional)
Instructions
Make the Dough
- In a large mixing bowl, combine the flour and salt. Make a well in the center and add the egg and sour cream. Mix until a dough forms, then knead it on a lightly floured surface for about 5 minutes until smooth and elastic.
- Tip: Letting the dough rest for 20-30 minutes will make it easier to roll out.
Prepare the Filling
- In another bowl, mix together the farmer’s cheese, powdered sugar, vanilla extract, and egg yolk until smooth and creamy.
- Tip: Taste the filling during preparation; you can adjust the sweetness according to your preference.
Assemble the Pierogi
- Roll out the dough on a floured surface to about 1/8 inch thick. Use a round cutter to cut circles from the dough. Place a tablespoon of filling in the center of each circle, fold them over, and pinch the edges to seal tightly.
- Tip: Ensure there’s no filling near the edges for a better seal.
Cook the Pierogi
- Bring a large pot of salted water to a boil. Drop pierogi in batches, cooking until they float to the top—about 3-4 minutes.
- Tip: You can stop here or sauté the boiled pierogi in a skillet with butter for a delightful crispness.
Serve and Enjoy
- Dust the warm pierogi with powdered sugar and serve with fruit preserves, if desired.