Perfectly Rustic Focaccia Bread Recipe
Warm bread straight from the oven has a way of settling the room. As the rosemary hits the heat, you can almost hear it wake up, and there’s a small pleasure in knowing this dough doesn’t ask much from you. Even if you’re new to bread, focaccia meets you halfway — and that small bit of ease feels good.
Why You’ll Love This Recipe
This focaccia bread recipe is straightforward, simple, and fulfilling, perfect for both beginners and seasoned bakers. Here’s what makes it special:
- Easy to Make: The dough comes together quickly and doesn’t require any special skills.
- Customizable: You can adapt the toppings to suit your taste—explore endless possibilities beyond rosemary.
- Versatile: Perfect as an appetizer, sandwich base, or a stunning table centerpiece.
- Heavenly Aroma: Baking focaccia fills your home with an irresistible aroma that’s simply heartwarming.
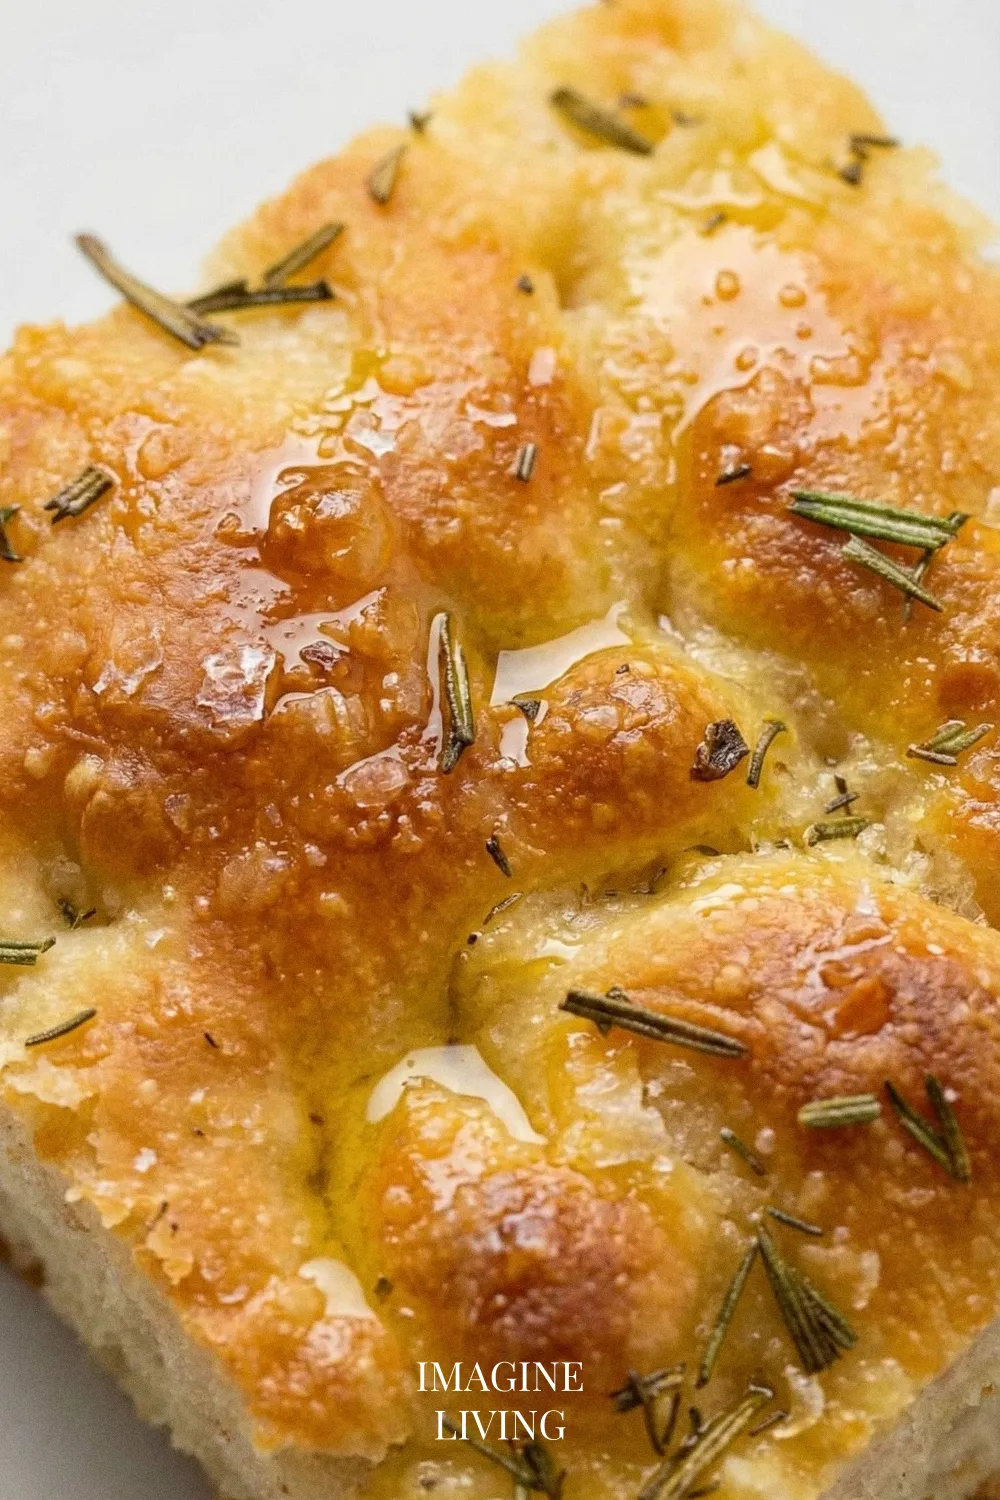
“Focaccia bread—golden top, airy crumb, olive oil shine.” Imagine Living

Ingredients: Fresh Focaccia Bread with Rosemary
Servings: 8
For the Dough
- 4 cups (500 g) all-purpose flour
- 2 teaspoons salt
- 1 packet (2¼ teaspoons) active dry yeast
- 1¾ cups (400 ml) warm water (about 110°F)
- ¼ cup (60 ml) olive oil, plus more for drizzling
For the Topping
- Fresh rosemary sprigs
- Coarse sea salt
Options: For a gluten-free version, substitute with a gluten-free all-purpose flour blend.

Equipment Needed
- Mixing bowl
- Baking sheet or pan (preferably around 12×18 inches)
- Parchment paper
- Plastic wrap or a clean kitchen towel
- Kitchen scale (optional)
Step-By-Step Guide: How to Make Focaccia Bread
A little patience and steady heat are the only tricky parts here — the rest falls into place more easily than it seems.
Step 1: Prepare the Dough
In a large mixing bowl, combine warm water and yeast, stirring gently. Let it sit for about 5 minutes until foamy. Add flour, salt, and olive oil, then mix until a shaggy dough forms. The dough will cling lightly to your fingers — a good sign it’s on track.
Tip: Don’t over-knead the dough; it should remain soft and slightly sticky.
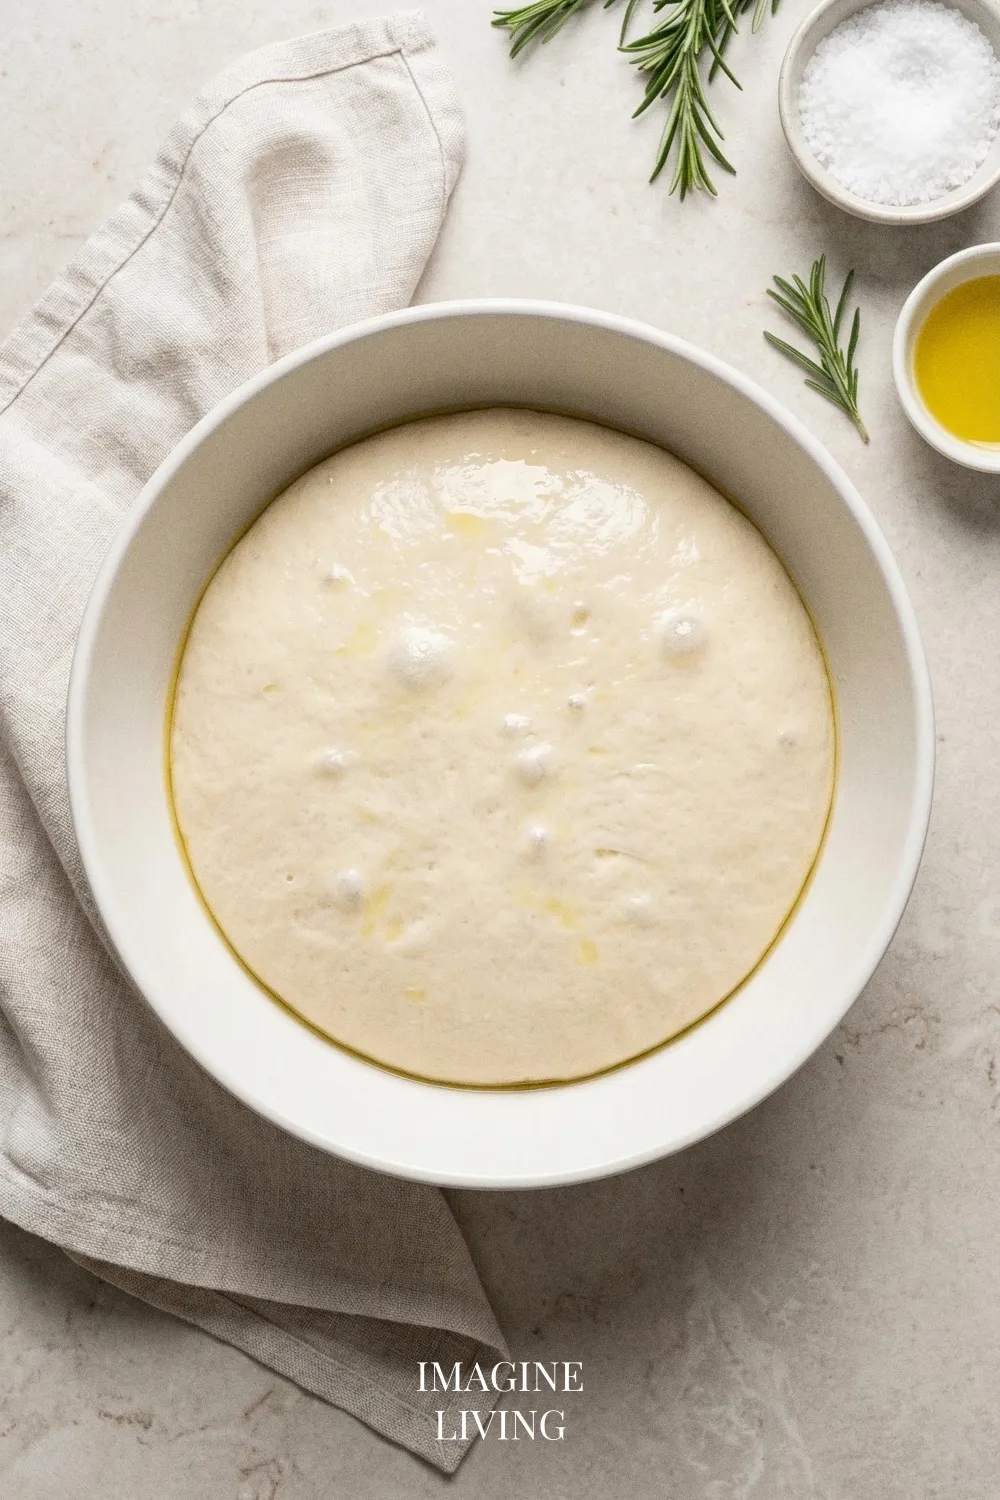
Step 2: Rise
Cover the bowl with plastic wrap or a kitchen towel and let it rise in a warm spot for about 1 hour, or until doubled in size. When it feels pillowy, it’s ready — almost like it’s breathing a little.
Tip: For a quick rise, preheat your oven for a minute, turn it off, and place the dough inside.
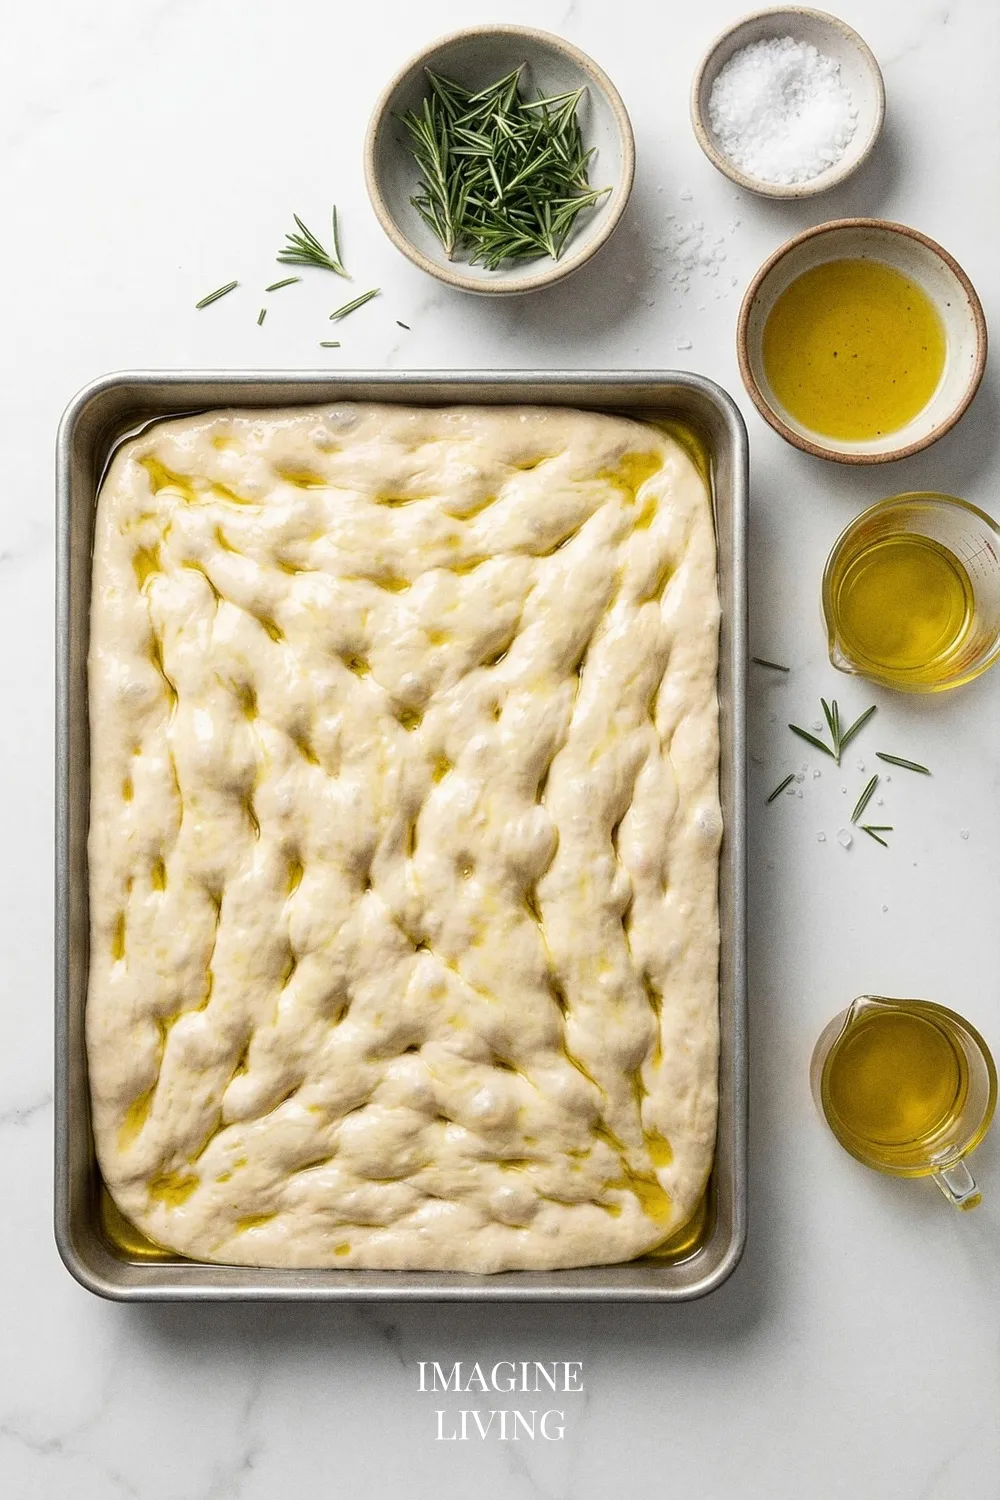
Step 3: Shape and Second Rise
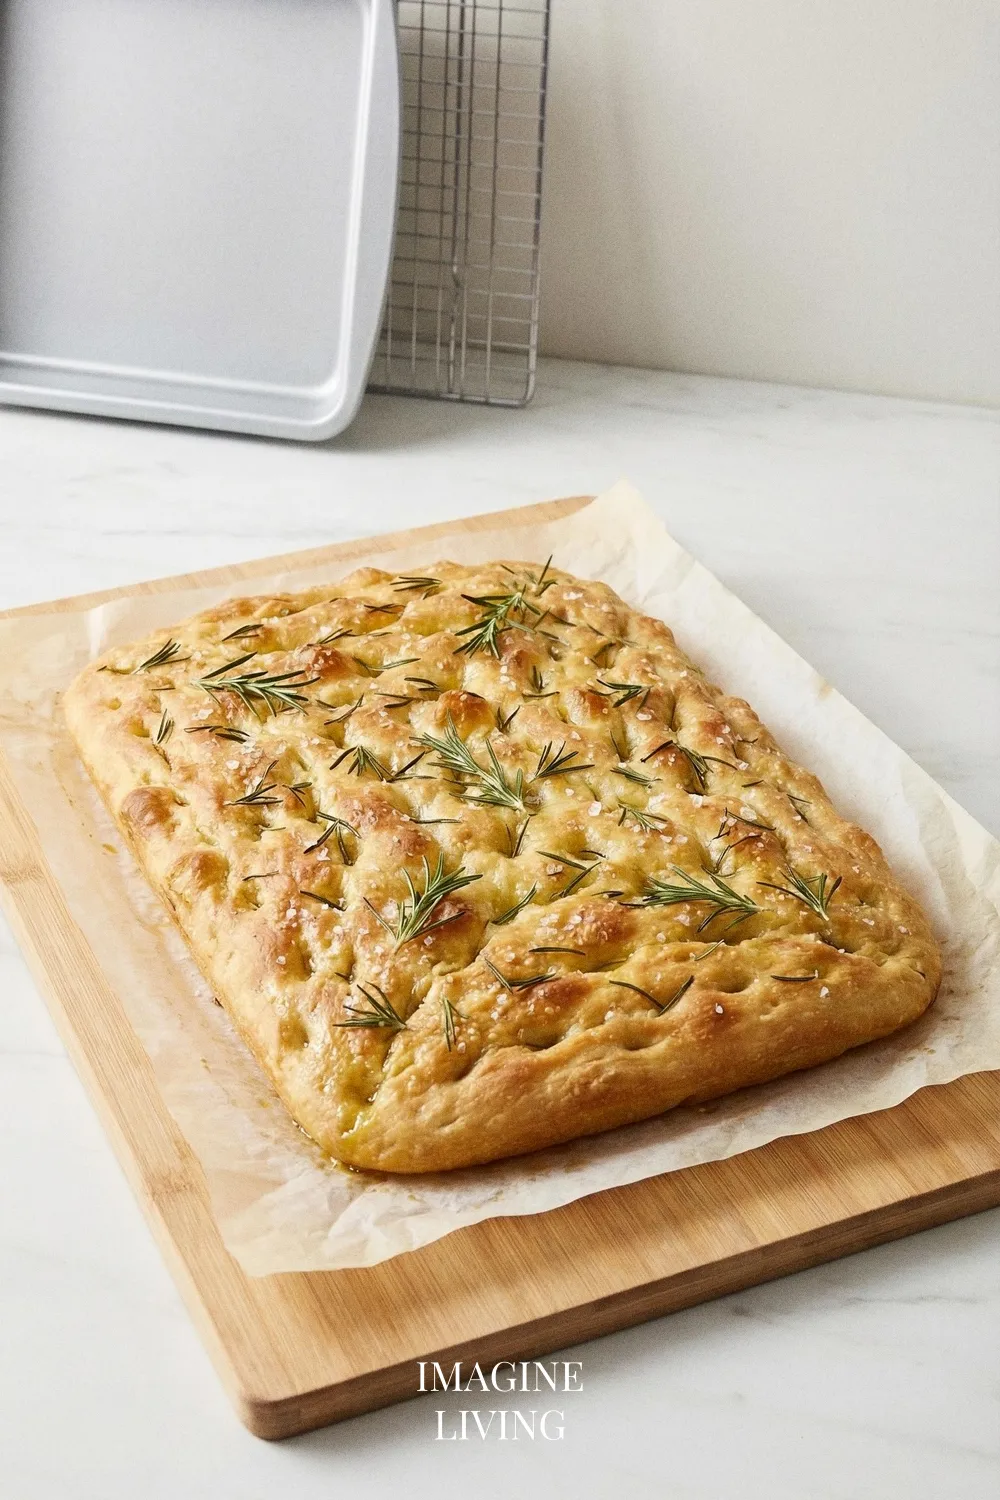
Lightly oil your baking sheet. Pour the dough onto the sheet and gently stretch it to fit, leaving it thick. Press your fingertips in to create dimples — the dough usually relaxes with each touch.
Cover again and let it rise for another 20–30 minutes.
Step 4: Preheat and Prepare
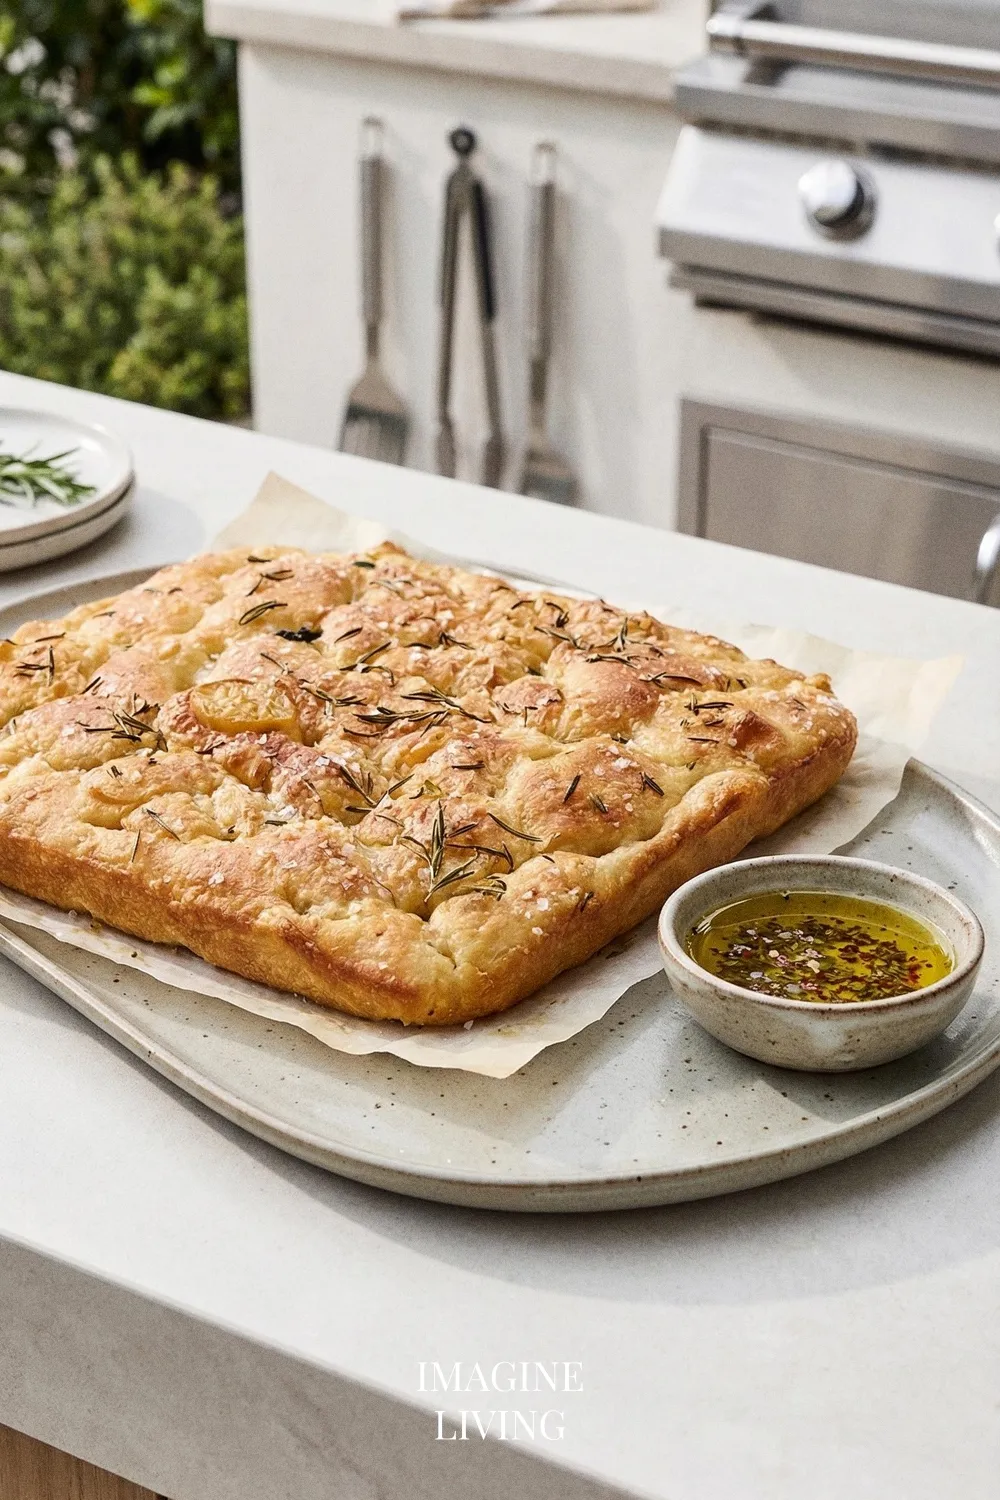
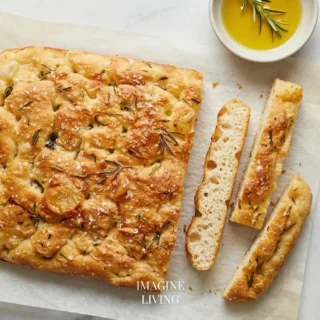
Preheat your oven to 425°F (220°C). Just before baking, deepen the dimples, drizzle generously with olive oil, sprinkle sea salt, and arrange rosemary sprigs on top. The oil will pool briefly in the dimples — that’s exactly what you want.
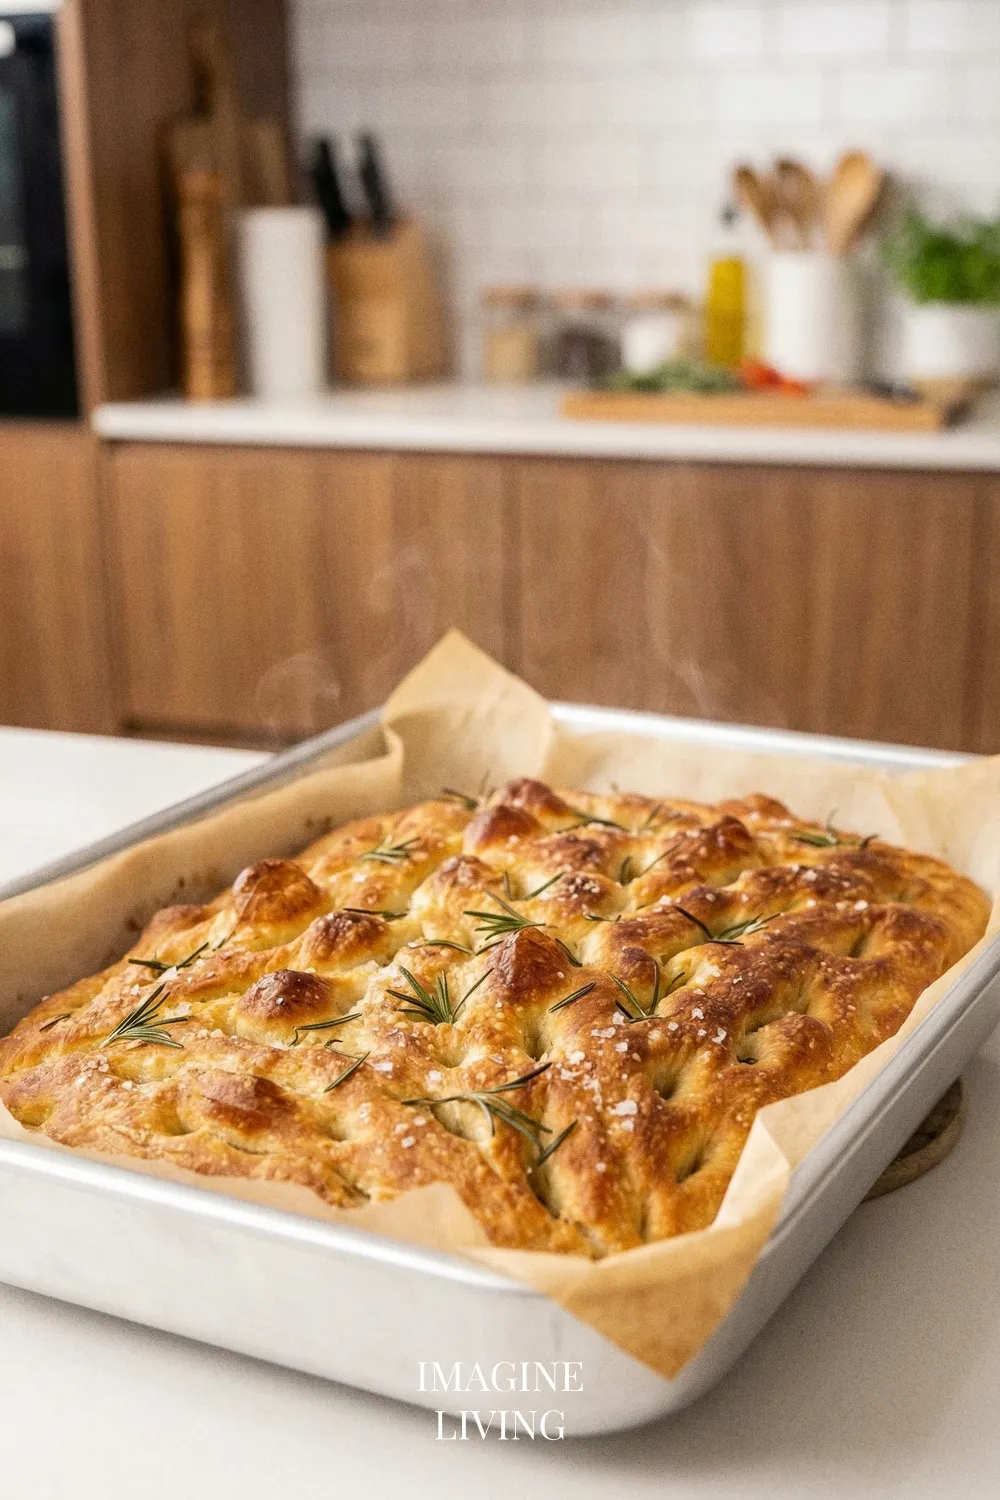
Step 5: Bake
Place the pan in the oven and bake for about 20–25 minutes until golden brown. The scent shifts from yeasty to toasty right near the end — a quiet nudge that it’s almost done.
Tip: For a crispy base, place a baking stone or an inverted baking sheet in the oven while it heats.
This video is here as an extra source of inspiration! While it may not match this exact recipe, it offers helpful techniques, ideas, or visual guidance to enhance your cooking experience.
Pro Tips for Focaccia Bread
A few small choices make this bread even better.
- Use high-quality olive oil for deeper flavor.
- Experiment by adding minced garlic or other herbs to the oil.
- Allow the focaccia to cool slightly before slicing for better structure.
- Store leftover dough in the fridge for quick bread the next day.
- Enjoy fresh focaccia within a few days for the best taste.
A little extra olive oil never seems to hurt here.
Dietary Variations & Substitutions
Gluten-Free Version
- Substitute all-purpose flour with a gluten-free all-purpose flour blend, using the same amount (4 cups).
- Be sure the blend contains xanthan gum; if not, add 1 teaspoon per cup of flour.
- Allow the dough to rest for about 10 minutes after mixing for improved texture.
Tip: Start checking for doneness a few minutes earlier, as gluten-free bread may brown faster.
Dairy-Free Version
- Use olive oil as specified, but avoid any dairy-based additives or toppings.
- Ensure that any additional toppings, like cheese, are also dairy-free if included.
- Monitor moisture; the absence of dairy may cause a slightly drier crumb.
Tip: A sprinkle of nutritional yeast can add a cheesy flavor without dairy.
Vegan Version
- The existing ingredients are already vegan-friendly; just ensure no dairy is used in any toppings.
- Consider adding a tablespoon of vinegar to the warm water to enhance the yeast’s action.
- Keep an eye on the dough’s rise; vegan versions may need slight adjustments in rising times.
Tip: Incorporate your favorite herbs or spices into the dough for added flavor.
Egg-Free Version
- The current recipe is naturally egg-free, so you can proceed without any changes needed.
- For added richness, include chia seeds or flaxseed meal mixed with water (1 tablespoon seeds + 3 tablespoons water, rested) if desired.
- Knead as instructed; ensure the dough remains soft and pliable.
Tip: Adjust the hydration slightly if using seeds, as they absorb some moisture.
Low-Sugar Version
- This recipe does not include added sugar, making it naturally low-sugar.
- If topping with ingredients like roasted tomatoes, ensure they are not packed in sugary sauces.
- Feel free to enhance flavors with herbs or spices instead of sweet toppings.
Tip: Consider a sprinkle of cracked pepper for an added flavor kick.
Creative Variations: Get Inspired with Focaccia
Olive Focaccia
Add sliced olives atop the dough before baking for a briny punch.
Tip: Mix green and black olives for a beautiful color contrast.
Tomato and Basil Focaccia
Top with halved cherry tomatoes and fresh basil before baking.
Tip: Drizzle balsamic reduction after baking for added flavor.
Garlic Herb Focaccia
Mix minced garlic into the olive oil and sprinkle with Italian herbs.
Tip: Serve warm with a garlic-infused dipping oil.
Cheese Focaccia
Sprinkle with shredded cheese (like mozzarella or parmesan) before baking.
Tip: Experiment with different cheeses for complex flavors.
Spicy Pepper Focaccia
Top with sliced jalapeños or red pepper flakes for a kick.
Tip: Pair with a cooling dip like yogurt-based tzatziki for balance.
Serving Suggestions
Focaccia pairs beautifully with a variety of dishes, including:
- A cozy bowl of soup
- Fresh salads for a light lunch
- As a base for delicious paninis
- Paired with a charcuterie board
Storage and Reheating
Store leftover focaccia in an airtight container at room temperature for up to three days. For longer storage, wrap tightly and freeze for up to a month.
To reheat, simply sprinkle with a splash of water and warm in a preheated oven at 350°F (175°C) for 5–10 minutes until heated through and crisp.
Common Mistakes to Avoid
A few slips are common — nothing here is hard to recover from.
Under-kneading the Dough
Ensure the dough develops enough gluten for a good rise.
Tip: The dough should be smooth but still slightly sticky.
Skipping the Second Rise
Let the dough rise a second time for optimal texture. A few extra minutes make a difference.
Overbaking
Watch carefully towards the end of baking to prevent drying out. Pulling it a minute early is usually safer than a minute late.
Overloading with Toppings
Less is often more when it comes to focaccia toppings. The bread appreciates a little breathing room.
Using Cold Ingredients
Make sure your water is warm to activate the yeast properly. Cold water slows everything down.
FAQs
Can I use whole wheat flour for focaccia?
Yes, but consider mixing it with all-purpose flour for better texture.
How can I add flavor to my focaccia dough?
You can mix herbs like rosemary or thyme directly into the dough.
Is it okay to eat focaccia the next day?
Absolutely. Just store it properly to maintain freshness.
Can I freeze focaccia?
Yes, wrap it tightly and store it in the freezer for later enjoyment.
What should I serve with focaccia?
It pairs well with soups, salads, or as part of a charcuterie board.
Enjoying the Rustic Comfort of Focaccia Bread
Once it cools just enough to handle, the first slice usually goes quietly. There’s something steadying about this bread — simple steps, good ingredients, and a result that feels generous without trying too hard. Enjoy it in whatever way fits the moment.
Perfectly Rustic Focaccia Bread Recipe
Equipment
- Mixing bowl
- Baking sheet or pan (preferably around 12×18 inches)
- Parchment paper
- Plastic wrap or a clean kitchen towel
- Kitchen scale (optional)
Ingredients
For the Dough
- 4 cups all-purpose flour
- 2 teaspoons salt
- 1 packet active dry yeast (2¼ teaspoons)
- 1 ¾ cups warm water (about 110°F)
- ¼ cup olive oil plus more for drizzling
For the Topping
- Fresh rosemary sprigs
- Coarse sea salt
Instructions
Step 1: Prepare the Dough
- In a large mixing bowl, combine warm water and yeast, stirring gently. Let it sit for about 5 minutes until foamy. Add flour, salt, and olive oil, then mix until a shaggy dough forms.
- Tip: Don’t over-knead the dough; it should remain soft and slightly sticky.
Step 2: Rise
- Cover the bowl with plastic wrap or a kitchen towel and let it rise in a warm spot for about 1 hour, or until doubled in size.
- Tip: For a quick rise, preheat your oven for a minute, turn it off, and place the dough inside.
Step 3: Shape and Second Rise
- Lightly oil your baking sheet. Pour the dough onto the sheet and gently stretch it to fit, leaving it thick. Dimpling the surface with your fingers.
- Cover again and let it rise for another 20–30 minutes.
Step 4: Preheat and Prepare
- Preheat your oven to 425°F (220°C). Just before baking, use your fingers to create deeper dimples in the dough. Drizzle with olive oil, sprinkle with sea salt, and arrange rosemary sprigs artfully on top.
Step 5: Bake
- Place the pan in the oven and bake for about 20–25 minutes until golden brown.
- Tip: For a crispy base, place a baking stone or an inverted baking sheet in the oven while it heats.