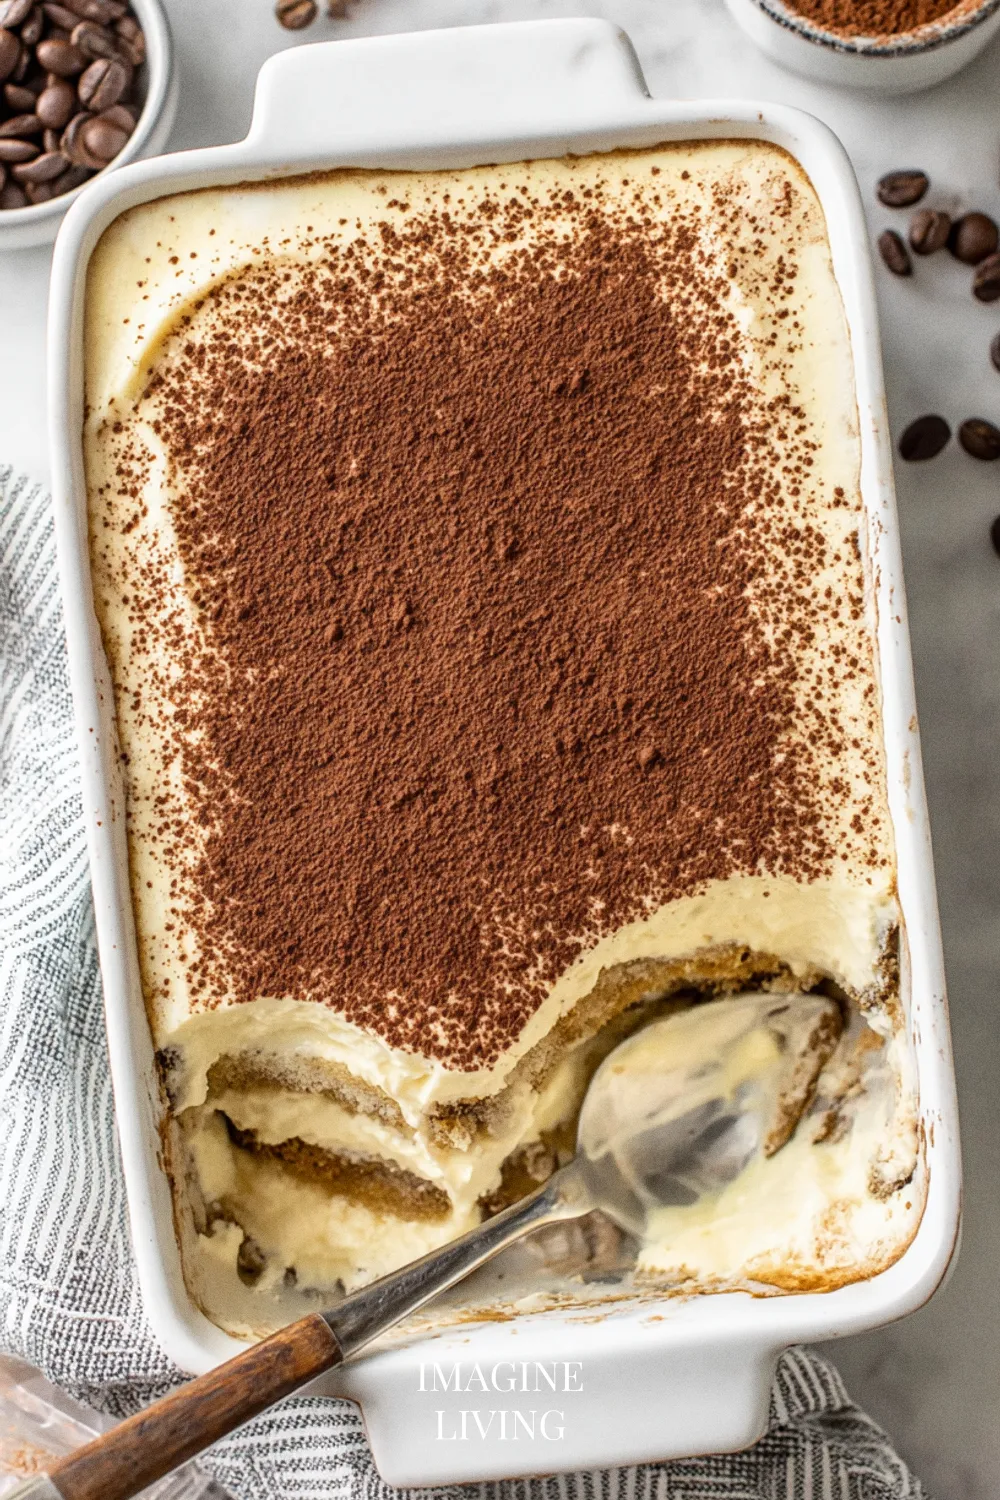
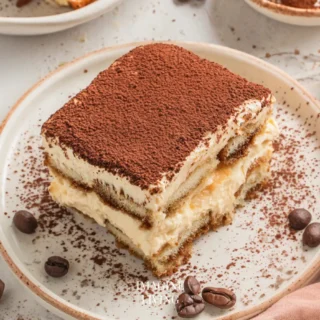
Indulge in Classic Tiramisu
Layers of coffee-soaked ladyfingers and soft mascarpone come together in a way that feels both simple and a little luxurious. The first spoonful always brings that gentle hit of espresso, and there’s a quiet satisfaction in knowing it came together with steady, unfussy steps—nothing rushed, nothing fussy. And if a small moment of wit fits anywhere, it’s here: tiramisu never looks like much while you make it, yet somehow acts like it knew exactly what it was doing all along.
Why You’ll Love This Recipe
This authentic tiramisu feels like a project at first glance, but it settles quickly into a rhythm—whip, fold, dip—making it approachable whether this is your first time or your fiftieth. As it chills, everything softens and melds, so the flavor deepens without any extra work from you.
- Effortlessly elegant and perfect for impressing guests.
- Suitable for any occasion, from dinner parties to cozy nights in.
- A delightful balance of creamy, rich, and coffee-flavored goodness.
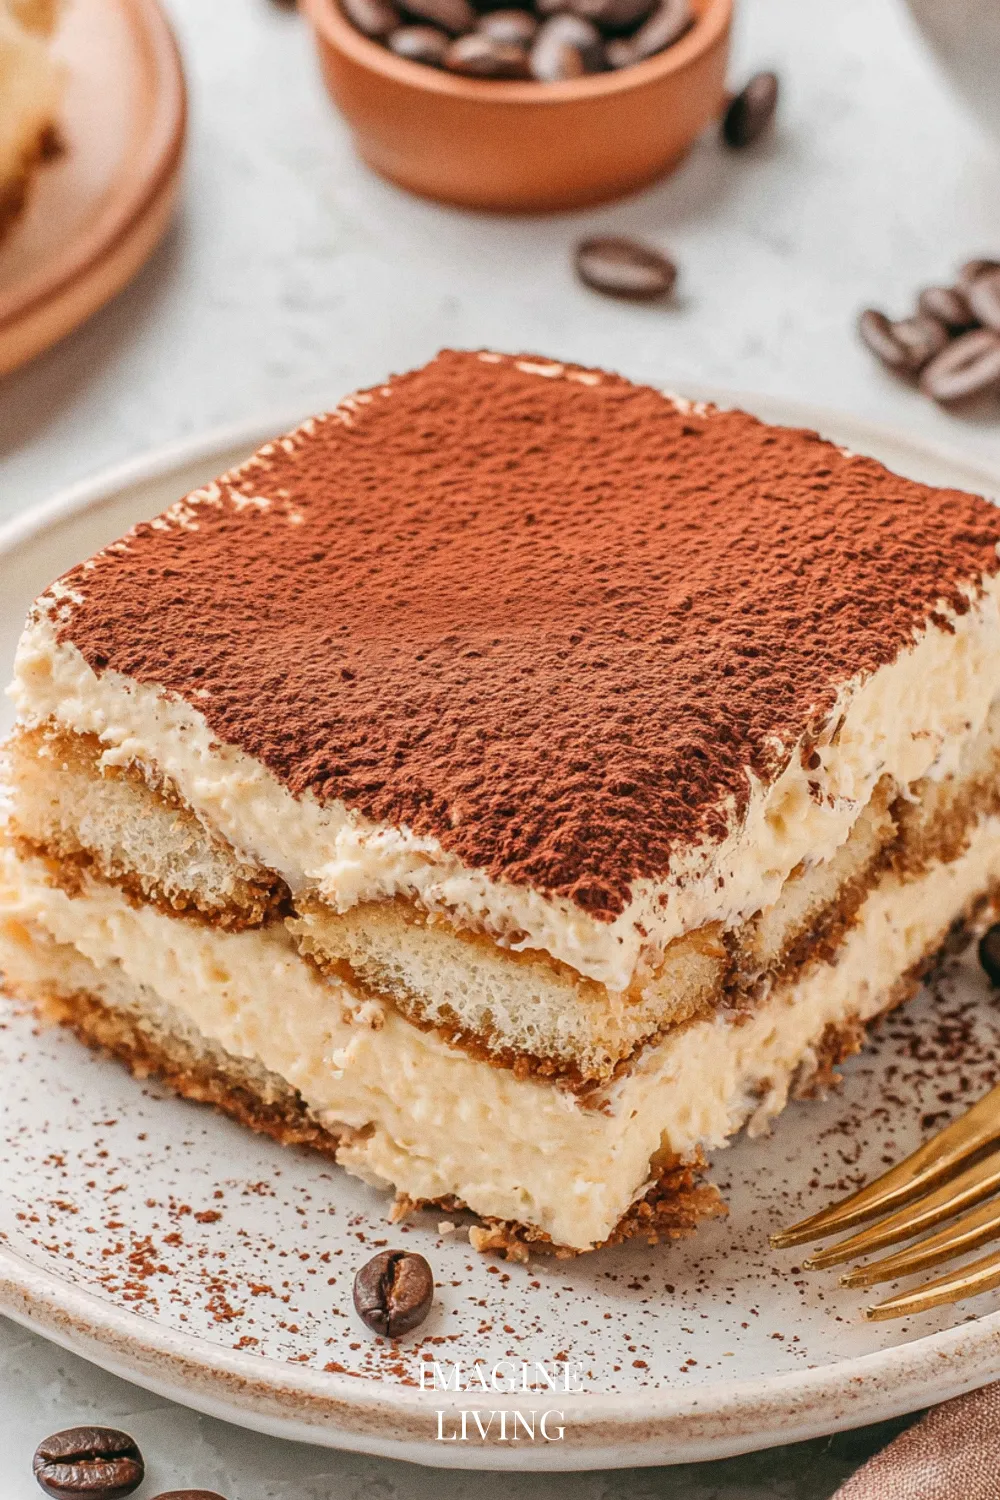
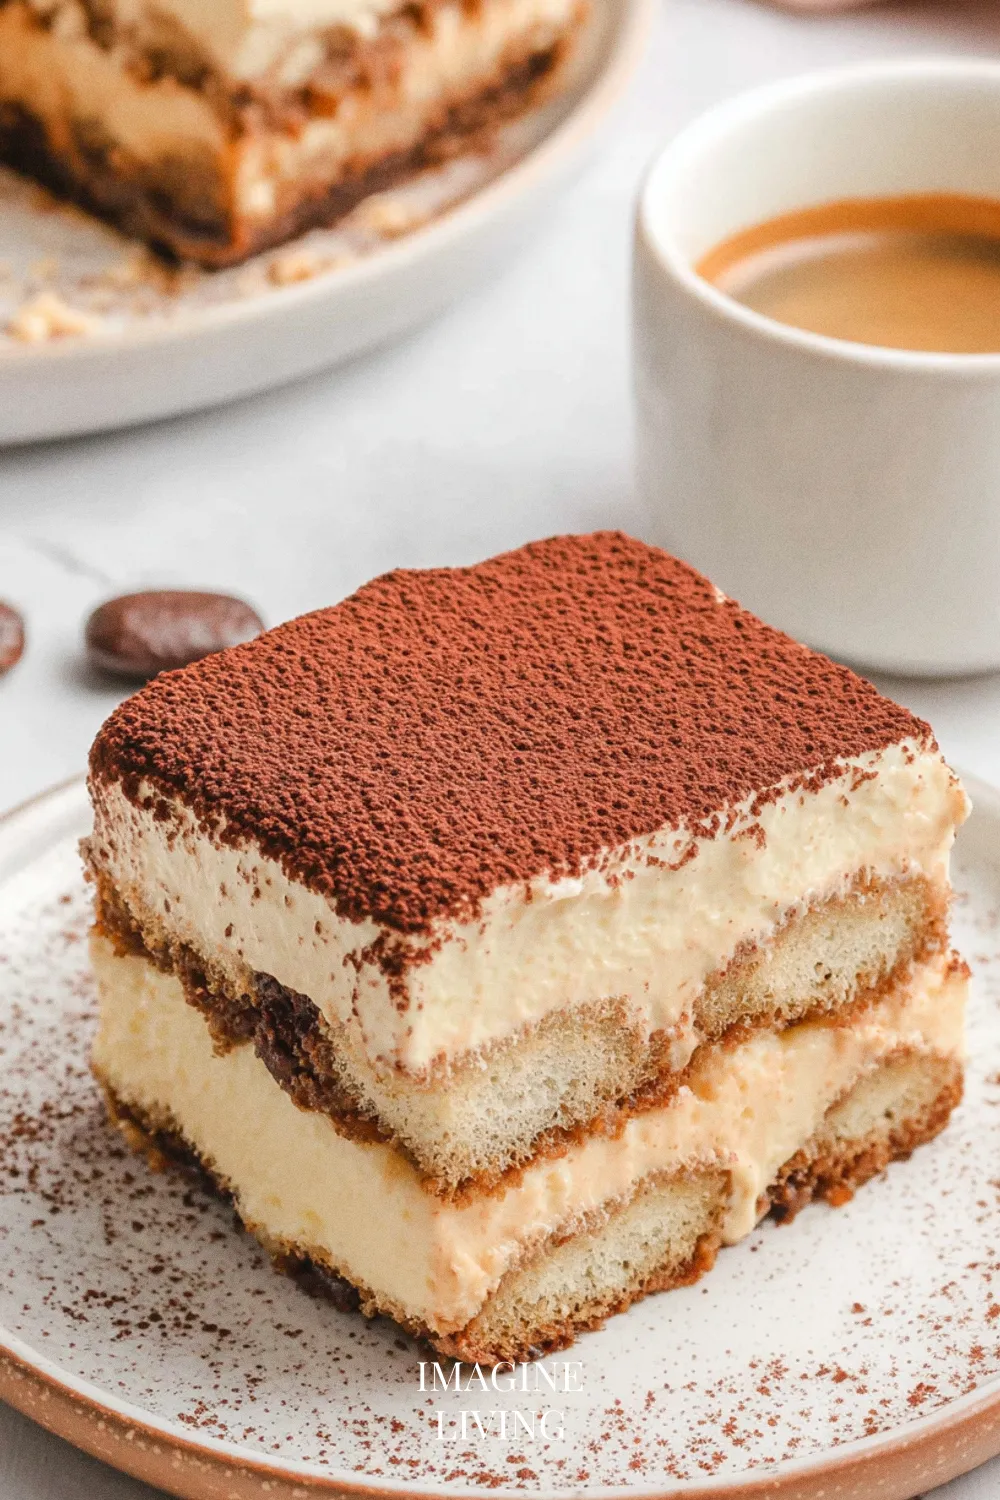
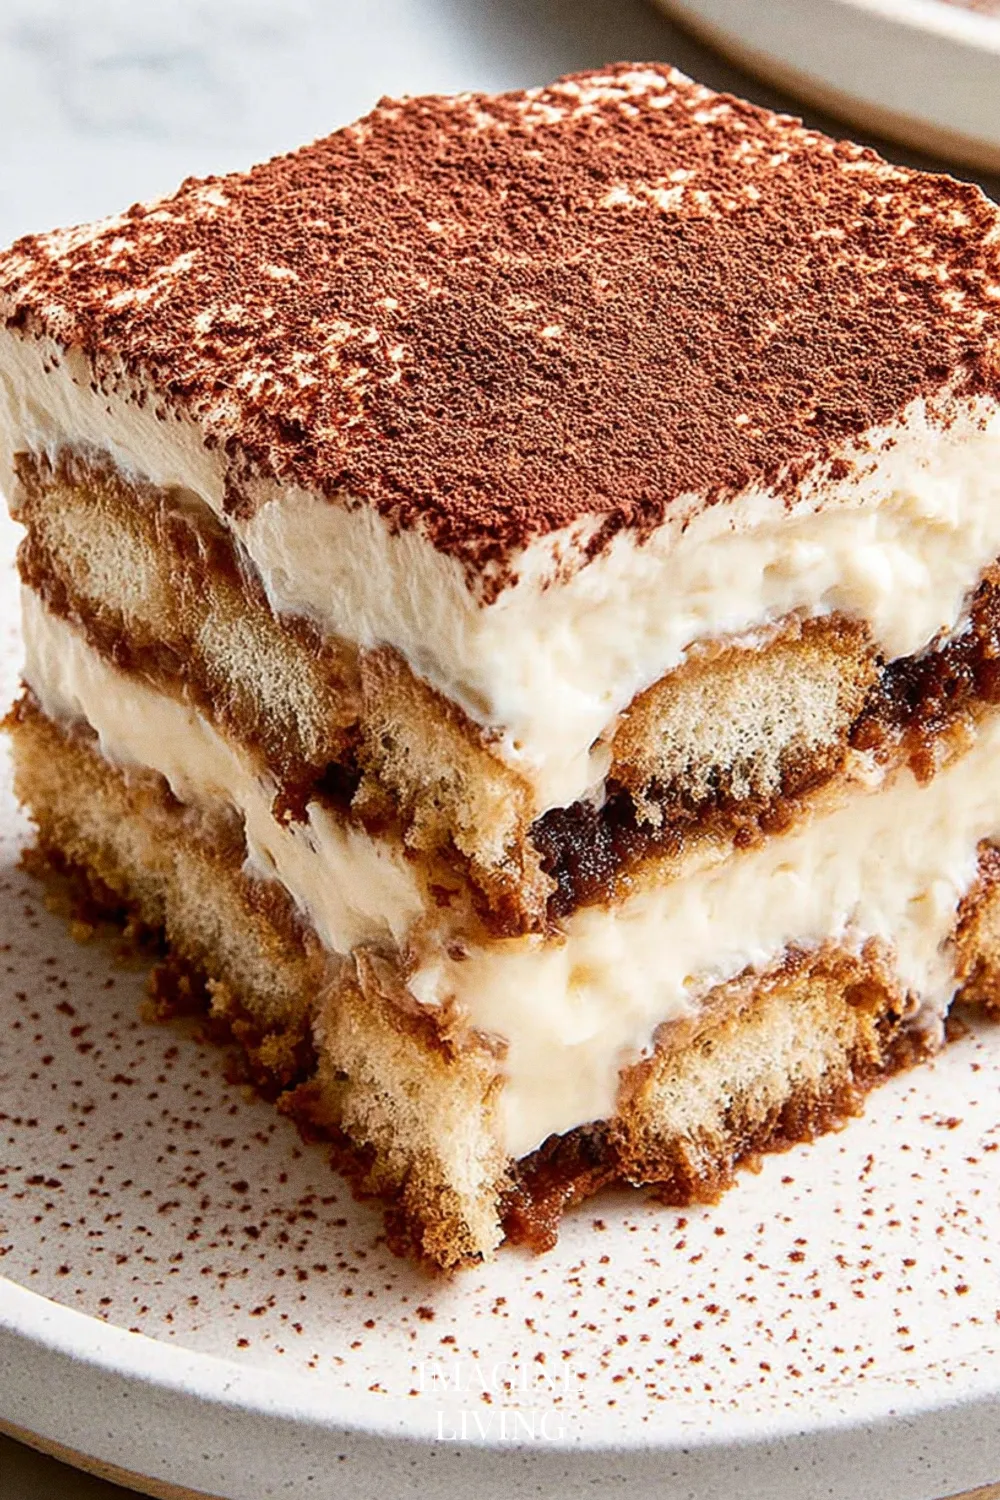
“Tiramisu—creamy layers with bold espresso and cocoa.” Imagine Living
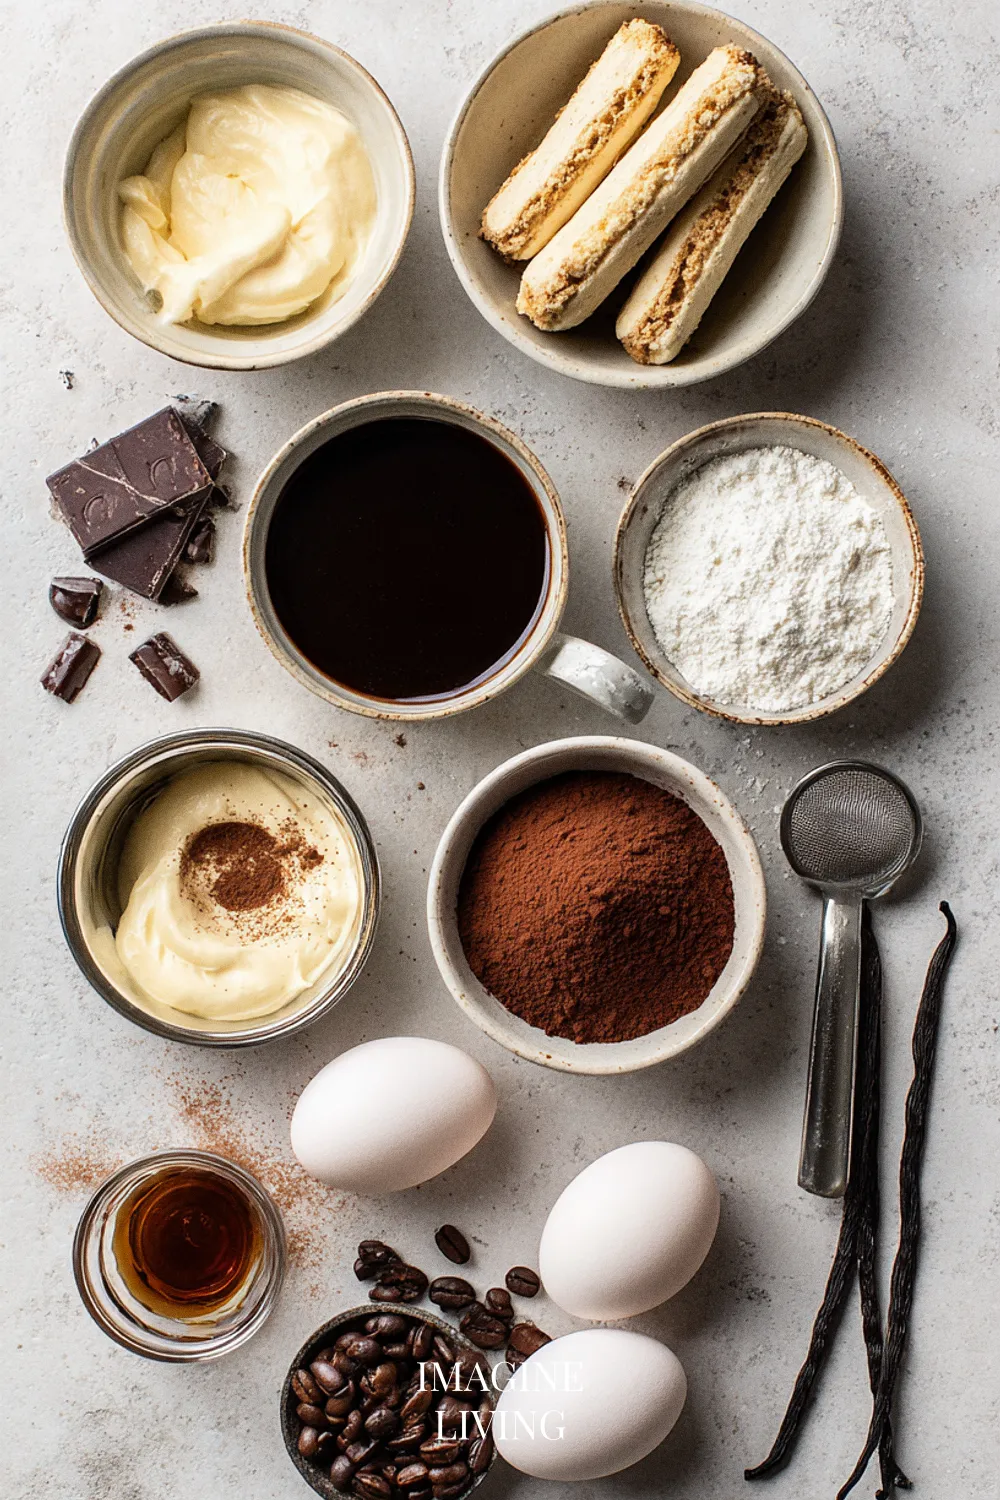
Ingredients: Classic Tiramisu Recipe (Serves 8)
For the Coffee Mixture
- 1 cup (240 ml) brewed espresso, cooled
- 2 tablespoons coffee liqueur (optional)
For the Filling
- 4 large egg yolks
- ½ cup (100 g) granulated sugar
- 2/3 cup (160 ml) heavy cream
- 1 cup (240 g) mascarpone cheese
- 1 teaspoon vanilla extract
For the Layers
- 24 ladyfingers (savoiardi)
- Unsweetened cocoa powder, for dusting
Options: Swap coffee liqueur for a non-alcoholic syrup for a family-friendly version.
Equipment Needed
- Mixing bowls
- Electric mixer or whisk
- 9×9 inch (23×23 cm) baking dish
- Sifter or fine mesh strainer
Step-By-Step Guide: Making Tiramisu
A few parts call for attention—mainly the soaking and the folding—but they’re easier than they look once you’re moving.
Prepare the Coffee Mixture
Begin by brewing strong espresso and letting it cool to room temperature.
Tip: To intensify the flavor, add coffee liqueur to the espresso.
Make the Filling
Whisk the egg yolks and sugar until pale and slightly thickened. The mixture warms under your hand a bit—it’s a good sign it’s coming together.
In another bowl, whip the heavy cream until stiff peaks form, then gently fold it into the egg mixture.
Add the mascarpone and vanilla extract, folding until fully combined. A slow fold keeps it airy—easy to rush here, but there’s no need.
Tip: Ensure your mascarpone is at room temperature to avoid lumps.
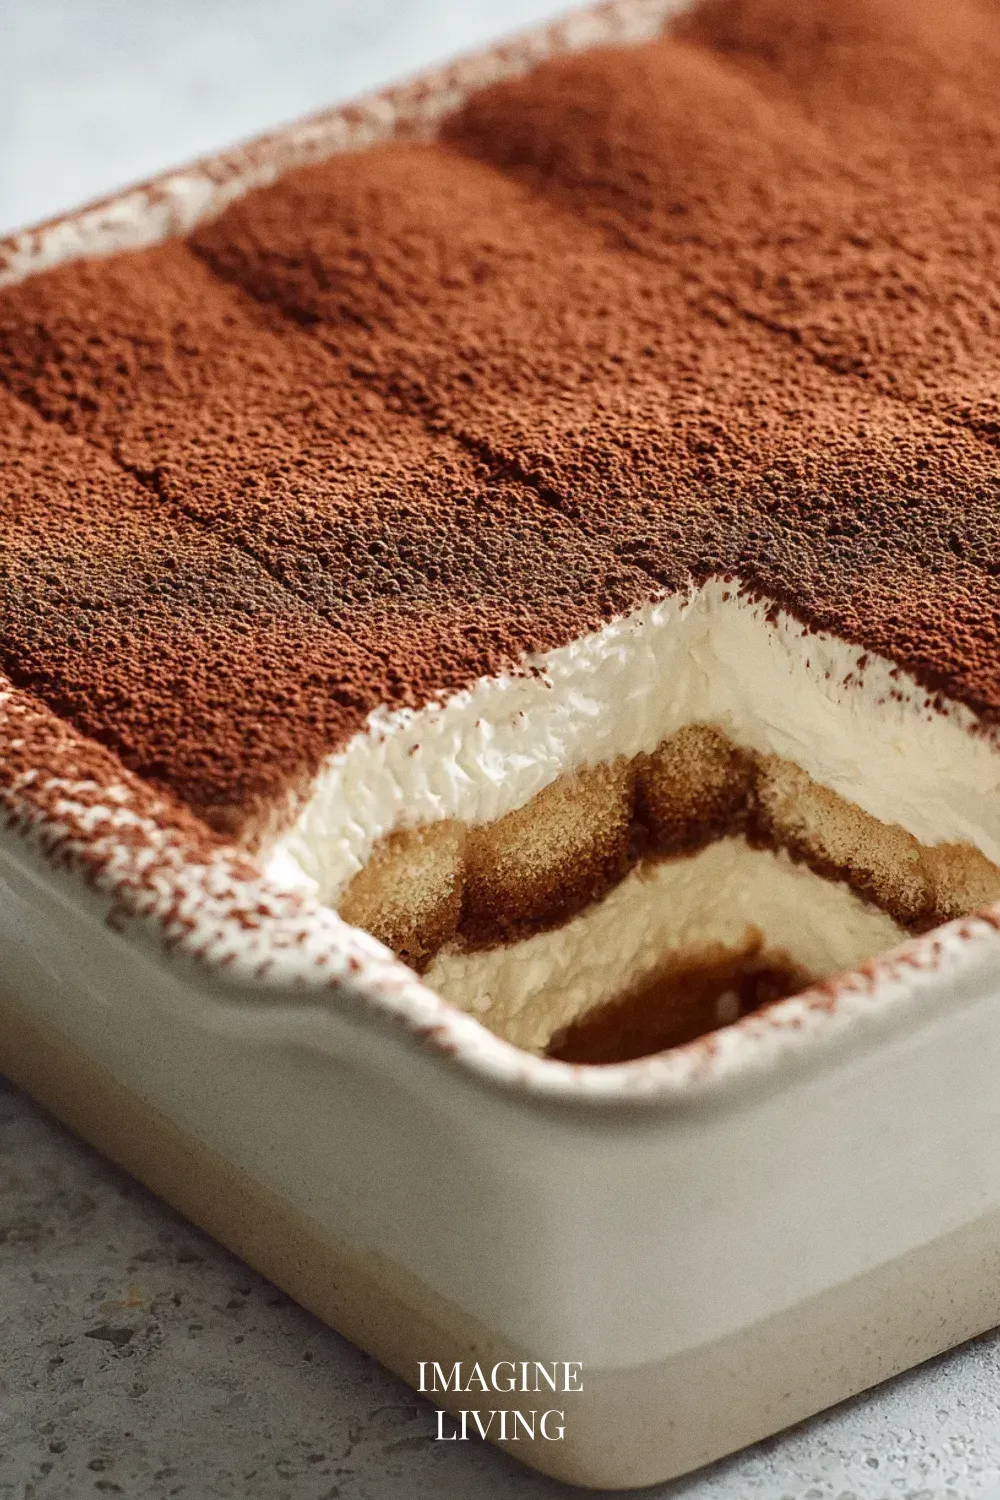
Assemble the Tiramisu
Quickly dip each ladyfinger into the cooled coffee mixture, soaked but not collapsing. There’s a brief moment when the surface darkens—pull them out there.
Lay half in a single layer in the dish.
Spread half of the mascarpone filling over the ladyfingers.
Repeat with a second layer of dipped ladyfingers and the remaining filling.
Chill and Serve
Cover the baking dish and refrigerate for at least 4 hours, preferably overnight. The waiting always feels long, but the texture thanks you for it. Dust generously with cocoa before serving.
Tip: For a decorative touch, use a sifter to create an even layer of cocoa.
This video is here as an extra source of inspiration! While it may not match this exact recipe, it offers helpful techniques, ideas, or visual guidance to enhance your cooking experience.
Pro Tips for Tiramisu
A few details make the process smoother and the result richer.
- Use high-quality coffee for the best flavor.
- Let the tiramisu rest overnight to deepen the flavor.
- Experiment with different liqueurs, such as Amaretto or Frangelico.
- Adjust the sweetness by tasting the mascarpone filling before assembly.
- For a richer taste, add a layer of melted chocolate on top of the last filling layer.
A small aside: tiramisu is forgiving—most tweaks blend right in.
Dietary Variations & Substitutions
Gluten-Free Version
- Substitute ladyfingers with gluten-free ladyfingers or homemade gluten-free sponge cake.
- Ensure the coffee liqueur is gluten-free if used.
- No adjustments to chilling time or assembly are needed.
Tip: Check for gluten-free options at local bakeries or specialty stores.
Dairy-Free
- Replace heavy cream with coconut cream and mascarpone with a dairy-free cream cheese or cashew-based alternative.
- Use a dairy-free coffee liqueur or omit it entirely.
- Ensure all ingredients are at room temperature for easier mixing.
Tip: The coconut flavor can enhance the overall profile of the dessert.
Vegan
- Swap egg yolks with 1/4 cup of silken tofu blended until smooth.
- Replace heavy cream with whipped coconut cream and use vegan ladyfingers.
- Chill for the same duration, ensuring layers set properly.
Tip: Adding a touch of vanilla extract can enhance the flavor profile in the absence of eggs.
Egg-Free
- Use 1/4 cup of a commercial egg replacer mixed with 1/4 cup water to mimic the yolks’ richness.
- Replace mascarpone with a mixture of dairy-free cream cheese and whipped coconut cream.
- No need to adjust the chilling time; layers will firm up as usual.
Tip: Experiment with dairy-free sweet cream to recreate the richness of mascarpone.
Low-Sugar
- Reduce sugar in the filling by 25%, using a sugar substitute like erythritol to maintain sweetness.
- Use unsweetened cocoa powder for the dusting instead of sweetened varieties.
- Check the flavor balance before assembly and adjust if necessary.
Tip: A touch of espresso powder can enhance the overall sweetness perception without adding sugar.
Nut-Free
- Ensure the ladyfingers and any cream alternatives are labeled nut-free to avoid cross-contamination.
- Omit nuts from any variations and choose nut-free whipped toppings.
- No changes in preparation or chilling time are required.
Tip: If using alternative creams, check for nut-free labels explicitly to avoid allergens.
Creative Variations: Tiramisu Inspired Delights
Chocolate Hazelnut Tiramisu
Incorporate chocolate hazelnut spread between the layers for a nutty twist.
Tip: Crush some hazelnuts to sprinkle on top for added texture.
Fruit Tiramisu
Replace espresso with fruit puree, such as strawberry or mango.
Tip: Layer in fresh fruit slices for an exciting contrast.
Vegan Tiramisu
Use coconut cream, aquafaba, and plant-based ladyfingers.
Tip: Chill coconut cream beforehand for easier whipping.
Matcha Tiramisu
Substitute the coffee with matcha tea.
Tip: Dust with matcha powder instead of cocoa for a beautiful finish.
Spiced Tiramisu
Add warming spices such as cinnamon or nutmeg to the coffee mixture.
Tip: Infuse the espresso with a cinnamon stick while brewing for extra flavor.
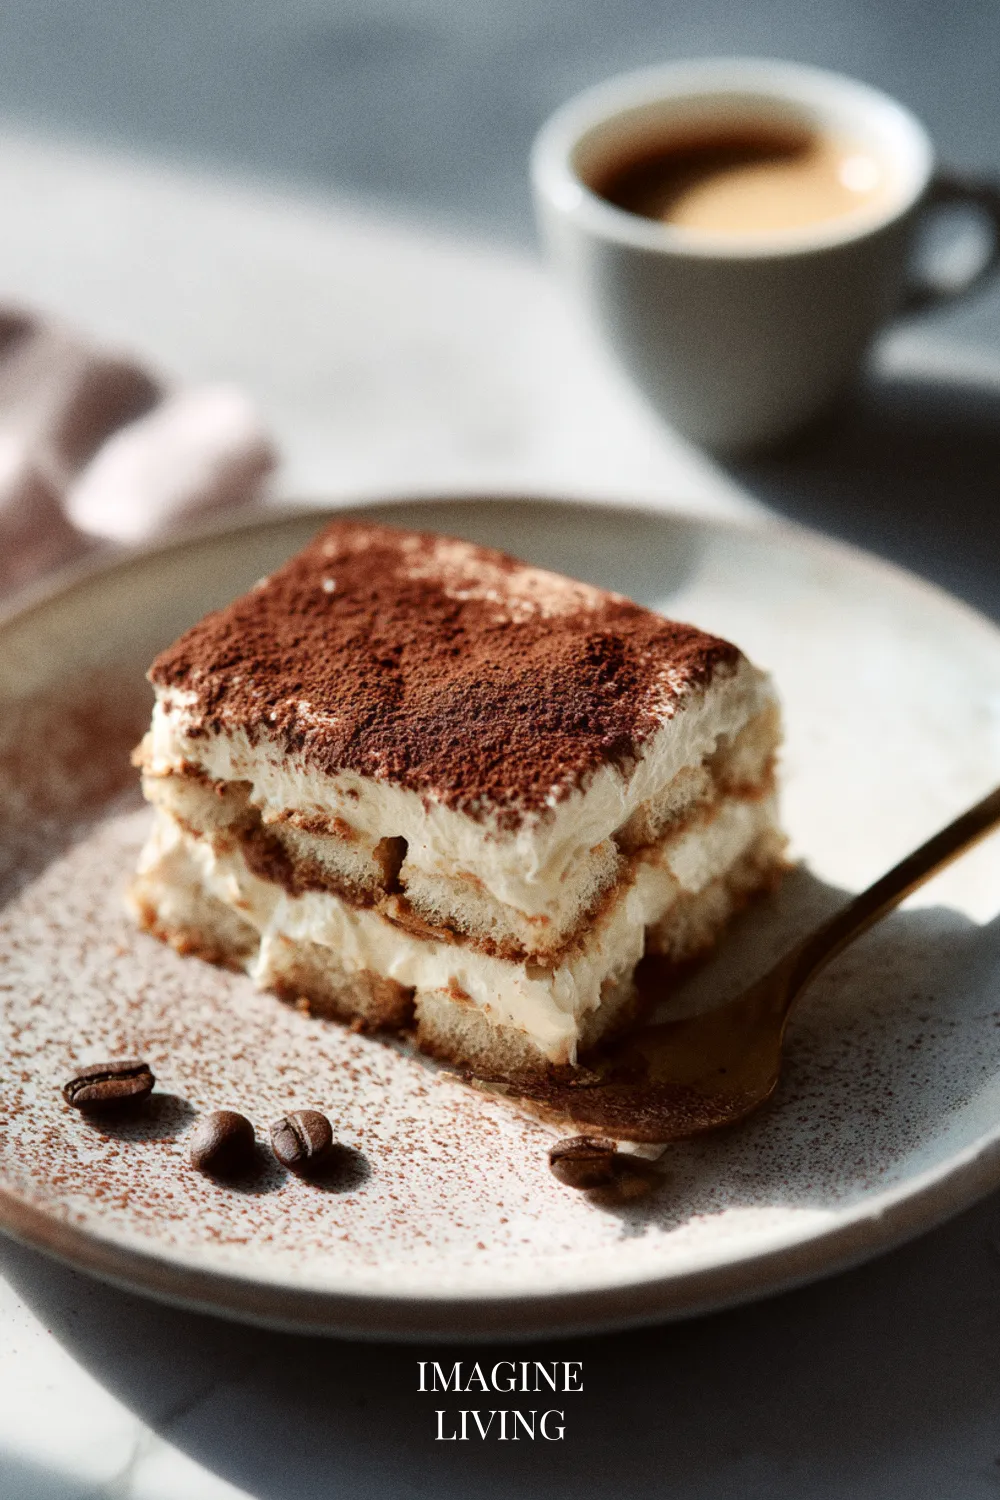
Serving Suggestions
Serve tiramisu as is or with a scoop of vanilla ice cream. A cup of strong coffee or dessert wine mirrors the flavors nicely without overpowering them.
Storage and Reheating
Store tiramisu in the refrigerator for up to 3 days, covered well to prevent odor absorption. Enjoy it chilled—it doesn’t need reheating.
Common Mistakes to Avoid
A little care helps the final result hold its shape and flavor.
Over-Soaking the Ladyfingers
Too long in coffee results in a soggy layer. A quick dip is enough, and you can always adjust on the next one.
Not Chilling Long Enough
Insufficient chilling leads to a loose structure. Overnight helps everything settle.
Using Low-Quality Ingredients
Mascarpone and coffee matter here. Fresh, good-quality ingredients keep the flavors clean.
Skipping the Cocoa Dusting
It brings essential contrast. Dust just before serving to keep it fresh.
Rushing the Assembly
Uneven layers happen when things move too fast. A steady pace makes it neater without much extra effort.
FAQs
What is tiramisu?
Tiramisu is a classic Italian dessert made with layers of coffee-soaked ladyfingers and mascarpone cream.
Can I make tiramisu ahead of time?
Yes. It improves as it rests.
Can I freeze tiramisu?
It can be frozen, though the texture may change. Fresh is best.
What type of coffee should I use?
Strong espresso is ideal, but strong brewed coffee works too.
Is there an alcohol-free version of tiramisu?
Yes—omit the alcohol or use flavored extracts or syrups.
Savor the Joy of Homemade Tiramisu
As you take that first chilled slice, there’s a quiet ease in knowing the layers have settled just right. It’s a simple pleasure, steady and satisfying—easy to share, and just as enjoyable when you don’t.
Classic Tiramisu
Equipment
- Mixing bowls
- Electric mixer or whisk
- 9×9 inch (23×23 cm) baking dish
- Sifter or fine mesh strainer
Ingredients
For the Coffee Mixture
- 1 cup brewed espresso cooled
- 2 tablespoons coffee liqueur optional
For the Filling
- 4 large egg yolks
- ½ cup granulated sugar
- 2/3 cup heavy cream
- 1 cup mascarpone cheese
- 1 teaspoon vanilla extract
For the Layers
- 24 ladyfingers (savoiardi)
- Unsweetened cocoa powder for dusting
Instructions
Prepare the Coffee Mixture
- Begin by brewing strong espresso and letting it cool to room temperature.
- Tip: To intensify the flavor, add coffee liqueur to the espresso.
Make the Filling
- In a mixing bowl, whisk together the egg yolks and sugar until the mixture is pale and slightly thickened.
- In another bowl, whip the heavy cream until stiff peaks form, then gently fold it into the egg mixture.
- Add the mascarpone and vanilla extract, folding until fully combined.
- Tip: Ensure your mascarpone is at room temperature to avoid lumps.
Assemble the Tiramisu
- Quickly dip each ladyfinger into the cooled coffee mixture, ensuring they are soaked but not soggy. Then, lay half of them in a single layer in the baking dish.
- Spread half of the mascarpone filling over the ladyfingers, smoothing it evenly.
- Repeat the process with another layer of dipped ladyfingers and remaining filling.
Chill and Serve
- Cover the baking dish with plastic wrap and refrigerate for at least 4 hours, preferably overnight. Before serving, dust the top generously with cocoa powder.
- Tip: For a decorative touch, use a sifter to create an even layer of cocoa.