Mini Pavlovas with Strawberries That Will Delight
The moment these bake, you get that subtle sweet scent that always feels like a small reward. I love how simple the ingredients are—you can almost relax into the process—and it’s nice knowing the strawberries will do half the work for you. If anything feels fussy, don’t worry; pavlovas look impressive long before they demand perfection. And there’s something quietly satisfying about making six tiny clouds on a tray.
Why You’ll Love This Recipe
Mini pavlovas offer a stunning presentation along with delightful flavors. They are:
- Light and airy, providing a gentle sweetness that pairs beautifully with tart strawberries.
- Versatile, allowing you to play with toppings all year round.
- Easy to make, perfect for both beginners and seasoned bakers.
- Great for portion control; each mini pavlova is a perfectly sized treat.
These little creations are sure to impress your guests and become a favorite at family gatherings.
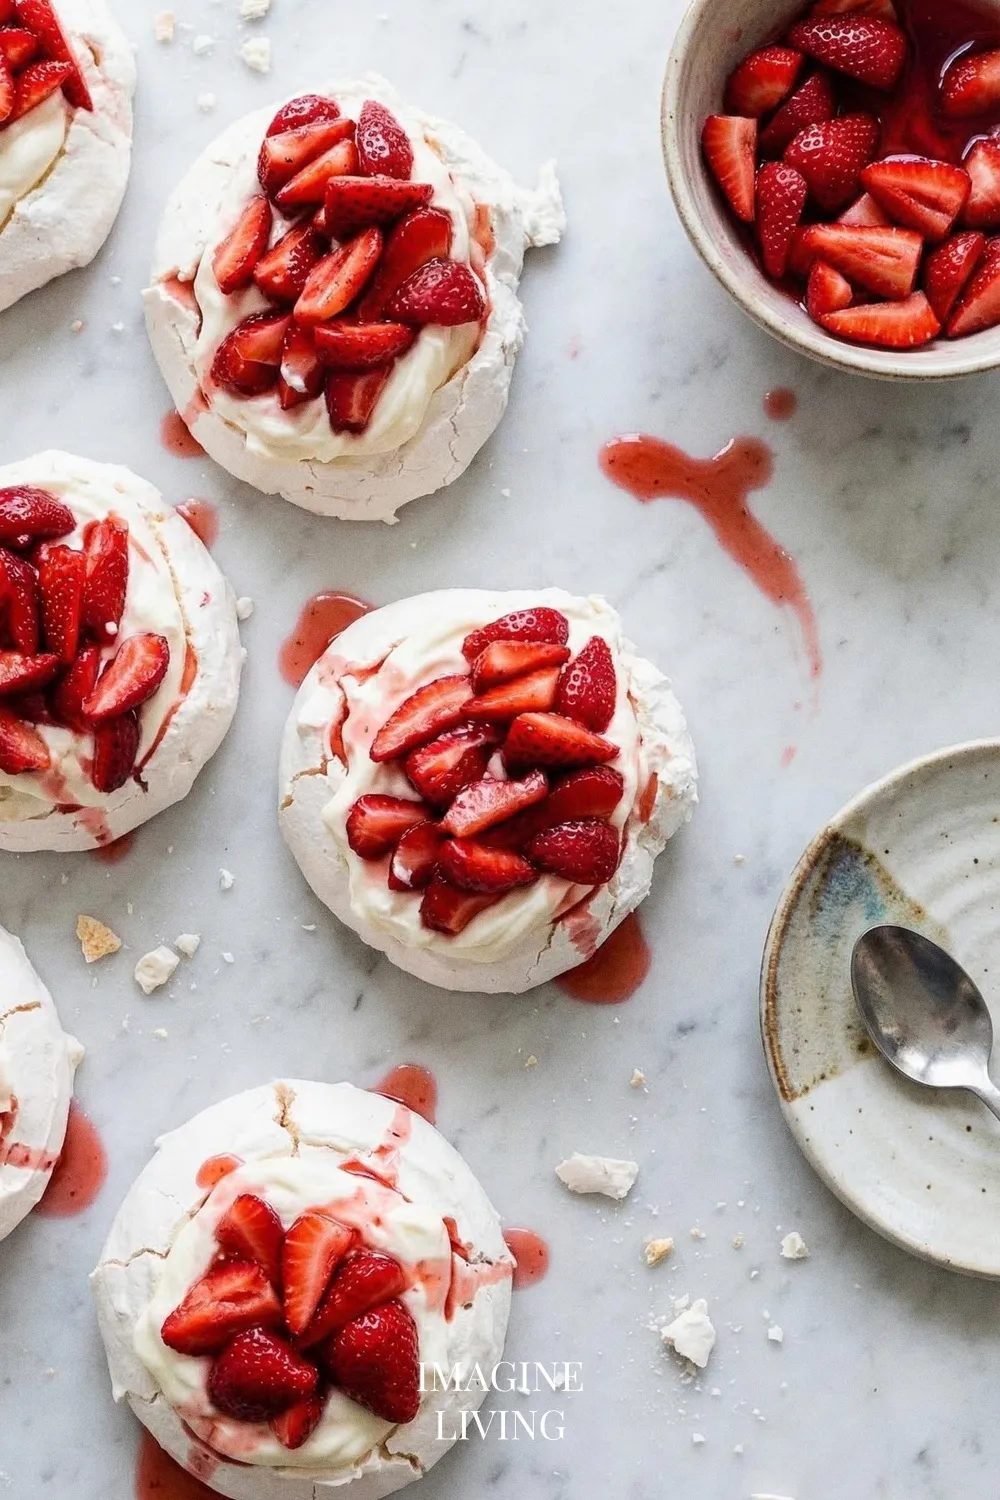
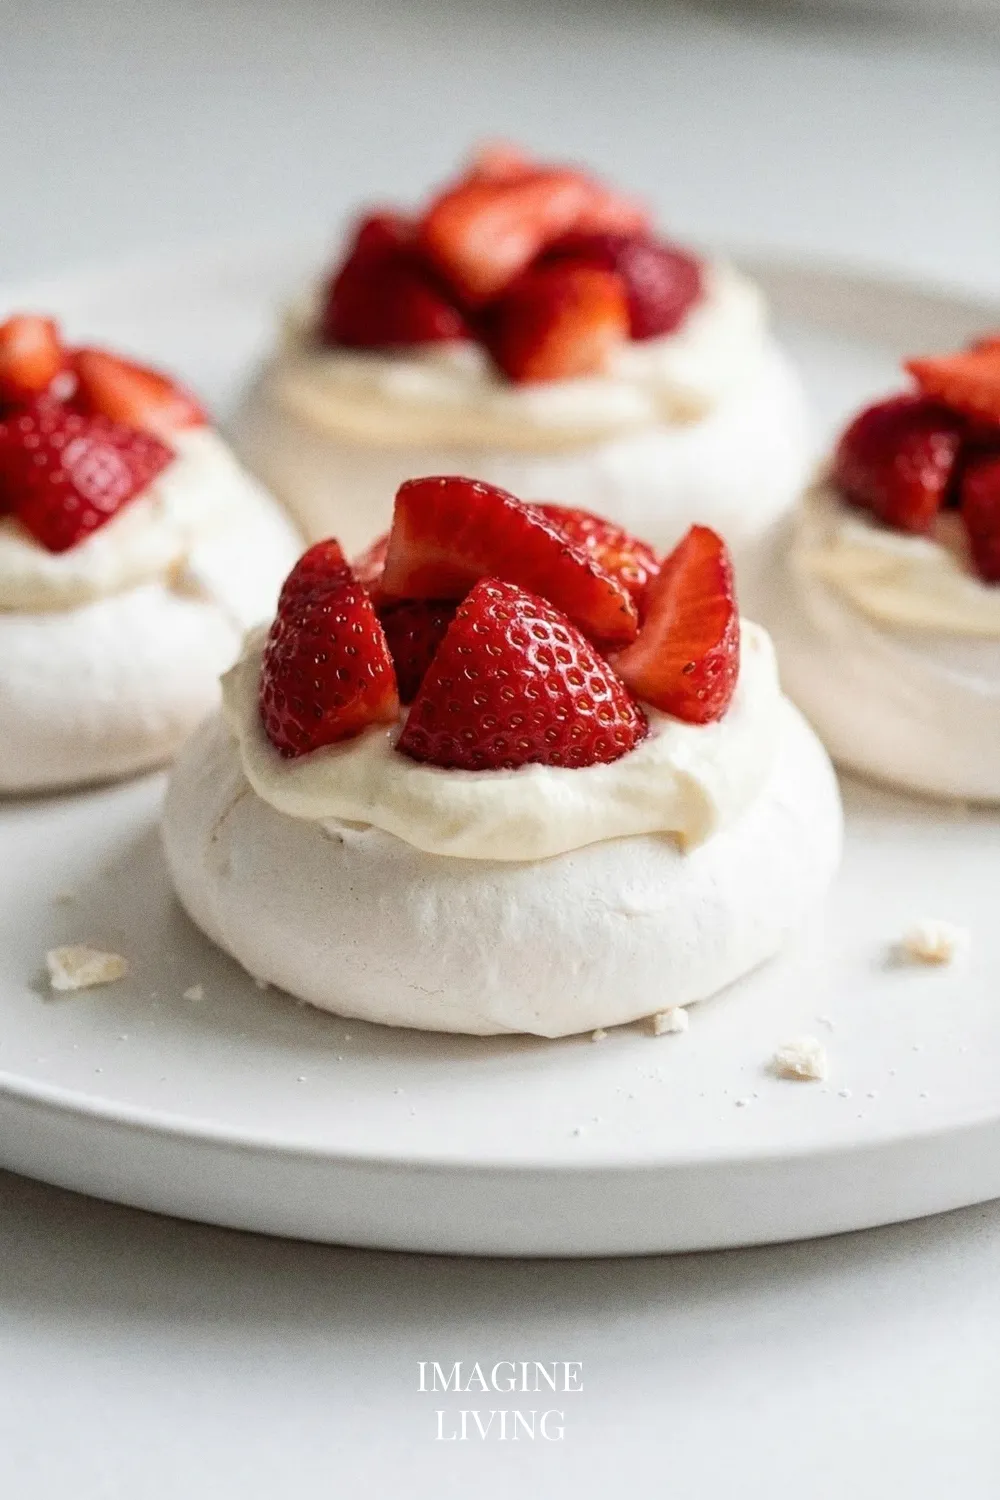
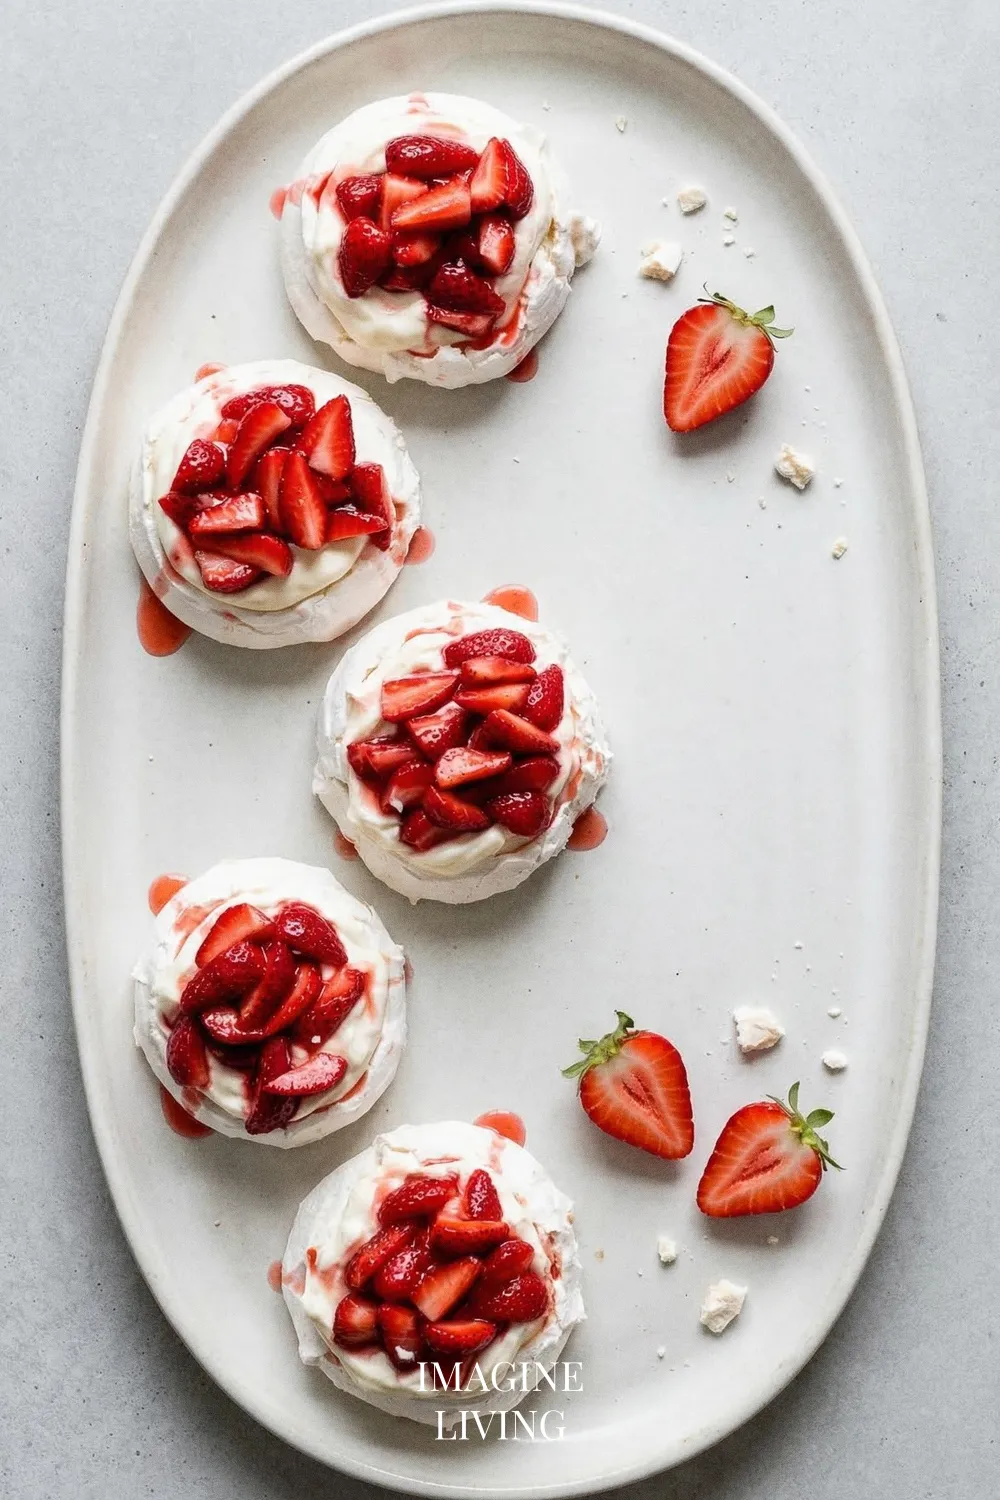
“Light meringue shells topped with cream and fresh strawberries.” Imagine Living
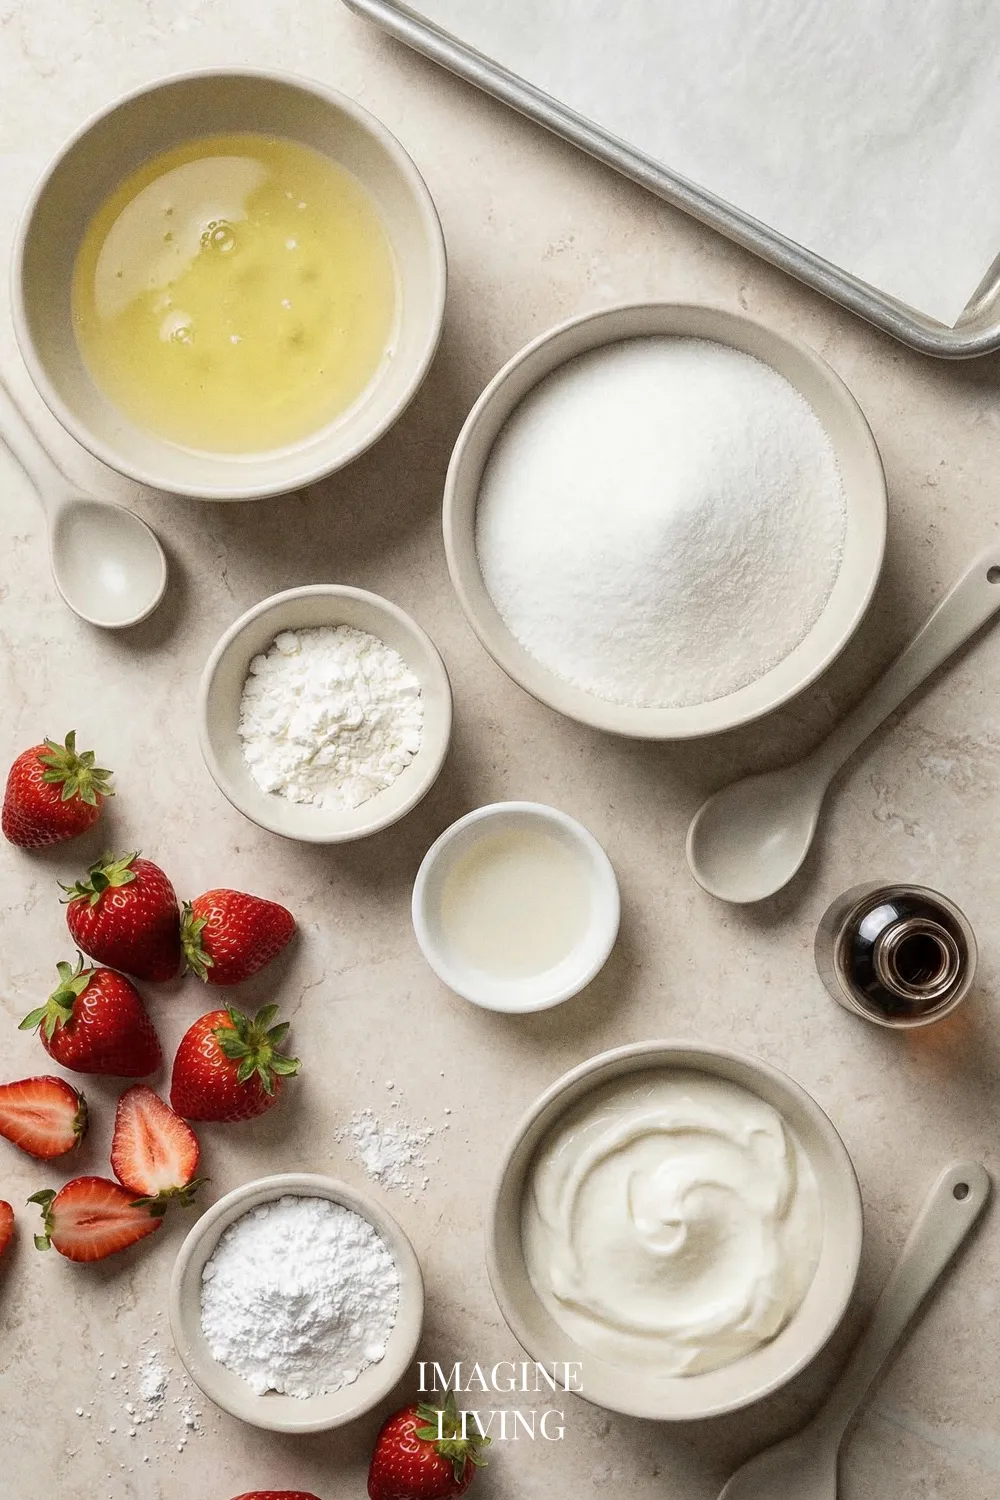
Ingredients: Mini Pavlovas with Strawberries
Servings: 6
For the Pavlova:
- 6 large egg whites
- 1 ½ cups (180 g) granulated sugar
- 1 teaspoon white vinegar
- 1 tablespoon cornstarch
For the Whipped Cream & Yogurt Filling:
- 3/4 cup plus 1 tbsp heavy cream (200 ml)
- 2/3 cup Greek yogurt (150 g)
- 1–2 tablespoons powdered sugar
- 1 teaspoon vanilla extract
For the Topping:
- Fresh strawberries, sliced
Options: Consider using dairy-free yogurt or alternative sweeteners for a lighter version.
Equipment Needed
- Electric mixer
- Baking sheet
- Parchment paper
- Mixing bowls
- Rubber spatula
- Serving platter
Step-By-Step Guide: How to Make Mini Pavlovas with Strawberries
The only real challenge here is staying patient with the egg whites and the bake time, but once you settle into it, the process feels surprisingly steady.
Prepare the Pavlova Base
Preheat your oven to 275°F (135°C). Line a baking sheet with parchment paper, creating a template for mini circles if desired. Separate the egg whites from the yolks, ensuring there is no yolk contamination, and place the whites in a clean mixing bowl.
Tip: Make sure your mixing bowl is completely grease-free for the best volume.
A quiet moment here—egg whites always seem to take their time settling into the bowl.
Whip the Egg Whites
Using an electric mixer, beat the egg whites on medium speed until soft peaks form. Gradually add the granulated sugar, one tablespoon at a time, while continuing to whip on high speed until the mixture is thick and glossy.
You’ll notice the sound of the mixer change a little as the texture tightens.
Add the Vinegar and Cornstarch
Gently fold in the vinegar and cornstarch using a rubber spatula. This will help stabilize the pavlova and create that perfect crisp exterior.
Shape the Pavlovas
Spoon the mixture onto the prepared baking sheet, making 6 circular nests with a slight indentation in the center for the filling. Bake for 1 hour, then turn off the oven and let the pavlovas sit inside to cool completely, allowing them to dry out.
There’s a small moment of trust when you turn off the oven and walk away—always worth it.
Whip the Cream and Yogurt
While the pavlovas cool, whip the heavy cream in a mixing bowl until soft peaks form. In another bowl, combine Greek yogurt, powdered sugar, and vanilla extract. Gently fold the whipped cream into the yogurt mixture until well combined.
Tip: Taste the mixture, adjusting the sweetness with more powdered sugar if desired.
The mixture settles into a smooth, soft swirl when it’s just right.
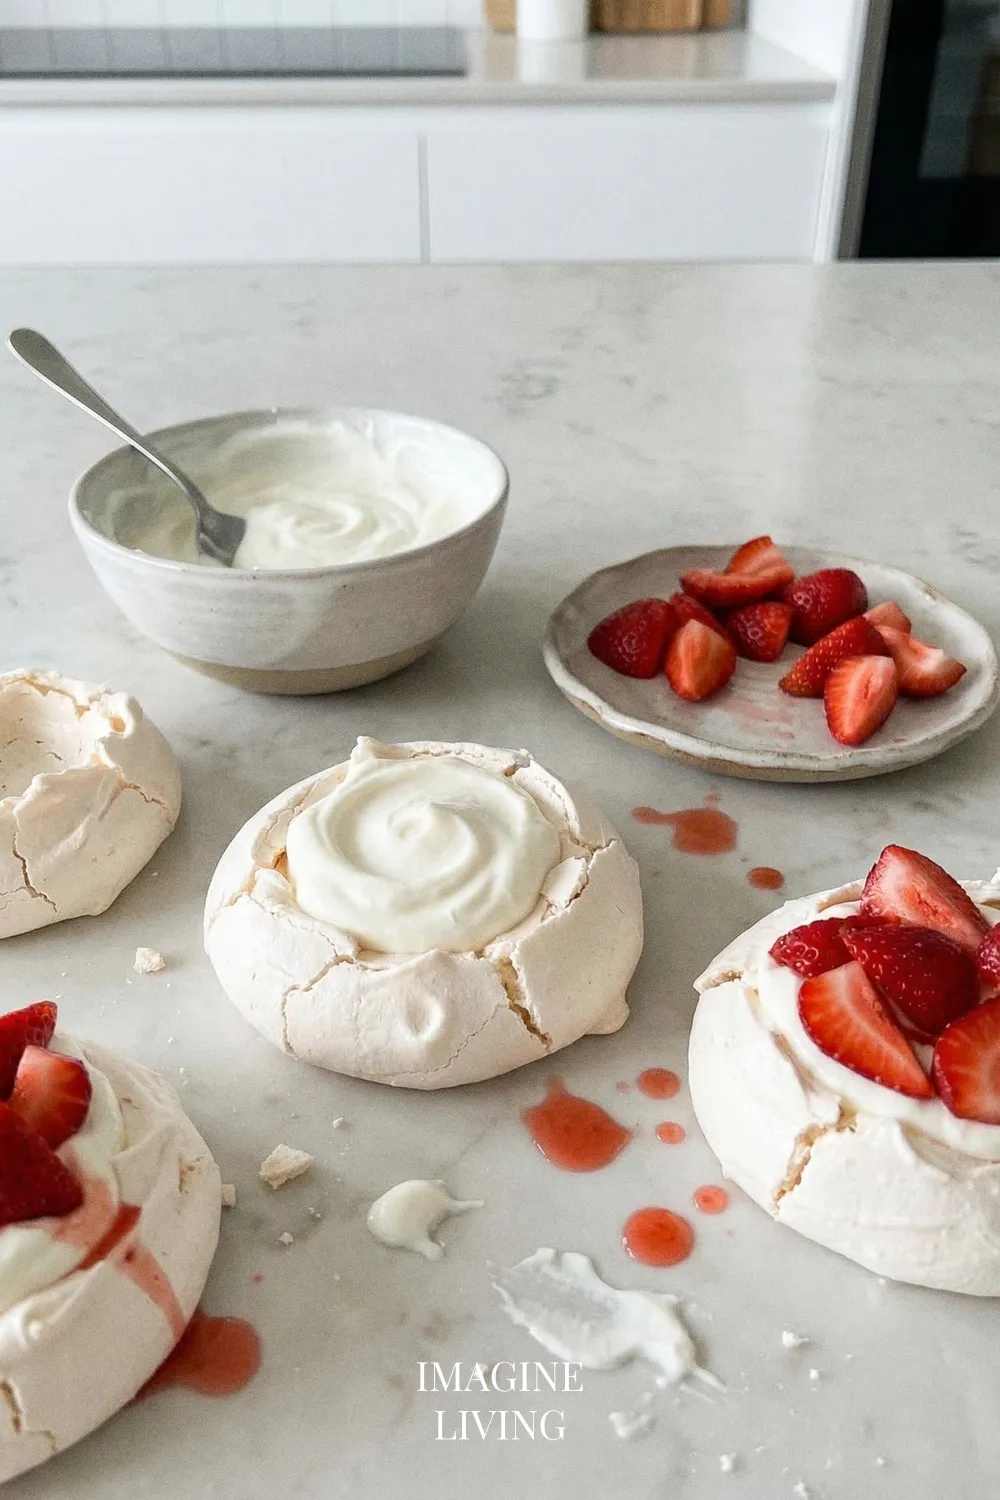
Assemble the Mini Pavlovas
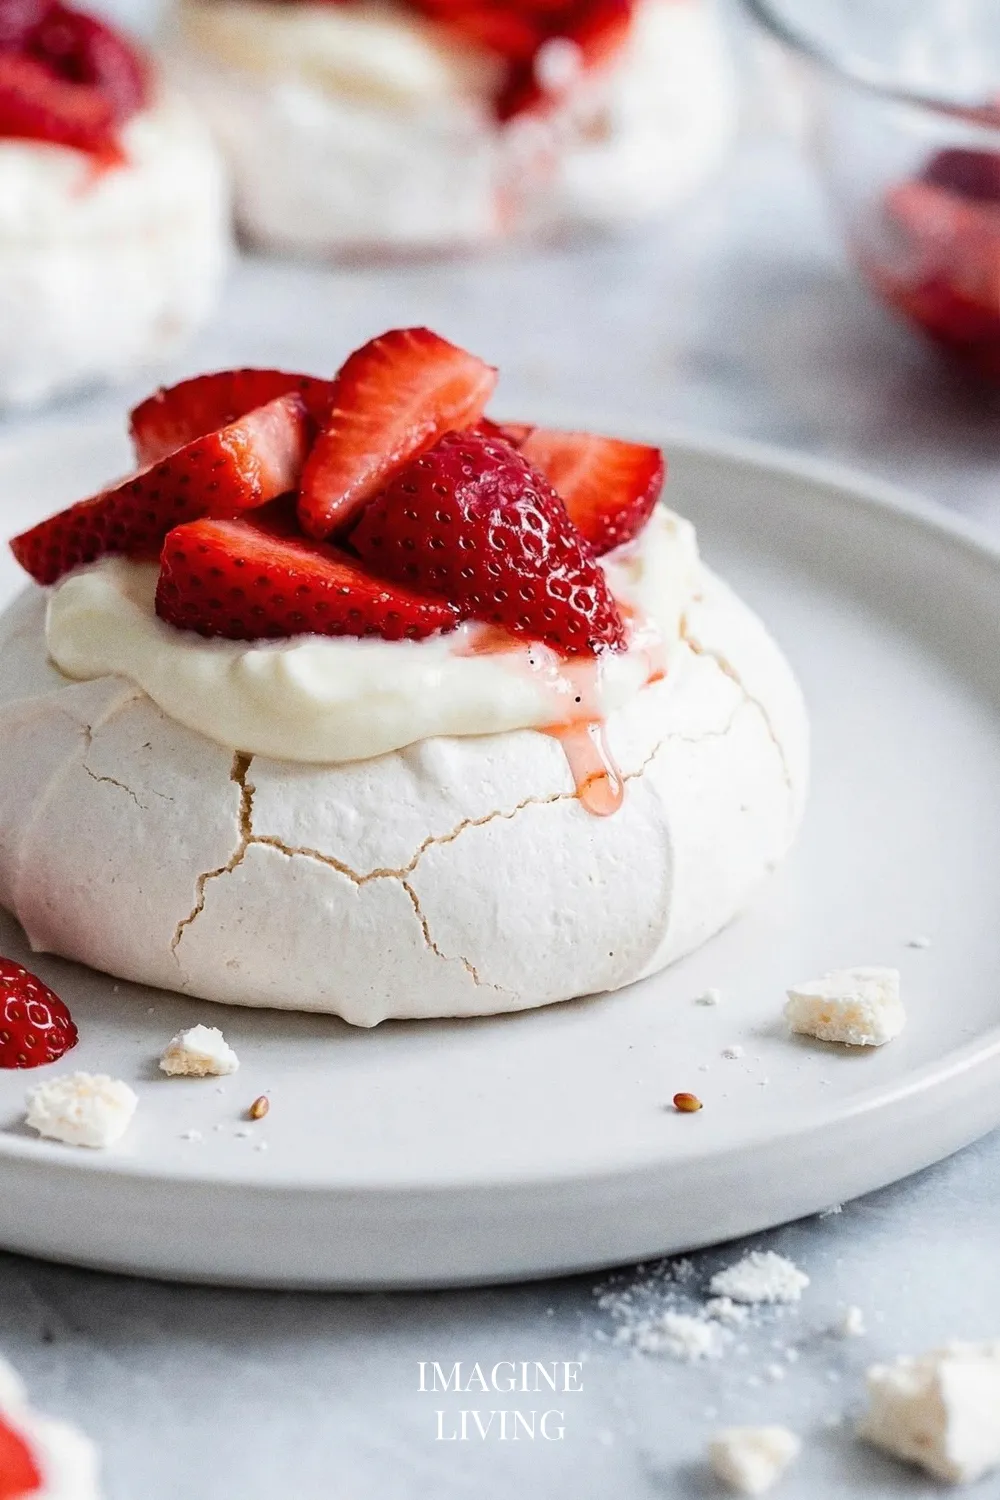
Once the pavlovas have cooled completely, spoon the cream and yogurt mixture into the center of each nest. Top generously with fresh sliced strawberries for a vibrant, colorful finish.
Option note: If using dairy-free yogurt, ensure it is a suitable substitute for this filling.
This video is here as an extra source of inspiration! While it may not match this exact recipe, it offers helpful techniques, ideas, or visual guidance to enhance your cooking experience.

Pro Tips for Mini Pavlovas with Strawberries
A few small things make the process smoother and keep the results light and crisp.
- Use room temperature egg whites for easier whipping.
- Ensure no yolk gets into the egg whites; even a small amount can hinder proper whipping.
- Allow pavlovas to cool in the oven to avoid cracking.
- Customize toppings with seasonal fruits or a drizzle of chocolate for a different twist.
- Store unfilled pavlovas in an airtight container to maintain their crisp texture.
It’s easy to get attached to your favorite topping combo—happens to everyone.
Dietary Variations & Substitutions
Egg-Free / Vegan Version
- Replace each egg white with aquafaba (3 tablespoons per egg white) whipped until stiff peaks form.
- Ensure that any sugar used is vegan-friendly, and swap Greek yogurt with a dairy-free yogurt alternative.
- Baking times may remain the same, but check for a slightly longer drying time to ensure texture.
Tip: A teaspoon of cream of tartar can help stabilize the aquafaba during whipping.
Dairy-Free Version
- Substitute heavy cream with coconut cream or a dairy-free whipping cream alternative in equal amounts.
- Use dairy-free yogurt (such as almond or coconut yogurt) instead of Greek yogurt, also at a 1:1 ratio.
- Taste for sweetness; additional powdered sugar may be needed with dairy-free yogurt if it’s less sweet.
Tip: Chill the coconut cream or dairy-free whipping cream overnight for best results.
Gluten-Free Version
- The recipe is already gluten-free as it contains no flour. Just ensure that any powdered sugar used is certified gluten-free.
- Check that the cornstarch is gluten-free, which most are, but it’s good to verify.
Tip: If serving to someone with gluten allergies, check for cross-contamination with gluten products in your kitchen.
Low-Sugar Version
- Reduce granulated sugar by half, and replace with a sugar alternative such as erythritol or stevia, using according to product direction.
- The filling can also be sweetened to taste with a low-calorie sweetener instead of powdered sugar.
Tip: Enhancing the flavor with a touch of vanilla extract can compensate for reduced sweetness.
High-Protein Version
- Swap Greek yogurt with a high-protein Greek yogurt or a protein-enriched dairy-free yogurt.
- Introduce a scoop of protein powder into the cream and yogurt mixture, adjusting the powdered sugar accordingly.
Tip: For flavor balance, vanilla-flavored protein powder can be a good choice.
Nut-Free Version
- Ensure that any yogurt substation does not contain nuts; opt for soy, oat, or coconut-based options, keeping in mind cross-contamination.
- The meringue should already be nut-free. Just double-check the sugar and cornstarch brands for potential processing issues.
Tip: Make sure to keep cooking utensils and surfaces free from nut residues to avoid cross-contamination.
Creative Variations: Unique Pavlova Ideas
Chocolate Pavlovas
Substitute half of the cornstarch for cocoa powder for a chocolate twist.
Tip: Pair with raspberries for a complementary flavor explosion.
Tropical Pavlovas
Top with mango, kiwi, and passion fruit for a tropical vibe.
Tip: Drizzle with coconut cream for added richness.
Lemon Pavlovas
Incorporate lemon zest into the whipped cream for a zesty kick.
Tip: Serve with a dusting of powdered sugar for an elegant finish.
Spiced Pavlovas
Add a pinch of cinnamon or nutmeg to the pavlova mix for warmth.
Tip: Top with poached pears for a seasonal flair.
Nutty Pavlovas
Fold in finely chopped nuts into the pavlova mixture for added crunch.
Tip: Pair with whipped mascarpone for an extra creamy filling.
Berry Medley Pavlovas
Combine strawberries, blueberries, and blackberries for a colorful topping.
Tip: Experiment with flavored syrups or jams for additional sweetness.
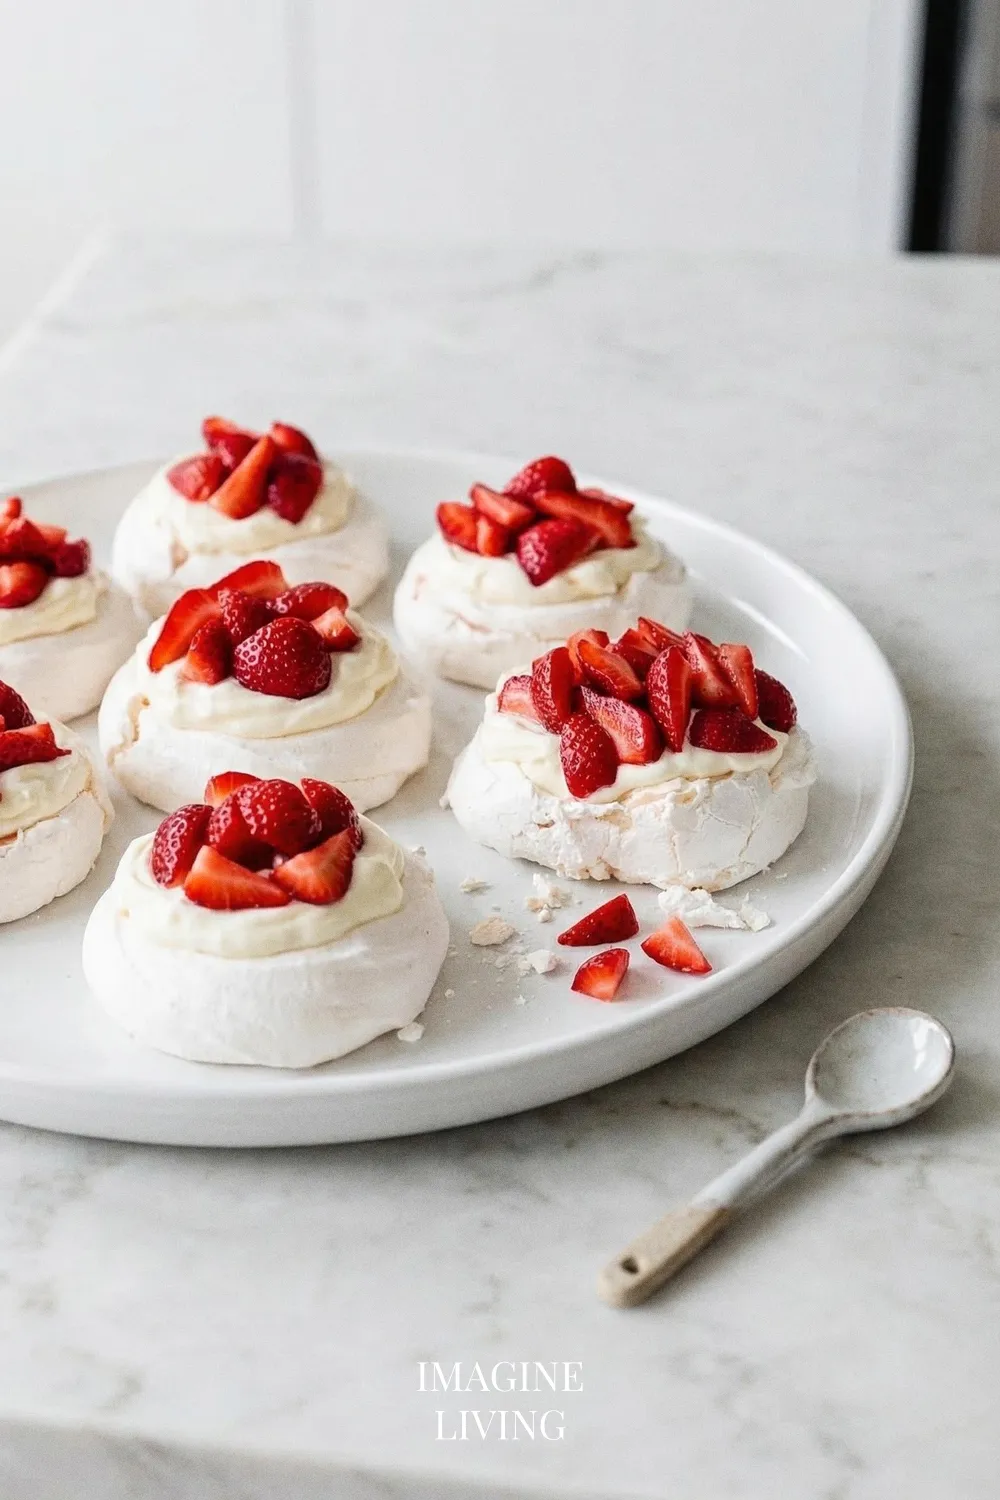
Serving Suggestions
Serve these mini pavlovas as a delightful end to a dinner party. They make an elegant dessert for tea time or a lovely treat to share with family. Consider pairing with a glass of sparkling wine for a festive touch.
Storage and Reheating
To store, keep unfilled pavlovas in an airtight container at room temperature for up to 2 days. If filled, they should be eaten the same day to maintain the texture of the pavlova. You can prepare the pavlova base in advance and assemble just before serving.
Common Mistakes to Avoid
A few bumps are normal with meringue, and each one has an easy way out.
Not Whipping Egg Whites Enough
Under-whipped whites won’t hold the structure needed for pavlovas.
Tip: Whip until glossy peaks form.
Adding Ingredients Too Quickly
Incorporating sugar or other ingredients too fast can deflate the mixture.
Tip: Add gradually, allowing the mix to incorporate fully.
Opening the Oven Door Prematurely
This can cause pavlovas to collapse before they dry out entirely.
Tip: Resist the temptation until they’re fully baked and cooled.
Using Cold Egg Whites
Cold eggs whip less effectively.
Tip: Let them sit out for 30 minutes before use.
Overbaking
Overdone pavlovas can become hard instead of chewy inside.
Tip: Keep an eye on them as baking time nears completion.
FAQs
What is pavlova made of?
Pavlova is made primarily of whipped egg whites and sugar, formed into meringue.
How long do pavlovas last?
Unfilled pavlovas can last for about 2 days in an airtight container.
Can I use a different fruit?
Absolutely! Pavlovas are versatile – feel free to try different fruits depending on the season.
Do I have to use Greek yogurt?
No, you can substitute regular whipped cream if you prefer a lighter filling.
How do I know when the pavlovas are done?
They should have a crisp outer shell and lift easily off the parchment without sticking.
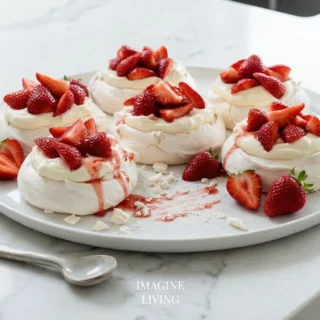
Mini Pavlovas That Celebrate Freshness
These mini pavlovas land in that sweet spot between simple and special. Once the strawberries settle onto their soft cream filling, the whole dessert feels quietly satisfying—easy to share, easy to enjoy, and just right whenever you want something light but still memorable.
Mini Pavlovas with Strawberries
Equipment
- Electric mixer
- Baking sheet
- Parchment paper
- Mixing bowls
- Rubber spatula
- Serving platter
Ingredients
For the Pavlova
- 6 large egg whites
- 1 ½ cups granulated sugar 180 g
- 1 teaspoon white vinegar
- 1 tablespoon cornstarch
For the Whipped Cream & Yogurt Filling
- 3/4 cup + 1 tbsp heavy cream 200 ml
- 2/3 cup Greek yogurt 150 g
- 1–2 tablespoons powdered sugar
- 1 teaspoon vanilla extract
For the Topping
- Fresh strawberries sliced
Instructions
Prepare the Pavlova Base
- Preheat your oven to 275°F (135°C). Line a baking sheet with parchment paper, creating a template for mini circles if desired. Separate the egg whites from the yolks, ensuring there is no yolk contamination, and place the whites in a clean mixing bowl.
- Tip: Make sure your mixing bowl is completely grease-free for the best volume.
Whip the Egg Whites
- Using an electric mixer, beat the egg whites on medium speed until soft peaks form. Gradually add the granulated sugar, one tablespoon at a time, while continuing to whip on high speed until the mixture is thick and glossy.
Add the Vinegar and Cornstarch
- Gently fold in the vinegar and cornstarch using a rubber spatula. This will help stabilize the pavlova and create that perfect crisp exterior.
Shape the Pavlovas
- Spoon the mixture onto the prepared baking sheet, making 6 circular nests with a slight indentation in the center for the filling. Bake for 1 hour, then turn off the oven and let the pavlovas sit inside to cool completely, allowing them to dry out.
Whip the Cream and Yogurt
- While the pavlovas cool, whip the heavy cream in a mixing bowl until soft peaks form. In another bowl, combine Greek yogurt, powdered sugar, and vanilla extract. Gently fold the whipped cream into the yogurt mixture until well combined.
- Tip: Taste the mixture, adjusting the sweetness with more powdered sugar if desired.
Assemble the Mini Pavlovas
- Once the pavlovas have cooled completely, spoon the cream and yogurt mixture into the center of each nest. Top generously with fresh sliced strawberries for a vibrant, colorful finish.